■English 11
5.
Pump down operation.
In order to protect the environment, be sure to pump down when relocating or disposing of the unit.
1) Remove the valve cap from liquid stop valve and gas stop valve.
2) Carry out forced cooling operation.
3) After five to ten minutes, close the liquid stop valve with a hexagonal
wrench.
4)
After two to three minutes, close the gas stop valve and stop forced cool-
ing operation.
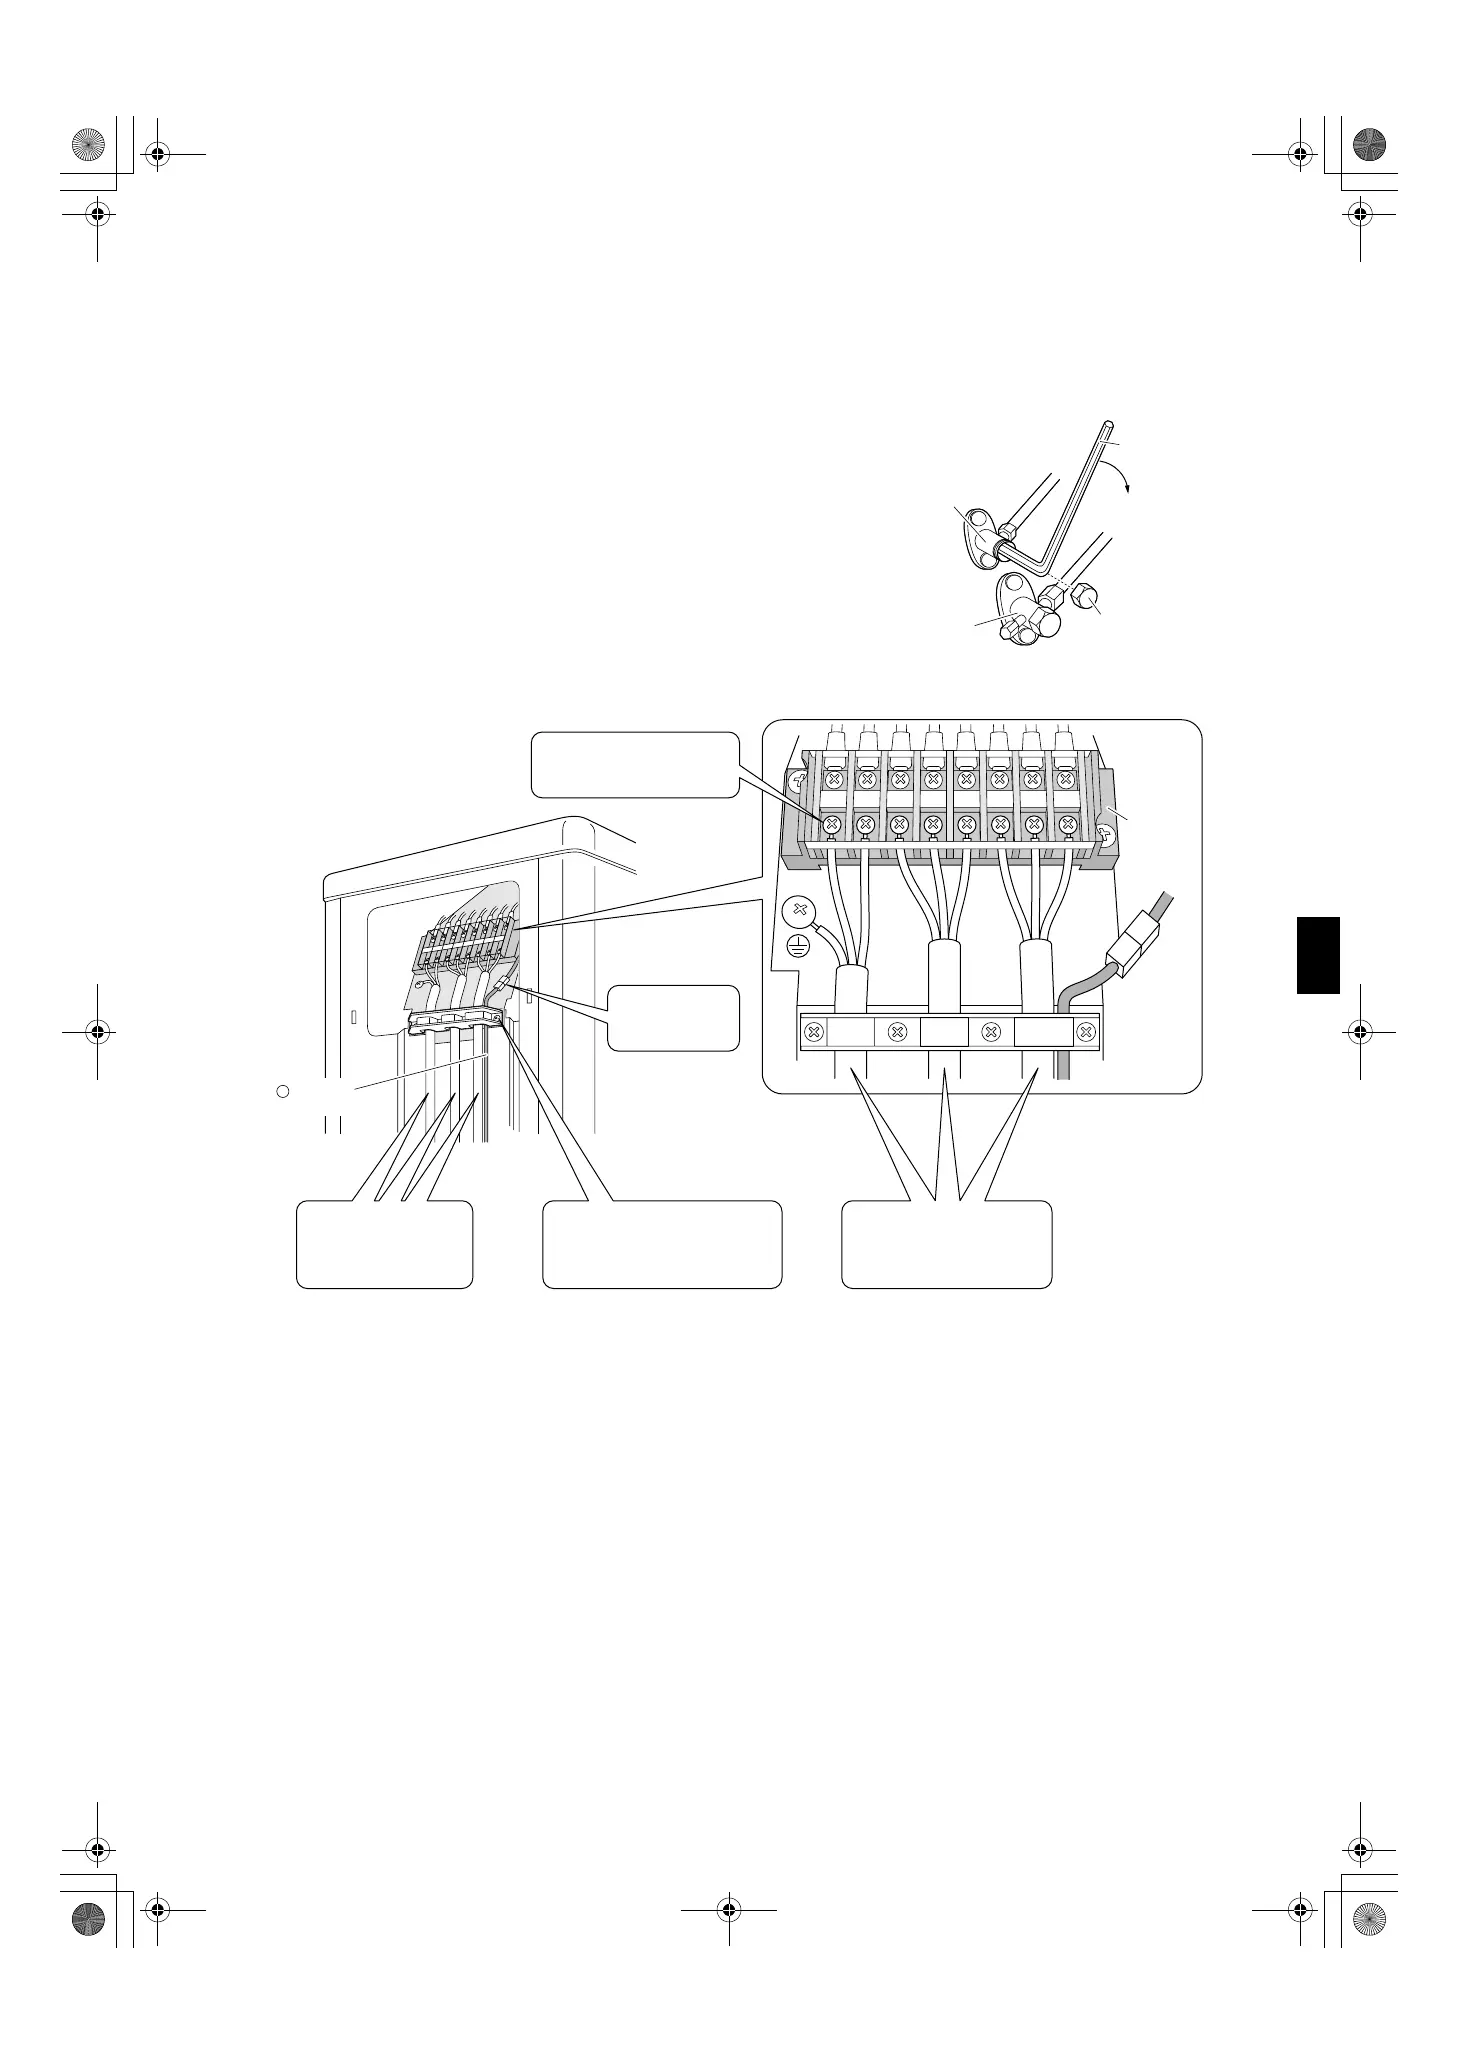
6.
Wiring.
• For interconnecting wire connections, see Indoor Unit, 4 Wiring.
Gas stop valve
Valve cap
Hexagonal wrench
Close
Liquid stop valve
45LNE123
4 P4
Thermistor
cable
G
Firmly secure wire retainer
so wire terminations will
not receive external stress.
Use the specified
wire type and
connect it securely.
Shape wires so that the
service lid and stop
valve cover fit securely.
Plug in the
connector fully.
Firmly fix the wires with
the terminal screws.
Terminal
block
01_EN_3P211822-2C.fm Page 11 Tuesday, November 27, 2007 6:31 PM
 Loading...