15 | Piping installation
Installer and user reference guide
83
LREN8~12A7 + LRNUN5A7
CO₂ ZEAS outdoor unit and capacity up unit
4P704142-1 – 2022.08
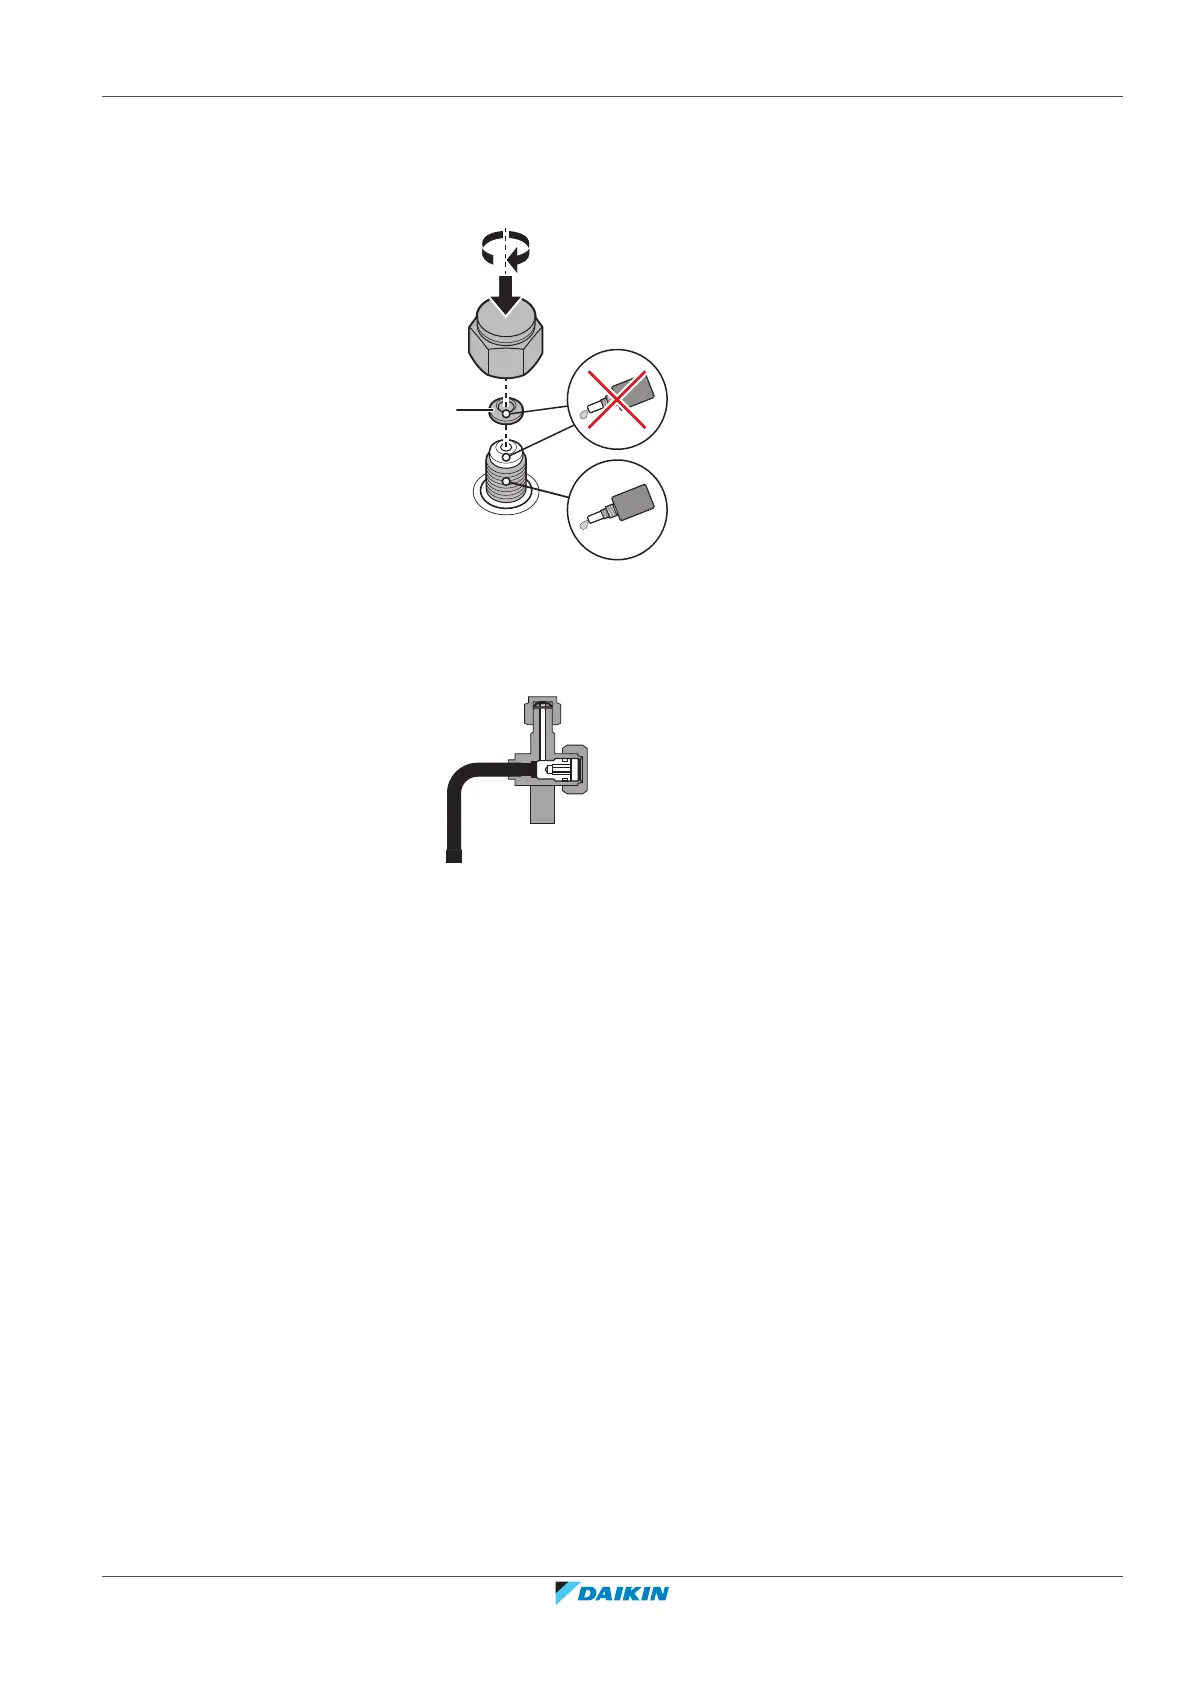
4 Apply screw lock agent or silicon sealant to the screw thread when mounting
the service port cap. Without it, moisture and condensing water may
penetrate and freeze between the screw thread. As a result, refrigerant may
leak and the service port cap may break.
a New copper packing
b Screw lock agent or silicon sealant only on screw thread
5 Tighten the service port cap with 2 spanners.
Result: The service port is fully closed.
15.3 Connecting the refrigerant piping
15.3.1 About connecting the refrigerant piping
Before connecting the refrigerant piping
Make sure the outdoor and indoor units are mounted.
Typical workflow
Connecting the refrigerant piping involves:
▪ Connecting refrigerant T-joints
▪ Connecting the refrigerant piping to the indoor units (see the installation manual
of the indoor units)
▪ Insulating the refrigerant piping
▪ Keeping in mind the guidelines for:
- Pipe connections
- Flaring pipe ends
- Brazing
- Using the stop valves



 To Next Page