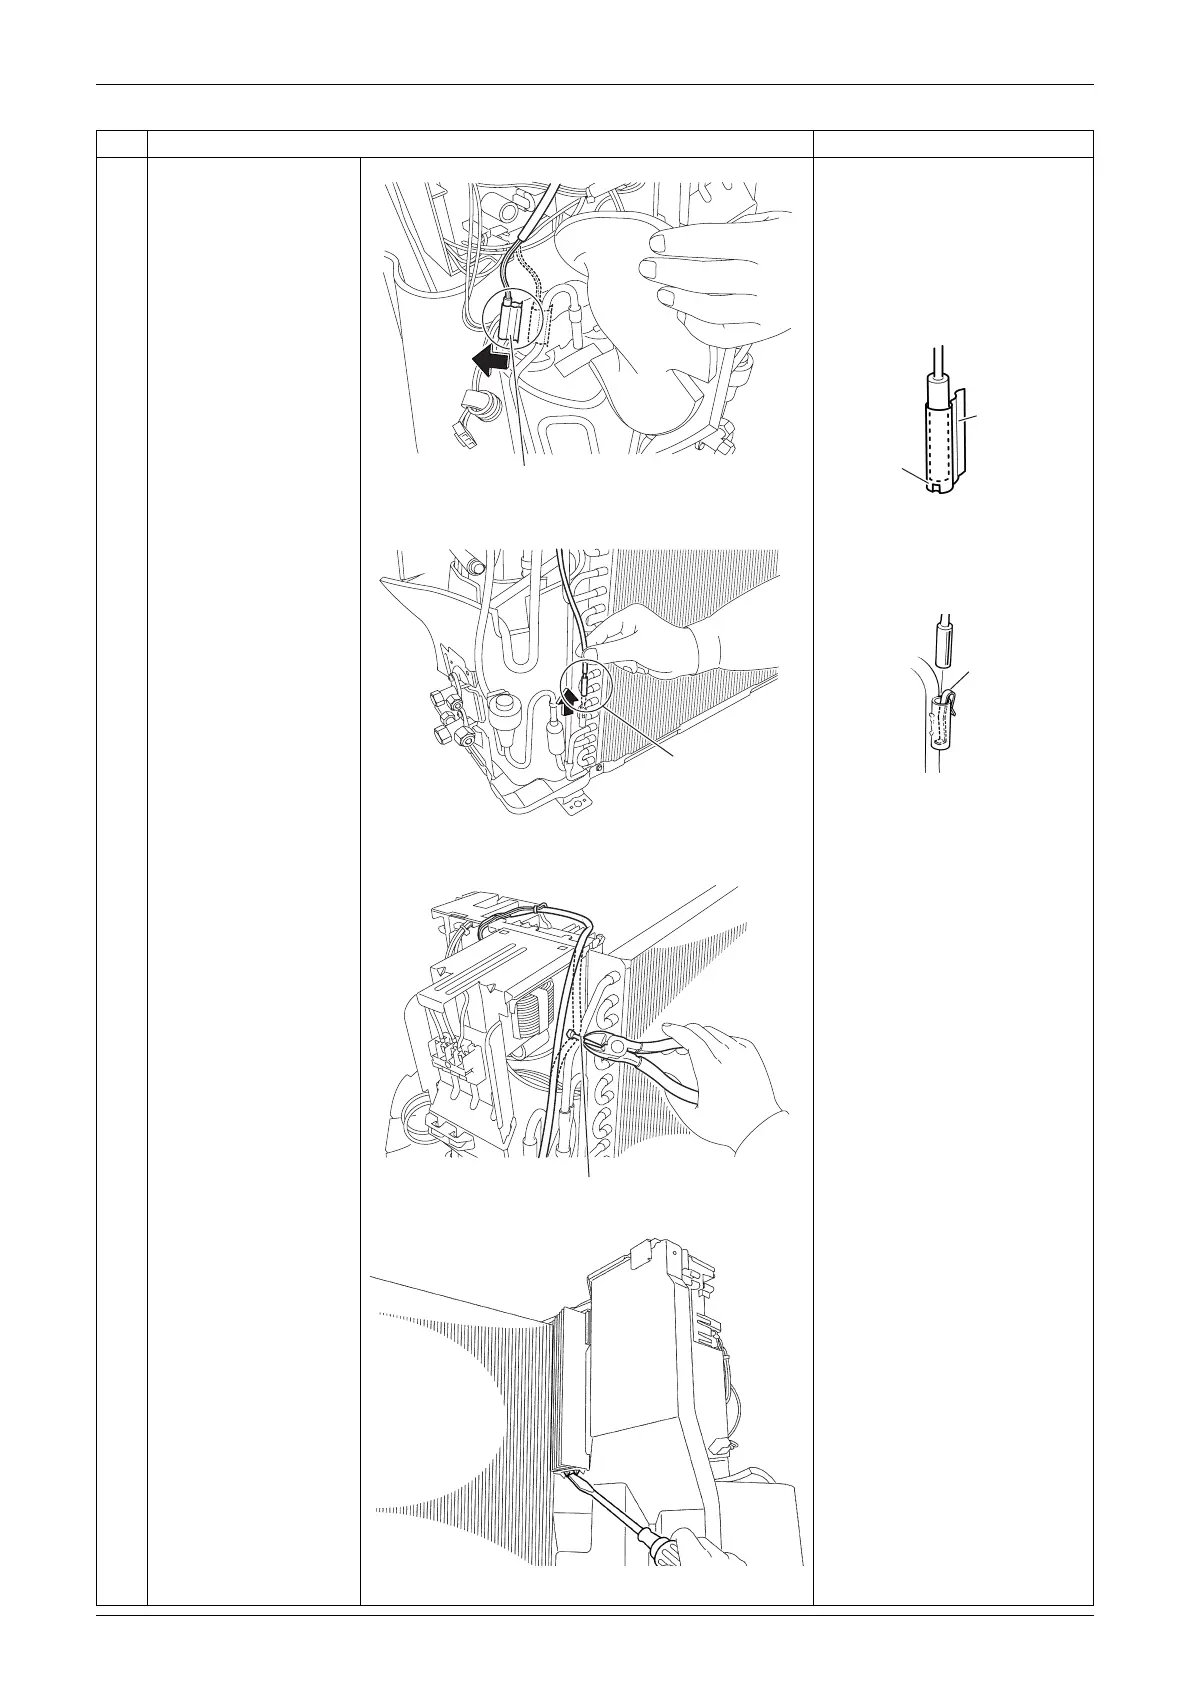
Si00-874 Removal of Electrical Box / PCBs
Removal Procedure 9
5
Release the discharge
pipe thermistor.
Pay attention so as not to
lose the fixture for the
thermistor.
When reassembling, do not
insert the thermistor up to
the dent of fixture.
6
Pull out the outdoor
heat exchanger
thermistor.
Pay attention so as not to
lose the clip for the
thermistor.
7
Cut the clamp.
8
Unfasten the hook from
the partition plate with a
flat screwdriver.
The electrical box can be
removed by lifting itself
without a screwdriver.
Step
Procedure Points
Discharge pipe thermistor
(R18744)
Dent
Fixture
(R18746)
(R18745)
Outdoor heat
exchanger
thermistor
Clip
(R18747)
(R7395)
Clamp
(R7318)
 Loading...