9 | Electrical installation
Installer reference guide
53
ARXM50-71+RXM42~71R2V1B + RXP50~71M2V1B + RXA42+50B2V1B +
RXF50+60B2V1B + RXF71A2V1B + RXJ50N2V1B + ARXF50~71A2V1B
R32 split series
4P513661-9J – 2020.05
Component
Recommended circuit breaker RXM71R
RXP50~71M
RXF50+60B
RXF71A
ARXF50~71A
20A
(a)
ARXM50~71R
RXM50+60R
16A
RXM42R
RXA42+50R
RXJ50N
13A
Earth leakage circuit breaker MUST comply with applicable legislation
(a)
Electrical equipment complying with EN/IEC 61000-3-12 (European/International Technical
Standard setting the limits for harmonic currents produced by equipment connected to
public low-voltage systems with input current >16A and ≤75A per phase).
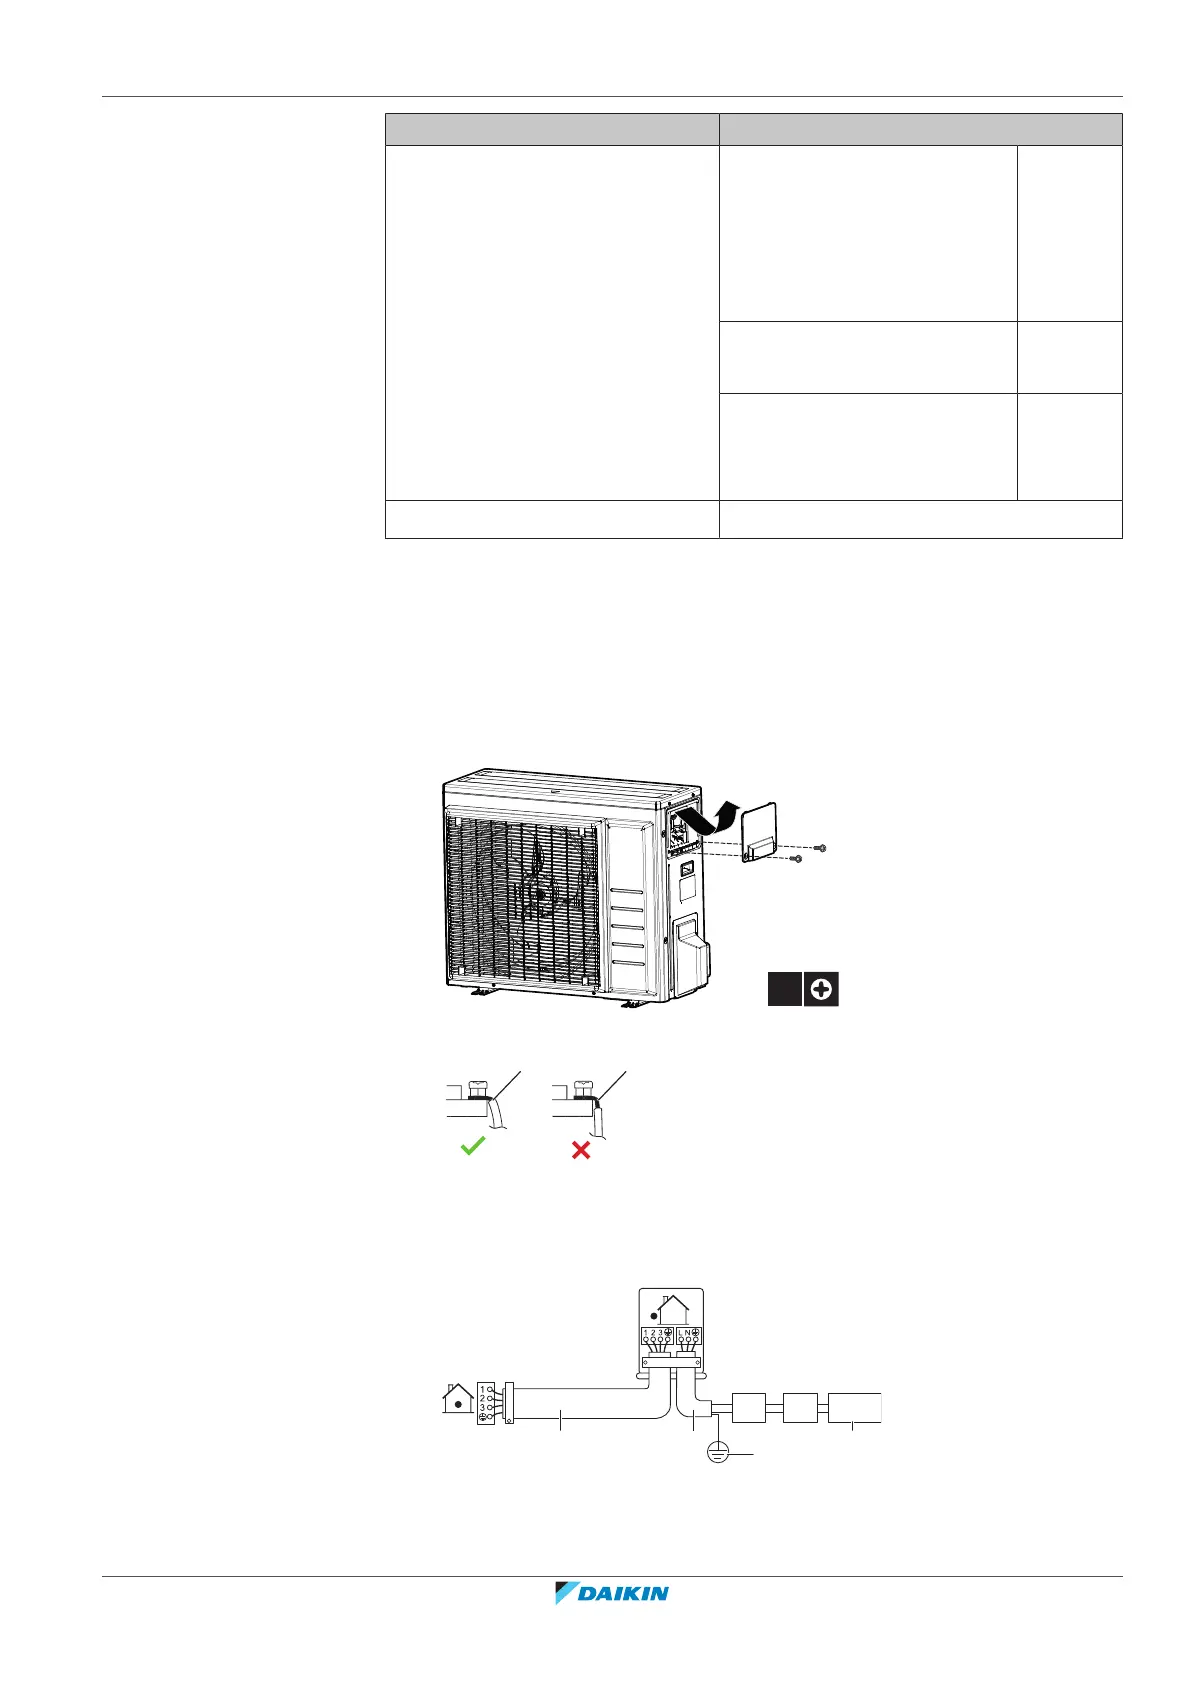
9.2 To connect the electrical wiring to the outdoor unit
1 Remove the switch box cover.
2 Strip insulation (20mm) from the wires.
a Strip wire end to this point
b An excessive strip length may cause electrical shock or leakage
3 Open the wire clamp.
4 Connect the interconnection cable and power supply as follows:
a Interconnection cable
b Power supply cable
c Circuit breaker
d Residual current device
e Power supply
 Loading...