Installation SiEN34-705
64 General Information
Notes: ! To ensure no excessive pressure is applied to the included drain hose (1), do not bend or
twist when installing. (This may cause leakage.)
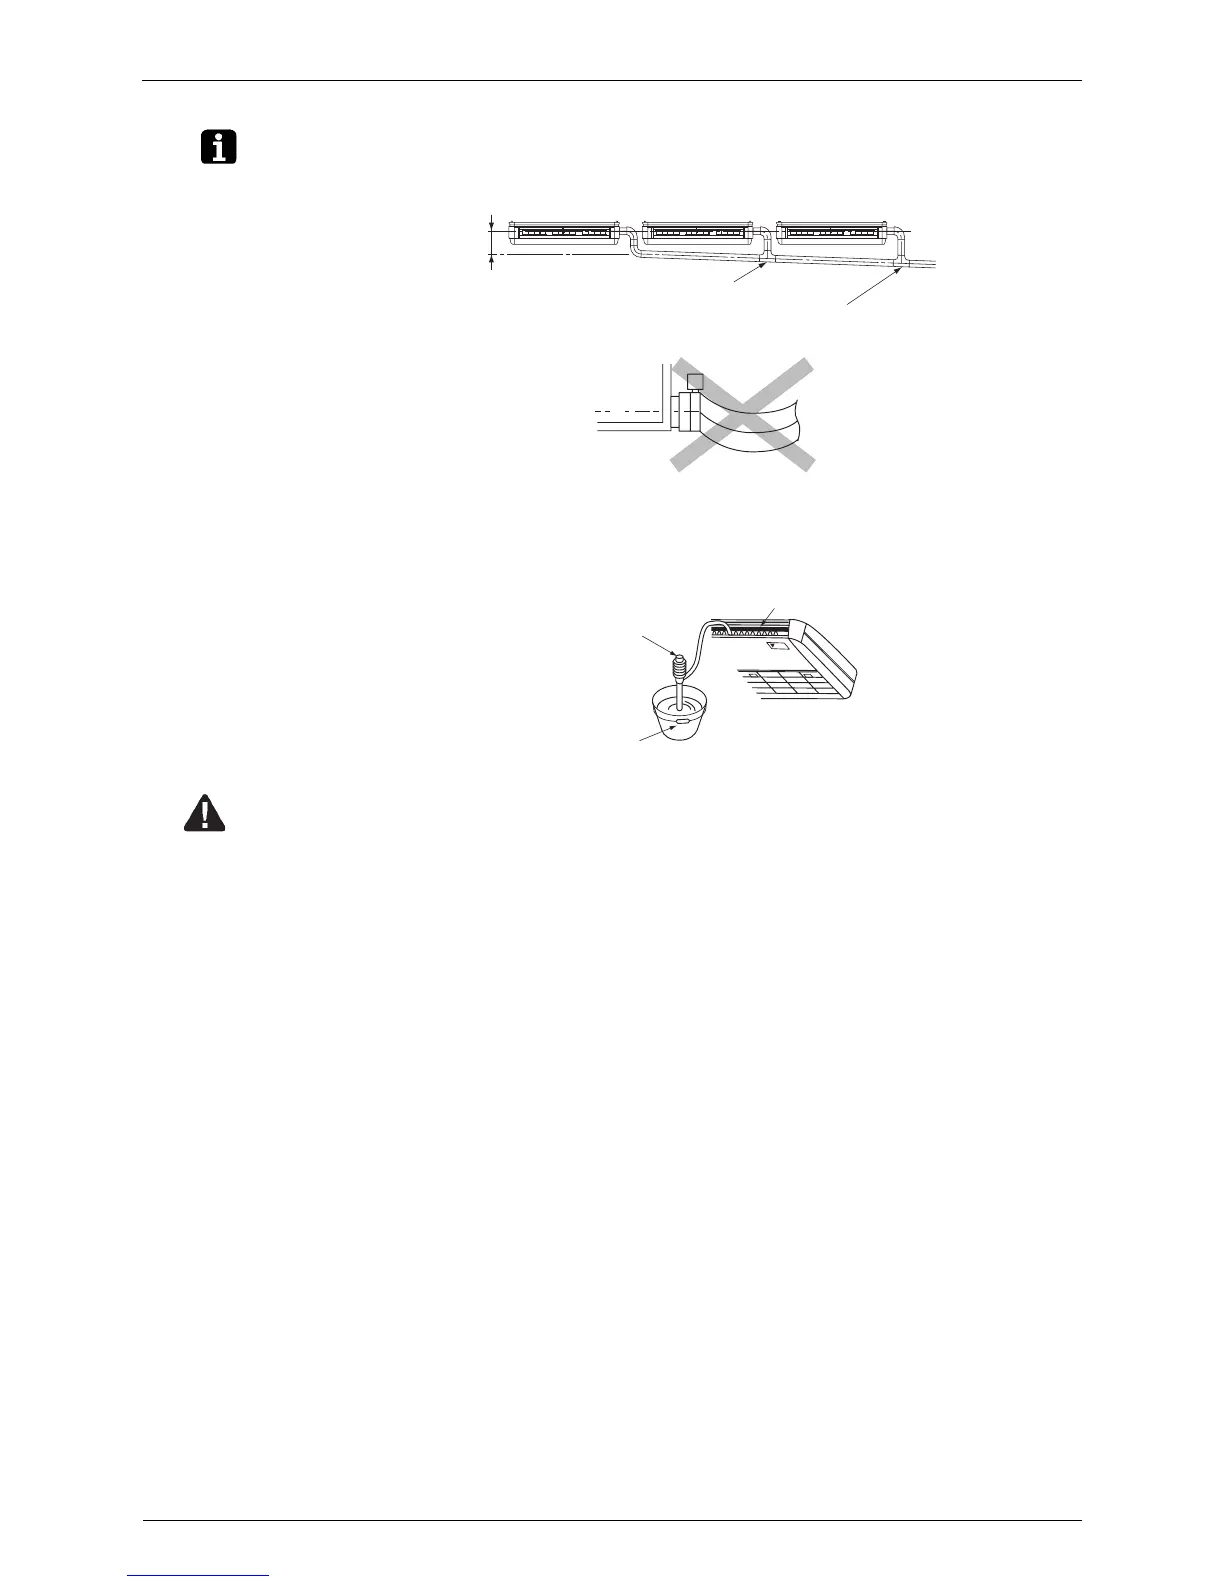
! If converging multiple drain pipes, install according to the procedure shown below.
Select converging drain pipes whose gauge is suitable for the operating capacity of the unit.
(2) Confirm that smooth drainage is achieved after the piping work.
! Add 0.6 liter of water in the drain pan from the air outlet for confirming drainage.
(Refer to Fig. 25)
Caution ! Drain piping connections
Do not connect the drain piping directly to sewage pipes that smell of ammonia. The
ammonia in the sewage might enter the indoor unit through the drain pipes and corrode the
heat exchanger.
! Keep in mind that it will become the cause of getting drain pipe blocked if water collects on
drain pipe.
≥
100 mm
T-joint converging drain pipes
Slope downwards at a gradient of at least 1/100
Wrong
Fig. 24
Fig. 25
Portable pump
Air outlet
Bucket