203P362438-1B English
RXYQ72T
1
2
3
RXYQ96-168T
1
2
3
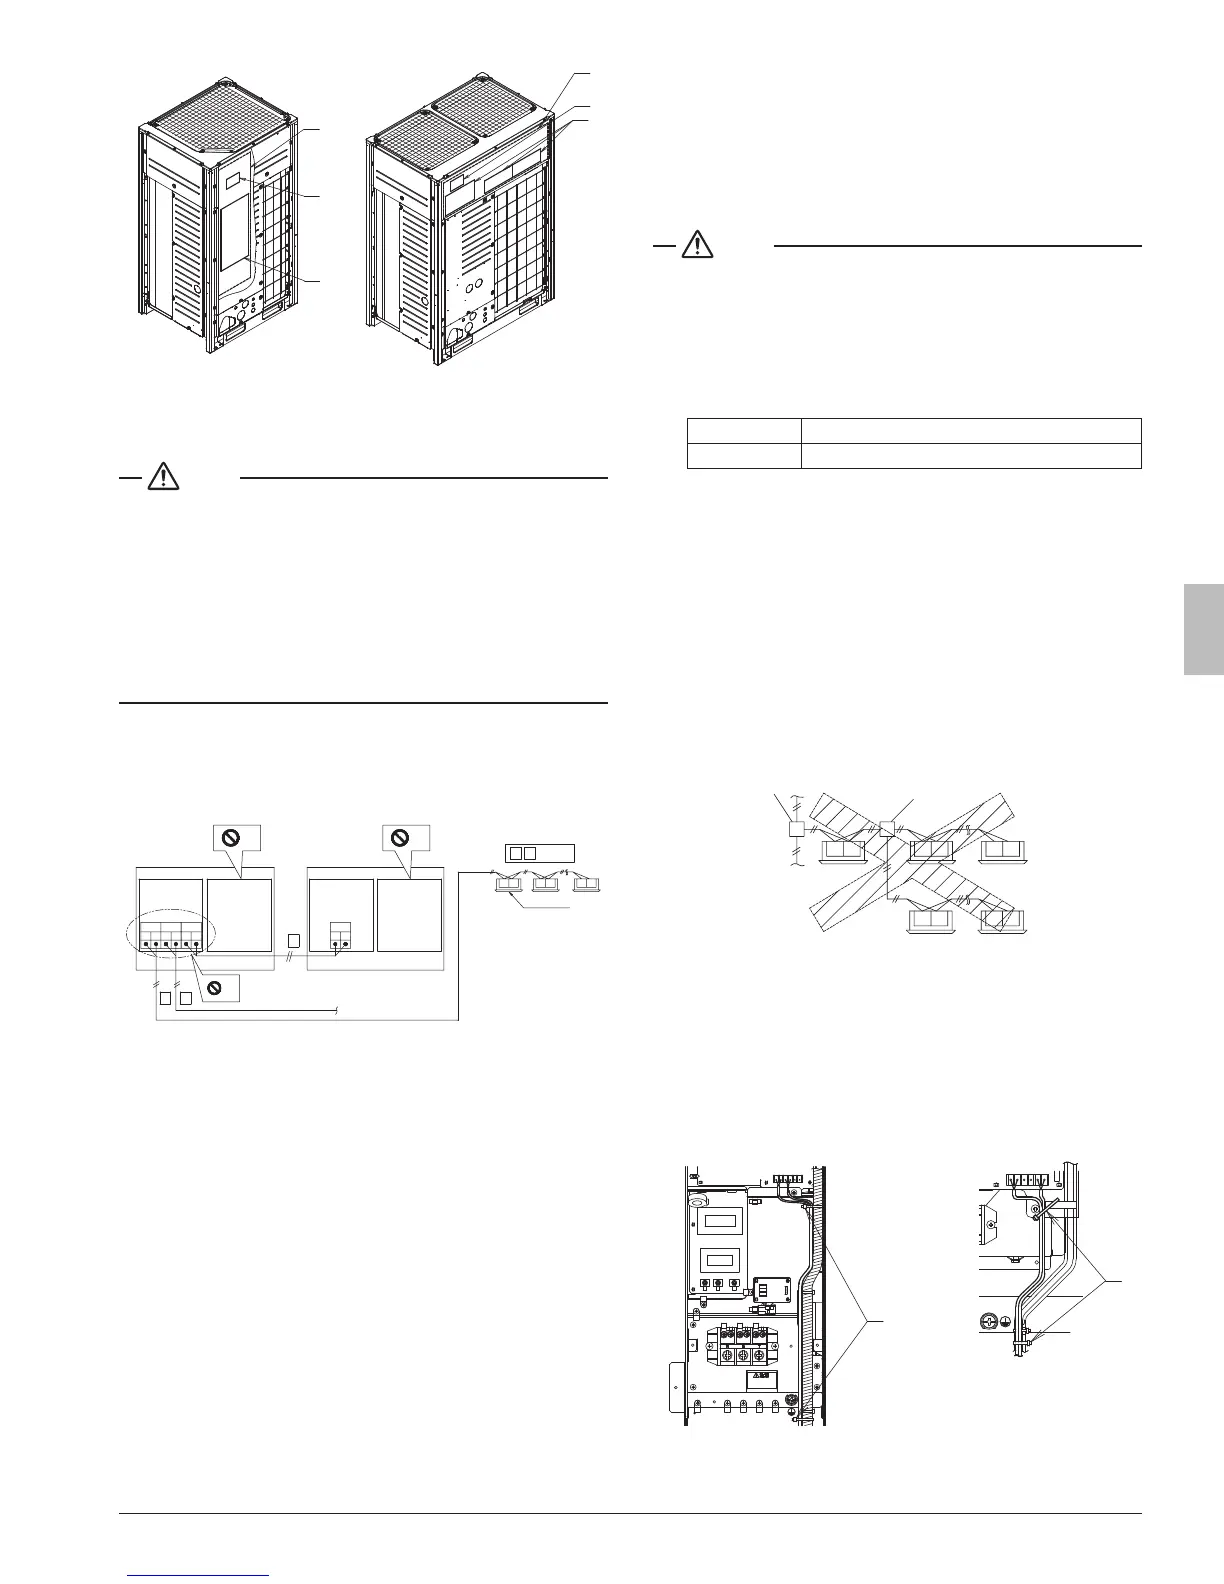
1 Control box cover
2 Inspection door
3 [Service precautions] Label location
NOTE
• Open the knock holes with a hammer or similar tool.
• After knocking out the holes, we recommend you remove any burrs
and paint the holes with repair paint to prevent rusting.
(Refer to the above gures)
• When passing wiring through the knock holes, remove burrs around
the knock holes and protect the wiring with protective tape.
(Refer to the above gures)
• If small animals might enter the unit, block off any gaps (hatching
parts in the above gures) with material (eld supply).
9.4. Transmission wiring connection procedure
• Referring to the gure below, connect the transmission wiring be-
tween outdoor unit and indoor unit, outdoor unit and outdoor unit of
other system, outdoor unit and outdoor unit of same system.
65
1 1
2
9
TO IN/D UNIT
F1 F2
TO OUT/D UNIT
F1 F2
TO MULTI UNIT
Q1 Q2
A1P
TO MULTI UNIT
Q1 Q2
21
43
A1P
65
1 2 :
10
11
F1 F2 F1 F2 F1 F2
7 7
8
1 Master unit (*)
2 Sub unit (*)
3 Outdoor unit A
4 Outdoor unit B
5 Control box
6 (Only RXYQ – TYDN) Control box (2)
7 (Only RXYQ – TYDN)
Do not open the control box (2) cover.
(There is no work when installation.)
8 Never connect the power wire.
9 To outdoor unit of other system
10 Use duplex wires (No polarity)
11 Indoor unit
(*) : The Outdoor unit that connects the transmission wiring to
an indoor unit is Master unit of the multi system.
The other units are Sub units. (In this gure, Outdoor unit A
is the Master unit.)
Check installation work to ensure proper operation. Onsite
settings can be accomplished by operating the printed
circuit board (A1P) of Master unit.
NOTE
• Do not connect the power wiring to terminals for the transmission
wiring. Doing so would destroy the entire system.
• When connecting wires to the terminal block on the printed circuit
board, too much heat or tightening could damage the printed circuit
board. Attach with care.
See the table below for the tightening torque of the transmission
wiring terminals.
Screw size Tightening torque
M3.5 (A1P)
0.59-0.71 ft
•
lbf (0.8-0.97 N
•
m)
• Transmission wiring (About the symbol [1]-[2], see the foregoing
gure) should be done within the following limitations.
If they are exceeded, transmission problems may occur.
[1] Between outdoor unit and indoor unit
Between outdoor unit and outdoor unit of other systems
Max. wiring length : 3280 ft. (1000 m)
Max. total wiring length : 6560 ft. (2000 m)
Max. no. of branches : 16
[Note]
No branch is allowed after a branch. See the follow-
ing gure.
Max. no. of outdoor units of other system that can be con-
nected : 10
1
2
F1 F2 F1 F2
F1 F2 F1 F2
F1 F2
1 Branch
2 Branch after branch
[2] Between outdoor unit and outdoor unit of same system
Max. wiring length : 100 ft. (30 m)
• The transmission wiring inside the control box should be secured
using the clamp (1) as shown in the gure below.
RXYQ72T
1 (A1P)
X1M
2
2
1 (A1P)
X1M
RXYQ96-168T
1 In the control box
2 Clamp (1) (accessory)
 Loading...