23 3P362438-1B English
RXYQ72T RXYQ96-168T
[R410A] Label
[R410A] Label
• See 14.3. Method for adding refrigerant on page27 for details on
handling the stop valve.
• The refrigerant charge port is connected to unit pipe. When
shipped, the unit contains the refrigerant, so use caution when at-
taching the charge hose.
<Air tight test>
Pressurize the liquid pipe, gas pipe, and equalizer pipe from the ser-
vice ports of each stop valve to 550 psi (3.8MPa) (do not pressurize
more than 550 psi (3.8MPa)). If the pressure does not drop within 24
hours, the system passes the test.
If there is a pressure drop, check for leaks, make repairs and perform
the air tight test again.
<Vacuum drying>
Evacuate the system from the liquid pipe and gas pipe stop valve ser-
vice ports by using a vacuum pump for more than 2 hours and bring
the system to 500 microns or less. After keeping the system under that
condition for more than 1 hour, check if the vacuum gauge rises or not.
If it rises, the system may either contain moisture inside or have leaks.
NOTE
During the rainy season, moisture might enter the piping. If
working during a rainy season and the work takes long enough
for condensation to form inside the pipes, take the following
precautions:
After evacuating the system for 2 hours, pressurize the system to
7.25psi (0.05MPa) (vacuum break) with nitrogen gas and evacuate
the system again using the vacuum pump for 1 hour to 500 microns or
less (vacuum drying).
If the system cannot be evacuated to 500 microns within 2hours,
repeat the operation of vacuum break and vacuum drying.
Then, after leaving the system in a vacuum for 1 hour, conrm that the
vacuum gauge does not rise.
11. Pipe insulation
• Insulation of pipes should be done after performing 10. Air tight test
and vacuum drying on page22.
• Always insulate the liquid piping, the gas piping, the equalizer pipes
(between the outdoor units for the outdoor multi system) and pipe
connections.
• Failing to insulate the pipes may cause leaking or burns.
Be sure to use insulation designed for HVAC equipment.
• Reinforce the insulation on the refrigerant piping according to the
installation environment. Condensation might form on the surface of
the insulation. Refer to the below.
- Ambient temperature : 86°F (30°C), humidity : 75% to 80% RH :
minimum thickness : 9/16 in. (15 mm).
- If the ambient temperature exceeds 86°F (30°C) and the humidity
80% RH, then the minimum thickness is 3/4 in. (20 mm).
See the Engineering data book for detail.
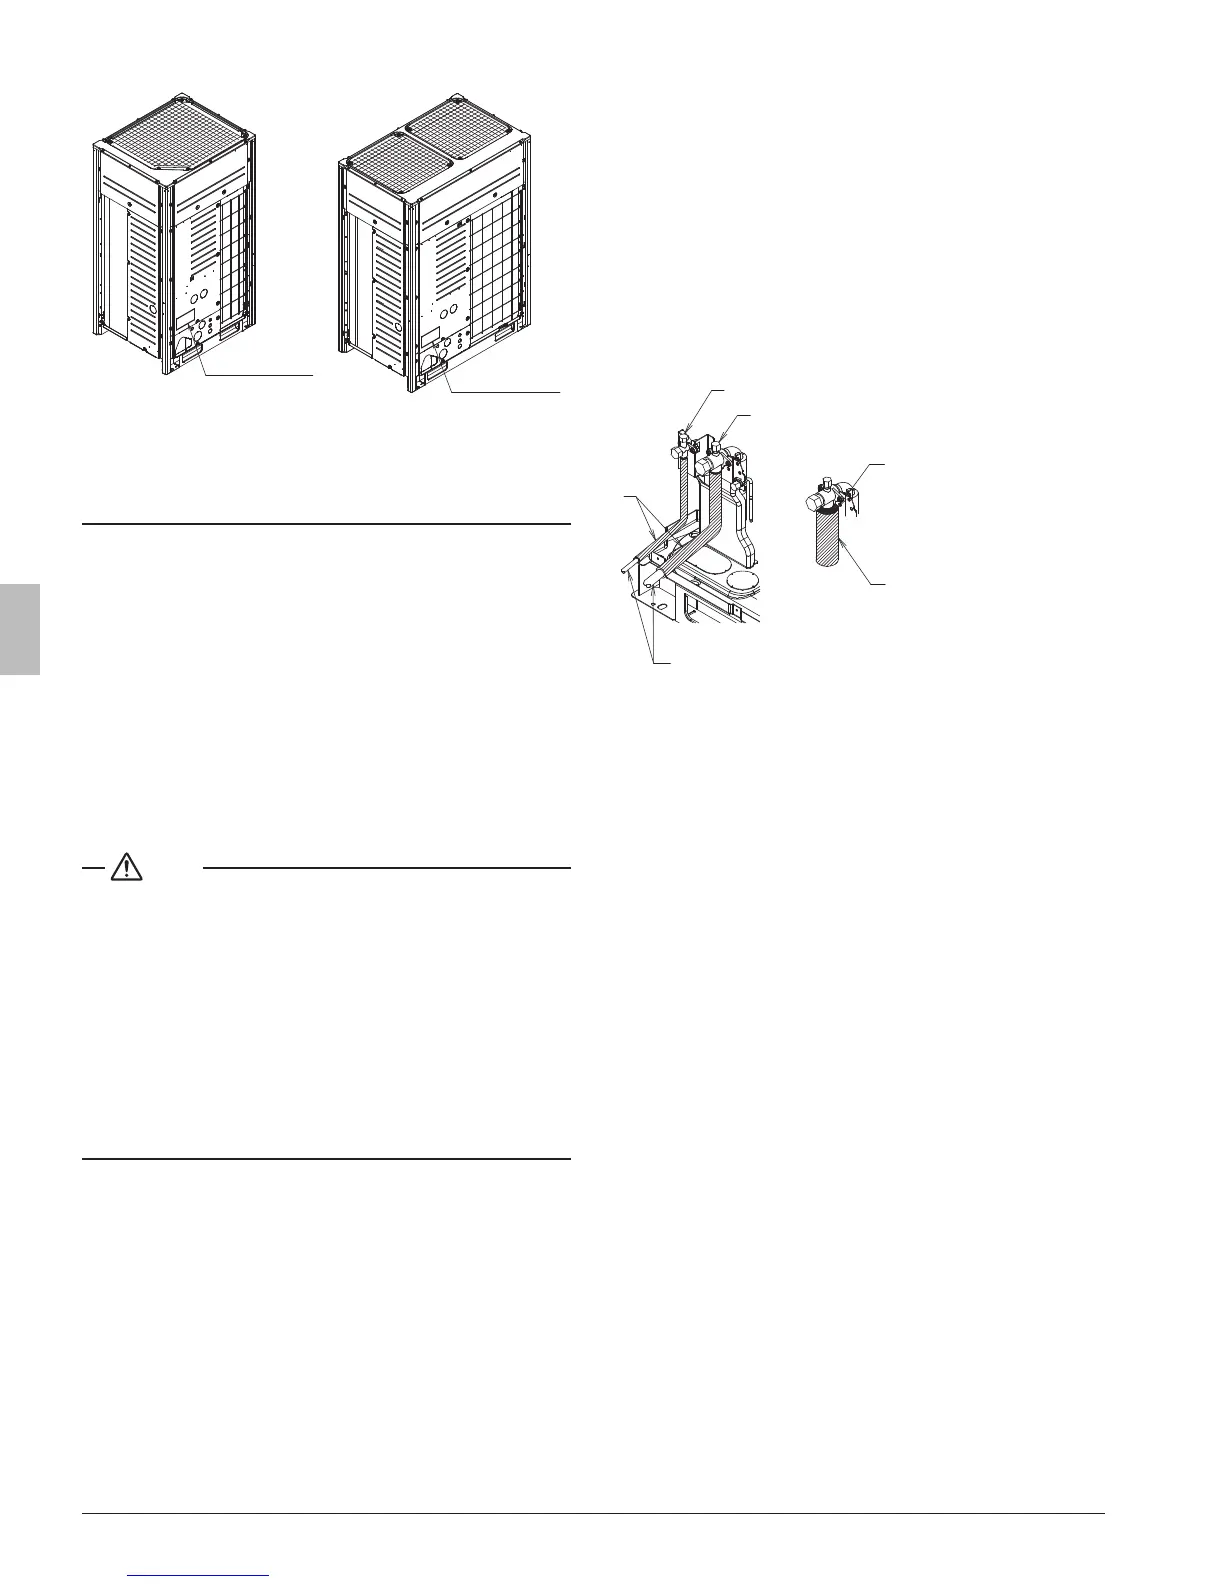
• If there is a possibility that condensation on the stop valve might
drip down into the indoor unit through gaps in the insulation and
piping because the outdoor unit is located higher than the indoor
unit, this must be prevented by caulking the connections. (Refer to
the following gure.)
1
2
1
5
3
4
1 Insulation material
2 Caulking, etc.
3 Liquid pipe stop valve
4 Gas pipe stop valve
5 Connection pipe
12. Checking of device and installation conditions
Be sure to check the followings.
For those doing electrical work
1 Make sure there is no faulty transmission wiring or loosening of a
nut.
See 9.4. Transmission wiring connection procedure on page20.
2 Make sure there is no faulty power wiring or loosening of a nut.
See 9.5. Power wiring connection procedure on page21.
3 Has the insulation of the main power circuit deteriorated?
Measure the insulation and check the insulation is above regular
value in accordance with relevant local and national regulations.
For those doing pipe work
1 Make sure piping size is correct.
See 7.2. Selection of piping material on page9 and 7.4. Selec-
tion of refrigerant branch kits on page10.
2 Make sure insulation work is done.
See 11. Pipe insulation.
3 Make sure there is no faulty refrigerant piping.
See 8. Precautions on refrigerant piping on page14.
13. Makingeldsettings
To continue the conguration of the VRV IV heat pump system, it is
required to give some input to the logic board of the unit. This chapter
will describe how manual input is possible by operating the push but-
tons/DIP switches on the logic board and reading the feedback from
the 7 segment displays.
 Loading...