Caution
Water accumulating in the drain piping can cause the drain to clog.
• To keep the drain tube from sagging, space hanging wires every 3 to 5ft.
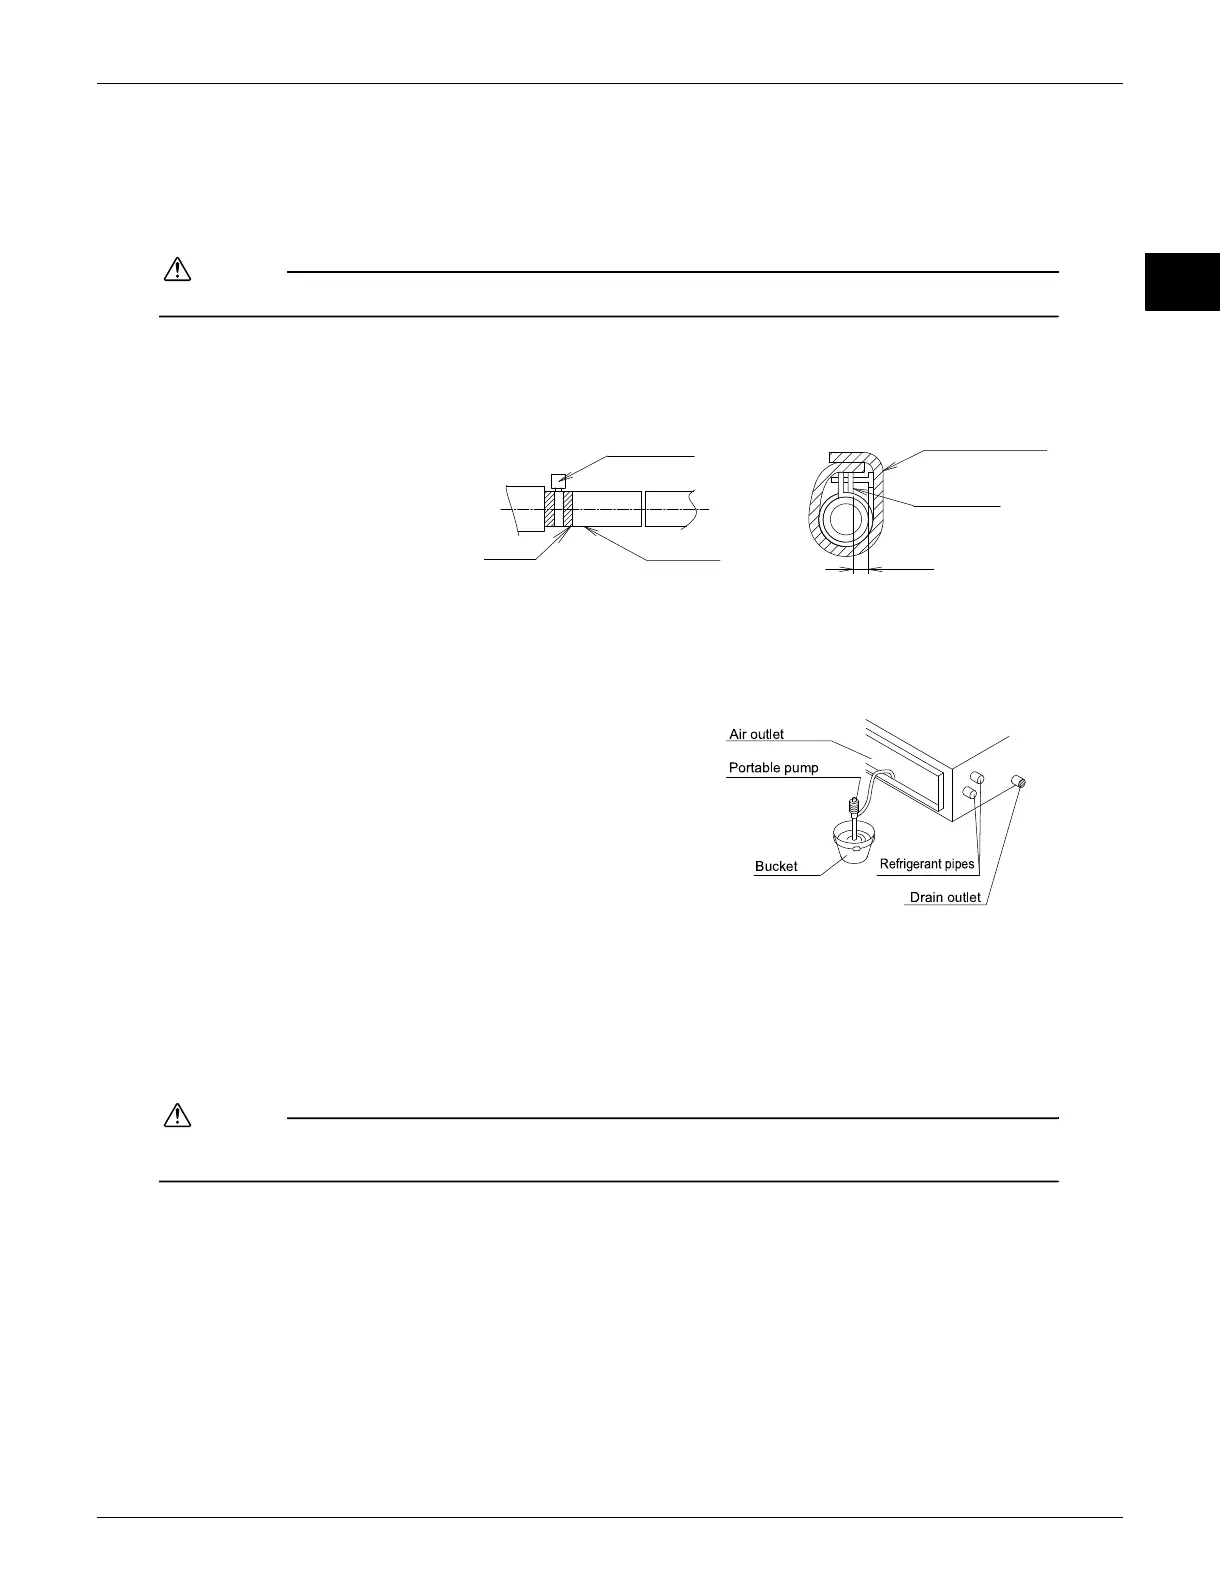
• Use the drain hose and the metal clamp. Insert the drain hose fully into the drain socket and firmly tighten the metal clamp with
the upper part of the tape on the hose end. Tighten the metal clamp until the screw head is less than 1/8in from the hose.
• The two areas below should be insulated because condensation may form there causing water to leak.
• Drain piping passing indoors
• Drain sockets
Referring the figure below, insulate the
metal clamp and drain hose using the
included large sealing pad.
PRECAUTIONS
Drain piping connections
• Do not connect the drain piping directly to sewage pipes that smell of ammonia. The ammonia in the sewage might enter the
indoor unit through the drain pipes and corrode the heat exchanger.
• Do not twist or bend the drain hose, so that excessive force is not applied to it.
(This type of treatment may cause leaking.)
After piping work is finished, check drainage flows smoothly.
• Gradually insert approximately 1L of water into the drain pan to check
drainage in the manner described below.
• Gradually pour approximately 1L of water from the outlet hole into
the drain pan to check drainage.
• Check the drainage.
INSTALLING THE DUCT
Connect the duct supplied in the field.
Air inlet side
• Attach the duct and intake-side flange (field supply).
• Connect the flange to the main unit with accessory screws (in 16, 20 or 24 positions).
• Wrap the intake-side flange and duct connection area with aluminum tape or something similar to prevent air escaping.
Caution
When attaching a duct to the intake side, be sure also to attach an air filter inside the air passage on the intake side. (Use an air
filter whose dust collecting efficiency is at least 50% in a gravimetric technique.)
1/8in
Large sealing pad
Clamp metal
(accessory)
(accessory)
Clamp metal
Drain hose
Tape
(accessory)
〈〉
 Loading...