USB POWER/
SERVICE
POWER
9V 1.3A
AUTO
SOURCE
SELECT
OFF
ON
IRBAND
AUTO
5.8 GHz
SUB OUT
RESET
RCA IN
RL
OPTICAL IN
OPTICAL IN
DIAGRAM 5
9
3. Installation and Setup
Follow the steps below to install your SOUND HUB COMPACT.
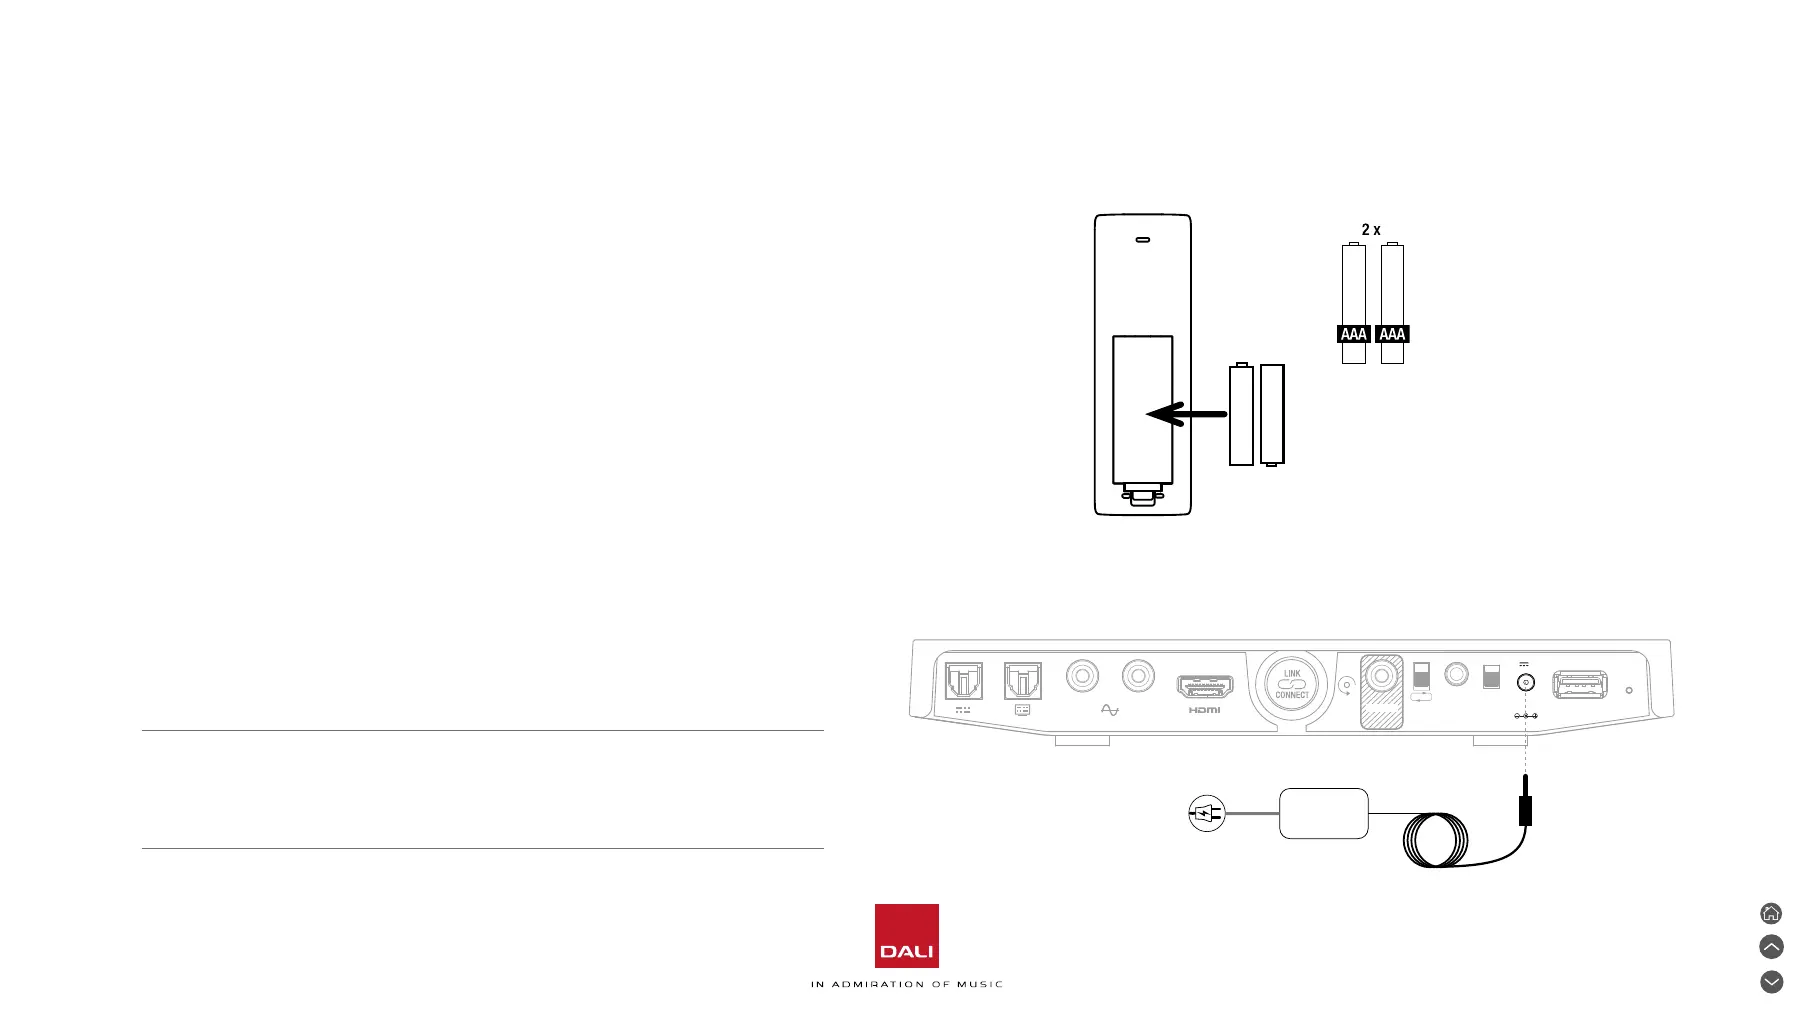
• Install baeries in the SOUND HUB COMPACT remote control.
Diagram 4 illustrates baery installation.
• If required, plug the IR Control Signal Receiver into the IR socket
on the SOUND HUB COMPACT rear panel as illustrated
in Diagram 5 and position the Signal Receiver head in an
unconcealed location. The Signal Receiver head can be secured
in position using its self-adhesive backing.
• With the location of your SOUND HUB COMPACT selected,
plug the power supply cable into the rear panel POWER
socket illustrated in Diagram 5 and then plug the power supply
into an appropriate mains power socket. Your SOUND HUB
COMPACT will switch on immediately in standby mode with its
rear panel power indicator illuminating red.
NOTE:
Depending on your location it may be necessary to fit one of the
supplied mains socket adaptors to the power supply. The adaptor
will simply click into position.
DIAGRAM 4
 Loading...