IMPORTANT: DISCONNECT POWER AND TURN OFF WATER SUPPLY.
Prepare Cabinet Opening Using Existing Utility Hookups:
• Follow the steps in this section if you are installing the dishwasher in an
existing cabinet opening with utility hookups.
• If you are installing the dishwasher in a cabinet opening that does not have
hookups, follow the steps under “Prepare cabinet opening where there are
no existing utility hookups” section.
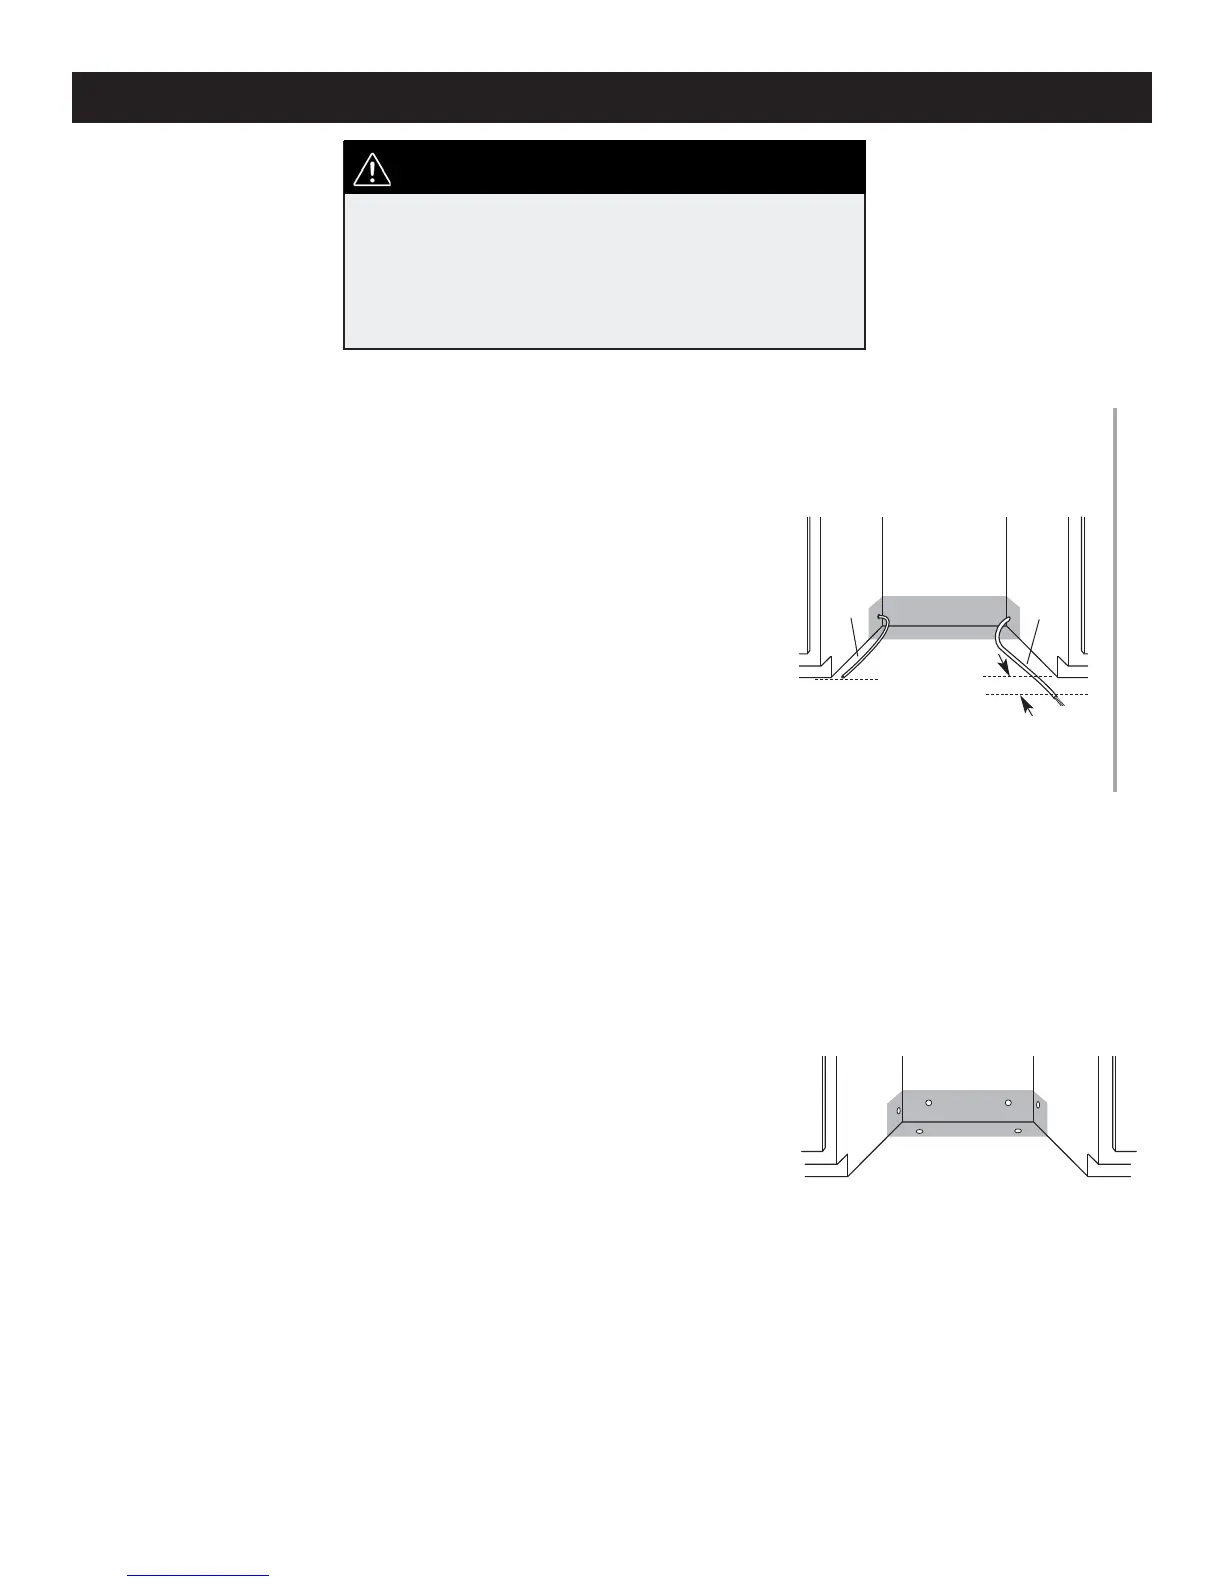
1. Check that the water line reaches to the front left of opening where the
water connection will be made.
2. Check that the direct wire reaches to the front right of opening where the
electrical connection will be made.
If the water line and the direct wire reach far enough into the opening, proceed
to the next section “Install the drain hose.“ If they do not reach far enough,
follow the steps under “Prepare cabinet opening where there are no existing
utility hookups.”
WARNING:
Electrical Shock Hazard
• Disconnect electrical power at the fuse box or
circuit breaker box before installing dishwash-
er.
• Failure to do so can result in death or electrical
shock.
6" (15.2 cm)
Water
Line
Direct
Wire
Install the Drain Hose:
IMPORTANT: Always use a new drain hose even when installing a new
replacement dishwasher.
1. Drill a 1-1/2” (3.8 cm) diameter hole in cabinet wall or fl oor on the side of
the opening closest to the sink.
2. Connect drain hose to waste tee or waste disposer using one of the follow-
ing methods:
• Option 1, Waste disposer – with air gap
• Option 2, No waste disposer – with air gap
• Option 3, Waste disposer – no air gap*
• Option 4, No waste disposer – no air gap*
*an air gap is recommended
Helpful Tip: To reduce the vibration of the hose, keep the hose away from the
fl oor and the edge of the hole where it passes through the cabinet.
INSTALLATION INSTRUCTIONS
5
 Loading...