9
Existing Installation
Existing Installation
Ensure that the power to the existing unit is switched
off prior to removal.
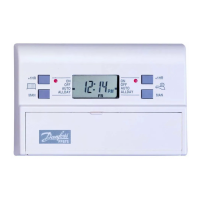
SYSTEMS RE-USING EXISTING WALLPLATE
Use the table on page 6 to confi rm wallplate compatability.
If the existing wallplate is of the SET pattern, follow
instruction 5-9 from the “New Installations” sections.
Should the existing product be a Danfoss Randall MK.9
time control the instructions below should be followed:
Remove and discard the white test point cover fi tted to
the top of the MK.9 wallplate.
Slide the small switches on the rear of the module
marked MK.9 - SET to the MK.9 position.
Ensure that the two retaining screws on the top of
the timeswitch are fully unscrewed. Firmly press the
module onto the wallplate and tighten the two screws
on the top of the module. An additional fi xing screw
to hold the bottom of the unit onto the wallplate
is packed separately and must be fi tted. The screw
should be placed into the recessed hole, beneath
the programming fl ap, adjacent to the COPY button,
screwed through the plastic retaining ring and securely
tightened.
Follow steps 6-9 from the “New Installations” section.
SYSTEMS HAVING INCOMPATIBLE BACKPLATES
Follow the “New Installations” instructions paying particular
attention to item 3).
1.
2.
3.
4.
!