12
VIIFR102 © Danfoss 03/2014
Installation manual Danfoss Link™ HP kit
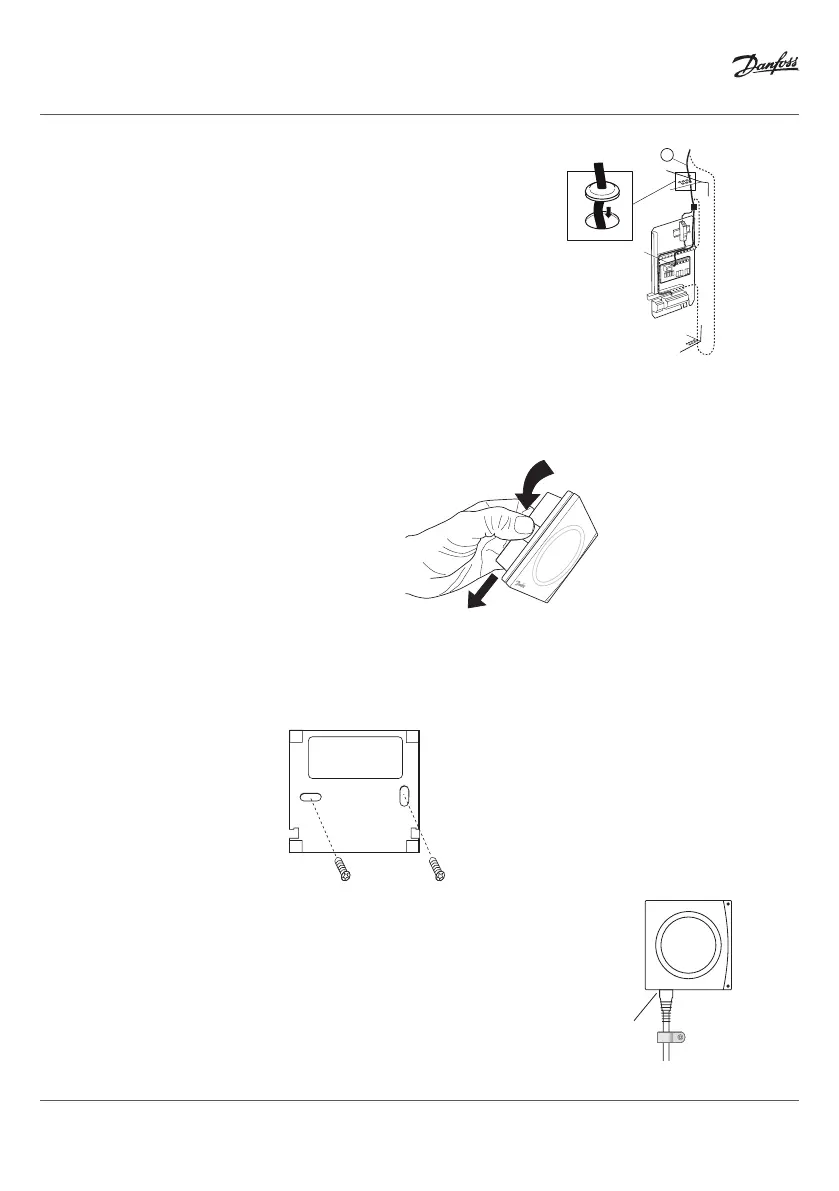
8. Connect the DCM03 cable to the free RJ45 connection on the relay
card. Pass the cable up through the cable lead-in and through the
membrane nipple. Adjust the length and press the membrane
nipple back.
Fitting DCM03
1. Remove the DCM03 unit rear panel by pressing in the spring-loaded plates on the side of the unit
and pulling the rear panel downwards until it can be removed.
2. Using the rear panel as a template, mark perpendicular boreholes at a suitable height on the wall
next to the heat pump.
3. Drill a hole with a diameter that can accommodate the rawlplugs and screws to be used. Screws
and rawlplugs are not included in the installation kit.
4. Insert the plugs in the holes and fasten the rear panel.
5. Re-fit the front.
6. Connect the DCM03 cable to the outlet marked RS 485 on the DCM03 unit.
7. Secure the cable with cable clamps at a suitable distance on the wall.
q
w