Guideline Trouble shooting guide for PAH, PAHT, PAHT C , PAHT G pumps
62
180R9379 | AQ188686503004en-000801 | PAH 2-12.5 } 07.2022
1. No ow/no pressure
Cause Remedy Comments
1.1 Dry running
(no water supply to the pump)
If no water comes out of the pump:
1.1.1 Check that inlet valve is open.
1.1.2 Check that booster pump is running.
Mount a low pressure switch in front of the
pump and check its set point/ function. The low
pressure switch ensures that the pump does not
start until the inlet pressure has reachedmini-
mum inlet pressure (see Data sheet).
1.2 Pump reversing
(electric motor is running the wrong direction,
i.e. counter-clockwise)
1.2.1 Change the phase on the electric motor to
make it run clockwise.
WARNING:
- The pump must not run without water for
more than a few seconds.
- If the pump takes in water from the high-
pressure outlet line, it builds up pressure in
pump housing and will eventually break
down.
Rotation direction for the pump is shown by an
arrow on the label on the pump.
1.3 No rotation of electric motor 1.3.1 Check that main switch is switched on.
1.3.2 Check the electricity at the facility.
1.3.3 Ensure that motor relay is switched on.
1.3.4 Ensure that fuse is not blown.
1.3.5 Ensure that booster pump is started.
1.3.6 Check that the monitor switches are
working correctly.
1.3.7 Disconnect pump from electric motor and
check that the motor is capable of running
with no load.
If motor-type relay or the electrical fuse is
blown, check that electric motor is sized
correctly.
1.4 No rotation of pump 1.4.1 Ensure that coupling between electric
motor and pump is connected.
1.4.2 Check if coupling is damaged.
1.4.3 Check that electric motor is sized correctly.
1.4.4 Check that the electrical installation is
correctly sized.
1.4.5 Contact Danfoss Sales oce for guidelines
in how to troubleshoot internal pump
parts.
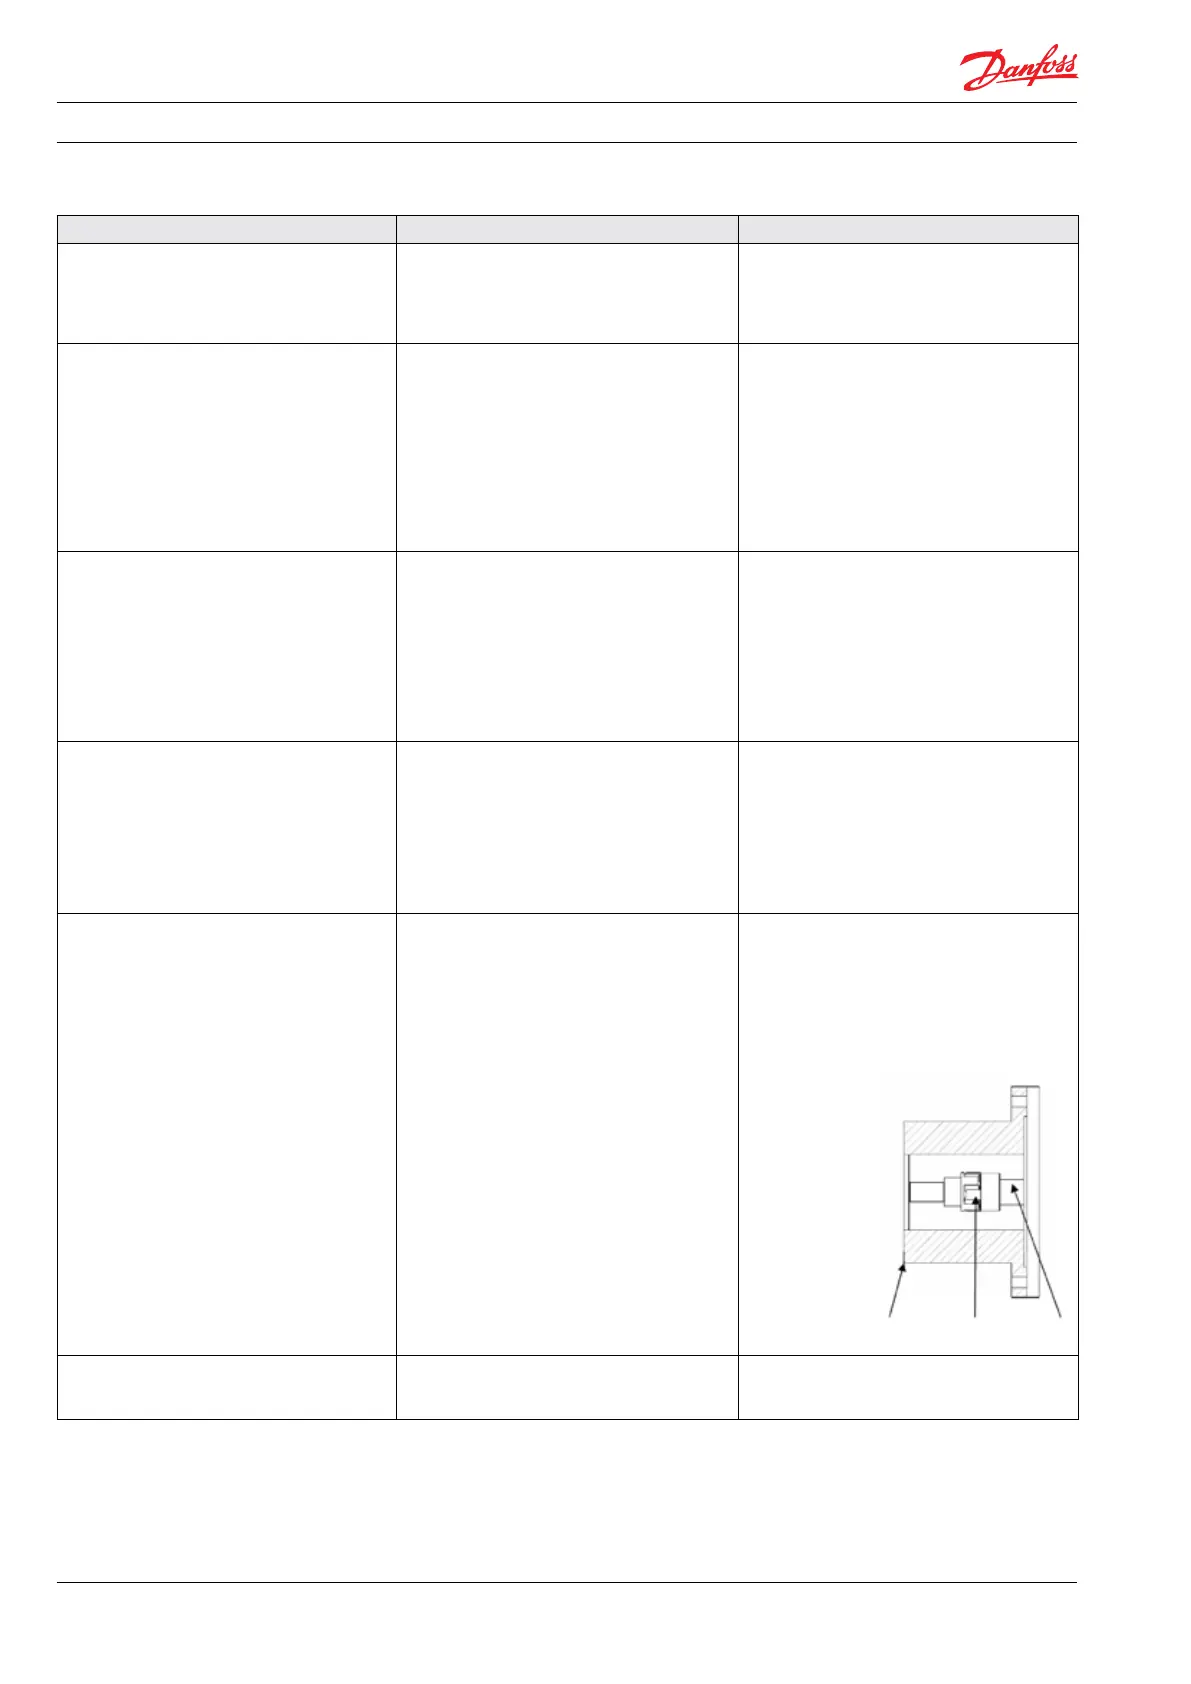
1.5 Axial load on pump shaft
(may cause high internal leakage)
Only applying to
PAH 2-12.5
PAHT 2-308
PAH F 20-40
PAHT C 2-308
PAHT G 2-308
1.5.1 Ensure that the air gap between the two
coupling parts is min 5 mm. It should
always be possible to move the plastic part
on the coupling at least 3 mm.
To ensure easy mounting of the exible coupling
without using tools, the tolerances must be
dimensioned accordingly.
WARNING:
Any axial and/or radial loads on the shaft must
be avoided. Any axial or radial load will cause
breakdown.
1.6 Pump damage
(the internal parts may be damaged)
1.6.1 Contact Danfoss sales oce for guidelines
in how to troubleshoot internal pump
parts.
Instructions on internal elements are available
on www.danfoss.high-pressurepumps.com
A B C
A - Bell housing
B - Flexible coupling
C - Motor shaft
 Loading...