EasyManua.ls Logo

Datsun 1000 - Page 24

Datsun 1000
224 pages
Print Icon
To Next Page IconTo Next Page
To Previous Page IconTo Previous Page
Loading...
18
Engine
I
1
t
1
he
I
t
tj
J
S
r
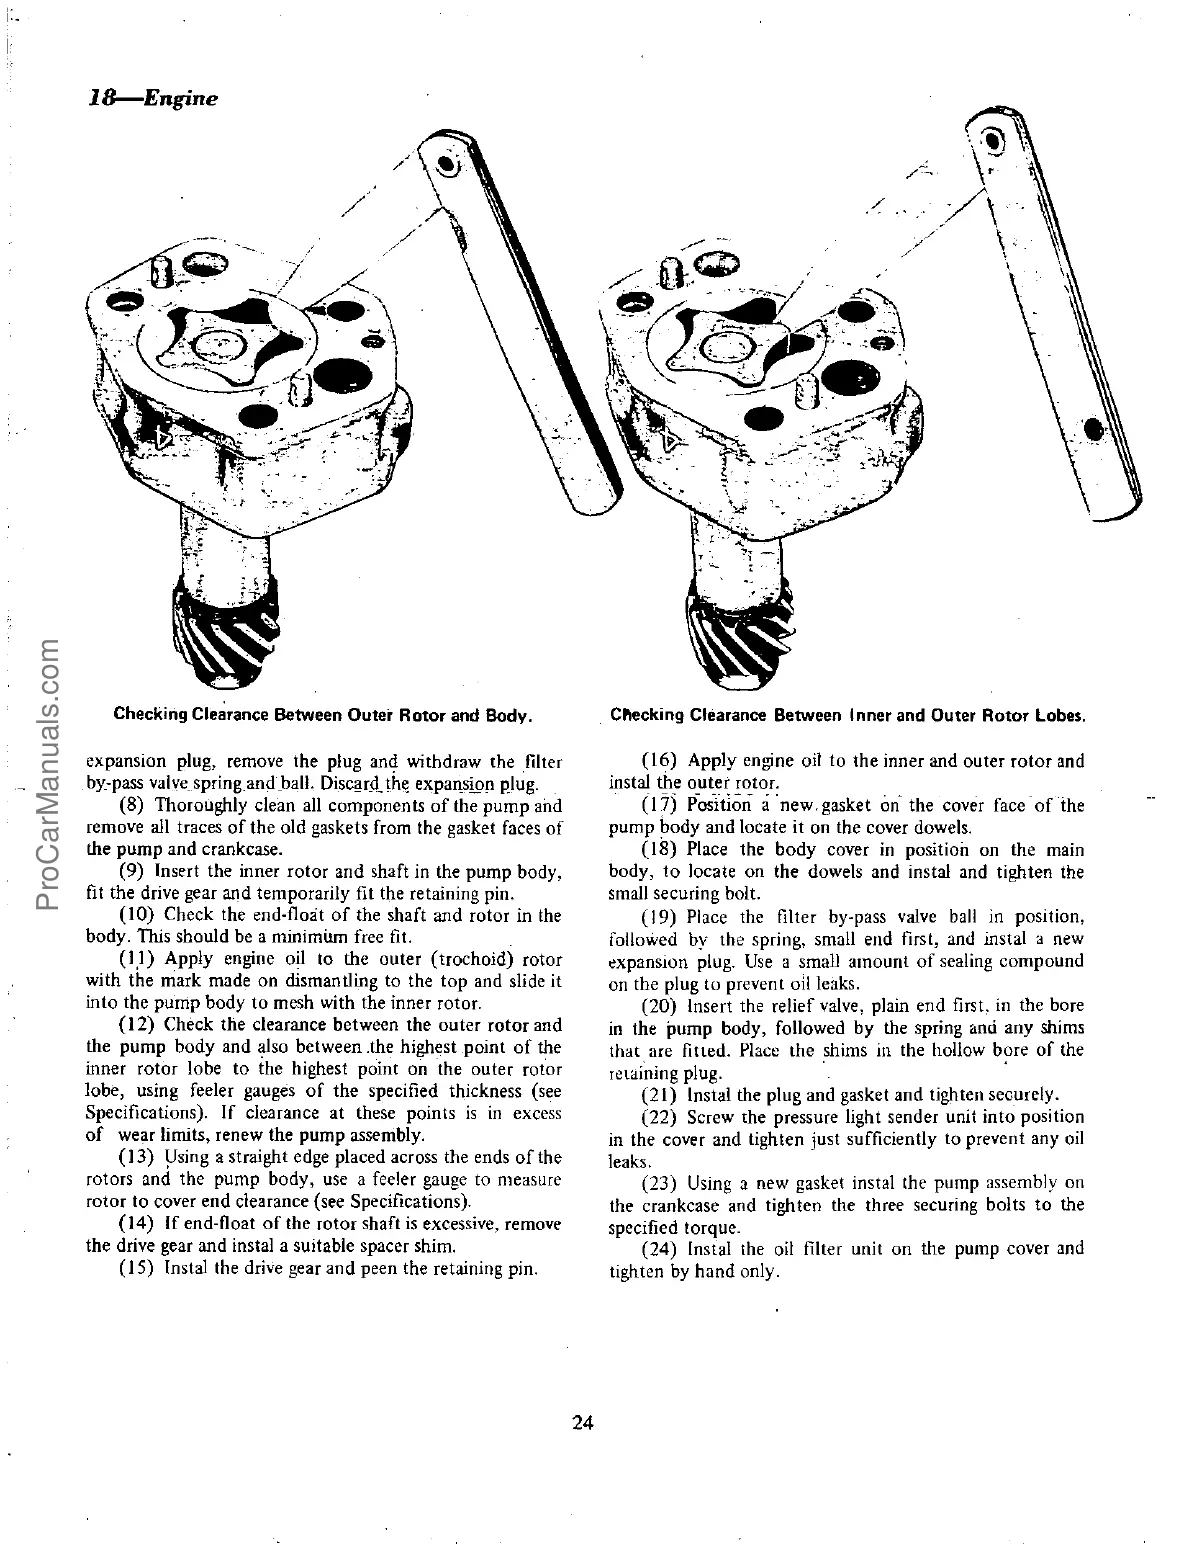
Checking
Clearance
Between
Outer
Rotor
and
Body
expansion
plug
remove
the
plug
and
withdraw
the
filtet
by
pass
valve
spring
and
ball
Disc
tt
the
expansign
I
lug
8
Thoroughly
clean
all
components
of
the
pump
and
remove
all
traces
of
the old
gaskets
from
the
gasket
faces
of
the
pump
and
crankcase
9
Insert
the
inner
rotor
and
shaft
in
the
pump
body
fit
the
drive
gear
and
temporarily
fit
the
retaining
pin
10
Check
the
end
float
of
the
shaft
and
rotor
in
the
body
TItis
should
be
a
minimUm
free
fit
1
I
Apply
engine
oil
to
the
outer
trochoid
rotor
with
the
mark
made
on
dismantling
to
the
top
and
slide
it
into
the
pump
body
to
mesh
with
the
inner
rotor
12
Check
the
clearance
between
the
outer
rotor
and
the
pump
body
and
also
between
the
highest
point
of
the
inner
rotor
lobe
to
the
highest
point
on
the
outer
rotor
lobe
using
feeler
gauges
of
the
specified
thickness
see
Specifications
If
clearance
at
these
points
is
in
excess
of
wear
limits
renew
the
pump
assembly
13
Using
a
straight
edge
placed
across
the
ends
of
the
rotors
and
the
pump
body
use
a
feeler
gauge
to
measure
rotor
to
cover
end
clearance
see
Specifications
14
f
end
float
of
the
rotor
shaft
is
excessive
remove
the
drive
gear
and
instal
a
suitable
spacer
shim
J
5
Instal
the
drive
gear
and
peen
the
retaining
pin
0
p
fj
L
G
e
Ii
I
1
t
fJ
S
r
Jr
I
w
Cftlecking
Clearance
Between
Inner
and
Outer
Rotor
lobes
16
Apply
engine
oil
to
the
inner
and
outer
rotor
and
instal
the
outer
rotor
J
7
POsition
a
new
gasket
on
the
cover
face
of
the
pump
body
and
locate
it
on
the
cover
dowels
J
8
Place
the
body
cover
in
position
on
the
main
body
to
locate
on
the
dowels
and
instal
and
tighten
the
small
securing
bolt
19
Place
the
filter
by
pass
valve
ball
in
position
followed
by
the
spring
small end
first
and
instal
a
new
xpans
ion
plug
Use
a
small
amount
of
sealing
compound
on
the
plug
to
prevent
oil
leaks
20
Insert
the
relief
valve
plain
end
first
in
the
bore
in
the
pump
body
followed
by
the
spring
ana
any
shims
that
are
fitted
Place
the
shims
in
the
hollow
bure
of
the
retaining
plug
21
Instal
the
plug
and
gasket
and
tighten
securely
l22
Screw
the
pressure
light
sender
unit into
position
in
the
cover
and
tighten
just
sufficiently
to
prevent
any
oil
leaks
23
Using
a
new
gasket
instal
the
pump
assembly
on
the
crankcase
and
tighten
the
three
securing
bolts
to
the
specified
torque
24
Instal
the
oil
filter
unit
on
the
pump
cover
and
tighten
by
hand
only
24
ProCarManuals.com