19
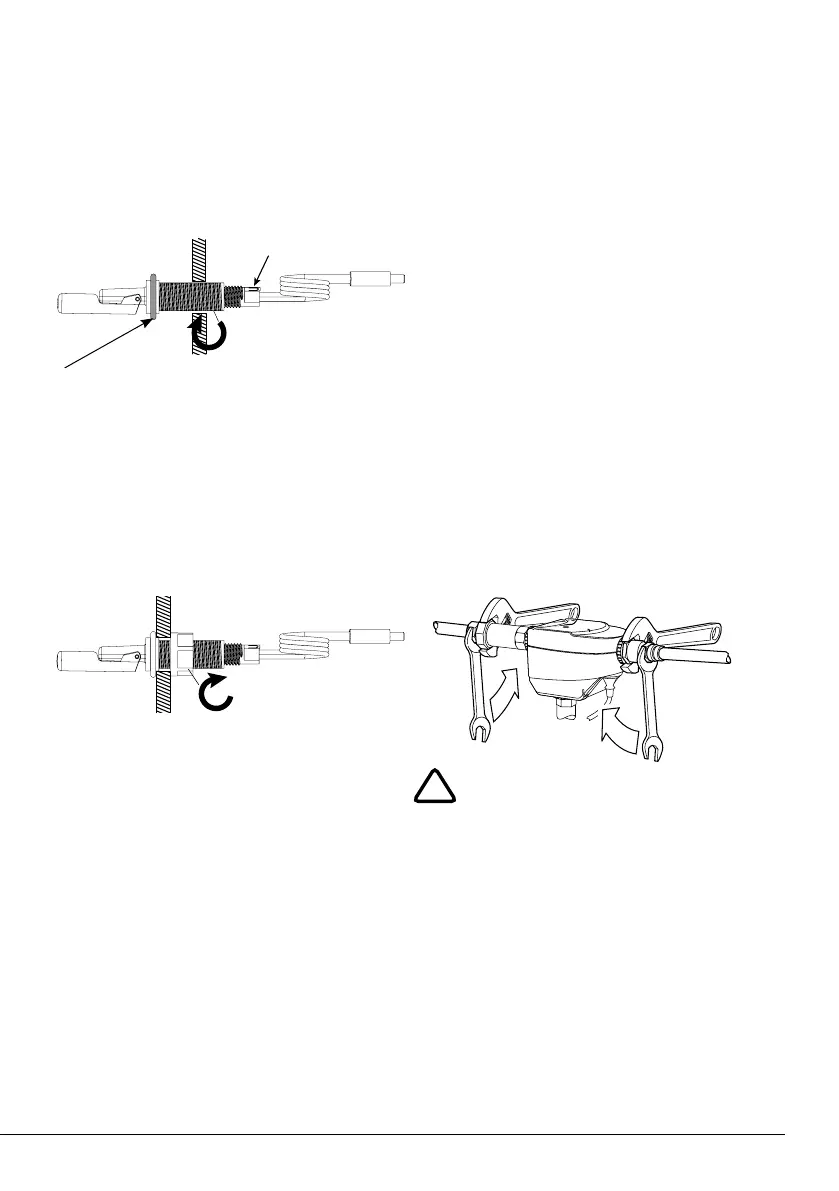
3. The switch will not work properly if it
is not properly orientated. Make
sure the word “UP” is seen at the very
end of the switch body. Now tighten
the compression nut to expand the
seal (as shown below).
4. Ensure that the switch is still correctly
orientated. With the word “UP”
visible, screw on and tighten the
sealing nut to finish the installation of
the float switch.
STEP 4 - CHECK PIPE WORK
Make sure the final assembled position
of your RainBank will align well with the
mains and rainwater pipe.
The pump and RainBank should be
assembled so that the mains water
supply to the unit and rainwater outlet to
toilets and laundry connect easily to the
plumbing on the same level.
STEP 5 - CONNECT PUMP TO
RAINBANK
Connect your pump to the RainBank
1. Screw rotary coupling into outlet of
pump (teflon tape not required).
STEP 6 - CONNECT PIPES
Connect the RainBank to the mains
water and delivery pipe plumbing.
IMPORTANT
• To allow easy connection it is strongly
recommended that you have flexible
copper pipes that allow some
movement so that they can line
up exactly with the mains water and
rainwater outlet. These pipes must be
¾ inch in diameter.
Tighten Sealing
Nut
!
‘UP’
Tighten
Compression
Nut
Bellow deforms
inside tank
 Loading...