18
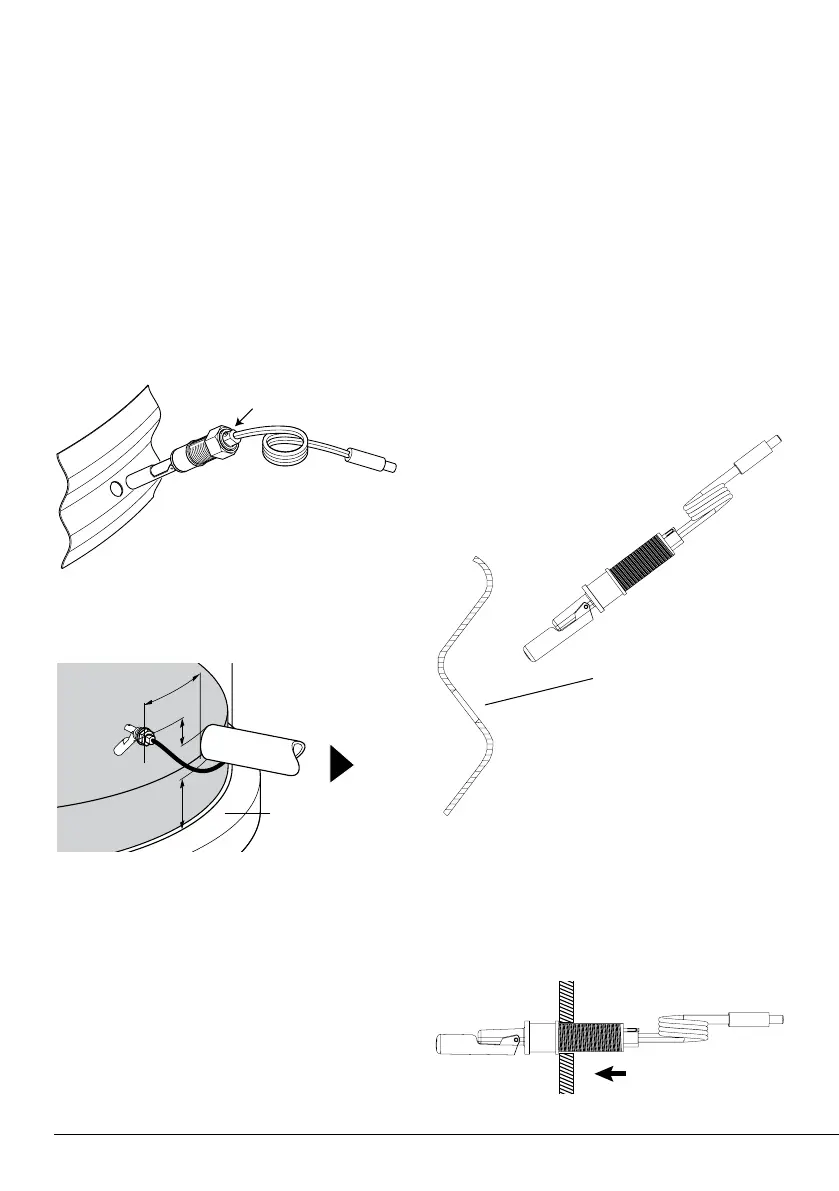
Insert Float
Drill Hole
ø 22mm
maximum tank wall thickness of
25mm. It is not suitable for concrete
or very thick plastic walled tanks.
There is an alternative float switch
that can be lowered into the top of
these types of tanks (Davey p/n: 13961).
Work out the correct position for the hole
for the float switch. With a corrugated
profile tank wall this is on the upper flat
section of the profile as shown below.
Work out the correct location of the float
switch relative to the pump outlet.
The float switch location should also be:
• At least 40mm above the pump inlet.
• Placed away from the rainwater entry
into the tank so that the incoming flow
does not interfere with the operation
of the switch.
Before cutting the hole check again that
the 5m lead from the float switch will
reach the RainBank and plug comfortably
into it.
1. Drill a 22mm hole in the side of the
tank in the correct position. A spade
drill is the best tool for this job.
Ensure all swarf is removed from the
hole. If installing the switch in a
corrugated tank you should make
sure that it is installed on the flat
section between the radii as shown
below.
2. Ensure the compression nut is
loosened so that the sealing grommet
is not expanded. Remove the sealing
nut and insert the switch into the hole
as below.
Centre hole on flat section of profile
Diameter of hole must be 22mm.
Note: Ensure level sensor is installed
with ‘UP’ facing up
150
40
100
Slab
To
 Loading...