Do you have a question about the Davey SILENSOR SLS200 and is the answer not in the manual?
Optimal pump placement considerations: proximity to water, firm base, and drainage for efficient operation.
Guidance on protecting the pump from adverse weather conditions to enhance durability and lifespan.
Specifications for PVC pipe connections using barrel unions and recommended installation practices.
Steps for correctly priming the pump and ensuring proper operation for maximum performance and longevity.
Procedure for inspecting and cleaning the strainer basket to prevent blockages and maintain pump efficiency.
Solutions for common operational issues: no flow, reduced flow, or pump not starting.
Instructions for safely disconnecting and removing the pump from plumbing for maintenance or replacement.
Guidelines for maintaining balanced water chemistry for optimal pump lifespan and pool health.
Essential steps for wiring, checking motor rotation, and safety precautions for three-phase models.
Weekly tasks to ensure safe operation, proper functioning, and longevity of the pool pump.
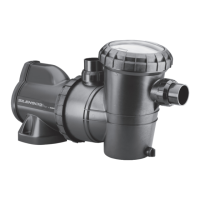
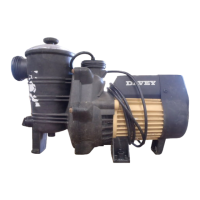
This document provides installation and operating instructions for the Davey Silensor pool and spa pump, available in single-phase and 400V three-phase models. The Silensor is designed to circulate swimming pool and spa water, adhering to Australian Standard AS 3633 or equivalent water quality conditions.
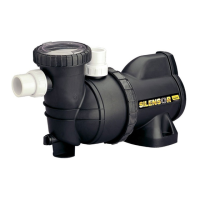
The Davey Silensor pump is engineered for quiet operation and maximum water flow. It features a water-cooled motor with built-in manual overload protection and an automatic thermostat to prevent overheating and 'dry run' damage. The pump is double insulated to the water circuit, and an equipotential bonding point is provided if required by local wiring standards.
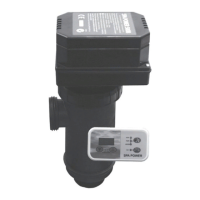
The pump's design ensures efficient performance, with the motor and pumping end matched for optimal quietness. Its innovative water-cooled motor contributes to its longevity and reliability. The Silensor incorporates dry run protection, which requires a power supply reset if activated, helping to prevent potential damage from running without water.
For three-phase models, the pumps are designed for connection to a nominal 400V power supply and must be wired with a contactor with 'quick-trip' overloads set at 4.3 amps. Davey recommends using overloads capable of detecting "single phasing" or "dropped phase" conditions in the power supply. These three-phase motors do not include capacitors in the capacitor cover.
The Silensor is suitable for connection to a nominal 240 volt 50Hz power supply for single-phase models, equipped with a flex lead and a 3-pin plug. If a power outlet is not within 3 meters, an electrician should install one in a safe, dry location. Extension cords are not recommended around pools.
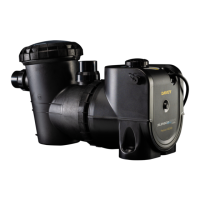
The pump should be located as close to the water as practicable, on a firm, well-drained base, elevated to prevent flooding. It is crucial for the installer/owner to ensure the nameplate is easily readable and the pump is accessible for service. Weather protection for the pump is also recommended.
Before starting the pump, ensure all pipework is correctly sealed, the pool/spa water level is at the correct height, and all appropriate valves are open, allowing free water flow. To prime the pump, remove the strainer basket lid, fill the basket area with water, and replace the lid, ensuring a seal on the large O-ring. After connecting to the power supply and switching on, allow the pump to run to expel trapped air. If prime is not established within two minutes, switch off the pump and repeat the procedure. Persistent air under the strainer basket lid indicates an air leak in the suction piping, which must be rectified to prevent pump damage.
For optimal performance, the strainer basket housing should always be full of water and free of air bubbles. The pool's water level should be maintained at least halfway up the skimmer box to ensure the pump always contains water. Re-priming may be necessary from time to time.
When connecting pipes, the pump uses applicable barrel unions designed to accept PVC pipes, fitting either inside or outside the union tail. Barrel unions should be hand-tightened without sealants, glues, or silicones. Using pipes smaller than specified is not recommended, and suction piping should be free of air leaks, humps, and hollows. The discharge piping connects to the swimming pool filter's inlet.
For three-phase models, ensure correct wiring into the mains 3-phase power. Check the pump's rotation by removing the bolt and washer from the rear, then the rear pump cover. Connect to power briefly to confirm the motor shaft turns clockwise, indicated by an arrow on the rear end shield. If rotation is incorrect, change any two power leads at the motor terminals. Carefully reassemble the wiring and covers, ensuring no wires are pinched.
Regular maintenance is crucial for the pump's longevity and personal safety. A weekly checklist includes:
The strainer basket should be inspected frequently through its transparent lid and emptied when debris accumulates. To do this, switch off the pump, close all pipework valves, unscrew the strainer basket lid anti-clockwise, and remove it. Lift the basket from its housing, empty trapped refuse, and hose it out. Check the basket for cracks before replacing it. Replace the lid, ensuring it seals on the large rubber O-ring; firm hand tightness is sufficient. The O-ring and thread can be lubricated with Hydra slip or equivalent products. Finally, open all valves in the pipework.
Maintaining balanced water chemistry is vital for the pump's life. The pump is designed for use with pool and spa water balanced according to the Langlier Saturation Index, with a pH level between 7.2 and 7.8. It should be regularly treated with a chlorine sanitizing agent, with levels not exceeding 3000ppm. Salt levels should be maintained between 4000ppm and 6000ppm. Regular water testing by a local pool shop is recommended.
If the pump needs to be removed from pipework, first switch off the power and unplug it. If wired into a time clock or automatic control, a qualified electrician must remove the wiring. Close water valves on the pool return and pump inlet pipework. Remove discharge and suction barrel unions, taking care not to lose the O-rings. Move the pipework with the barrel unions attached until the pump can be pulled clear. When making inquiries about the Silensor, always quote the model number from the nameplate on the motor.
| Model | SLS200 |
|---|---|
| Application | Swimming Pool |
| Power | 0.75kW |
| Motor Power | 0.75kW |
| Voltage | 220-240V |
| Frequency | 50Hz |
| Max Flow Rate | 200 L/min |
| Flow Rate @ 8m Head | 150 L/min |
| Suction Size | 50mm |
| Discharge Size | 50mm |
| Inlet/Outlet Size | 50mm |
| Noise Level | 55 dB |
| Type | Centrifugal Pool Pump |