EasyManuals Logo

DAVIS 6410 User Manual

DAVIS 6410
12 pages
To Next Page IconTo Next Page
To Previous Page IconTo Previous Page
Page #5 background imageLoading...
Page #5 background image
3
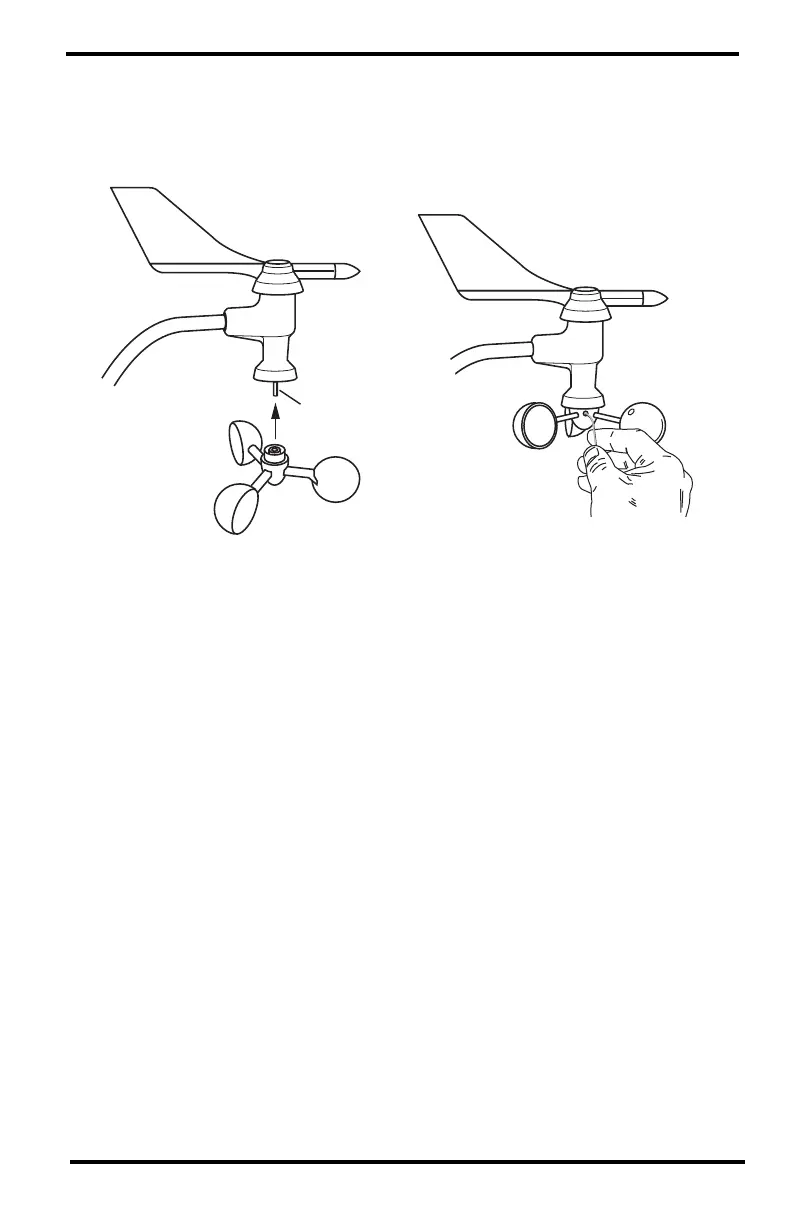
Attach the Wind Cups
1. Push the wind cups up onto the anemometers stainless steel wind cup shaft.
2. Slide the wind cups up the shaft as far as possible.
3. Use the Allen wrench provided to tighten the set screw on the side of the wind
cups.
4. The wind cups should drop slightly when you let go.
5. Ensure that the set screw is screwed in fully and very tight. Failure to do so
will cause the anemometer to function improperly.
6. Spin the wind cups.
7. If the wind cups spin freely, the anemometer is ready for installation.
If the wind cups don’t spin freely, take them off and repeat the wind cup
installation process.
Tighten set
screw with
Allen wrench
Push cups onto
stainless steel
shaft
Wind cup shaft

Questions and Answers:

Question and Answer IconNeed help?

Do you have a question about the DAVIS 6410 and is the answer not in the manual?

DAVIS 6410 Specifications

Operating Environment IconOperating Environment
operating temperature range-40° to +149°F (-40° to +65°C)
Wind Direction IconWind Direction
display resolution16 points (22.5°) on compass rose, 1° in numeric display
accuracy±3°
Wind Speed IconWind Speed
range2 - 200 mph, 3 - 322 kph, 2 - 173 knots, 1 - 89 m/s
accuracy±2 mph (3 kph, 2 kts, 1 m/s) or ± 5%, whichever is greater