Standard and Industrial Versions: Installation Page 11
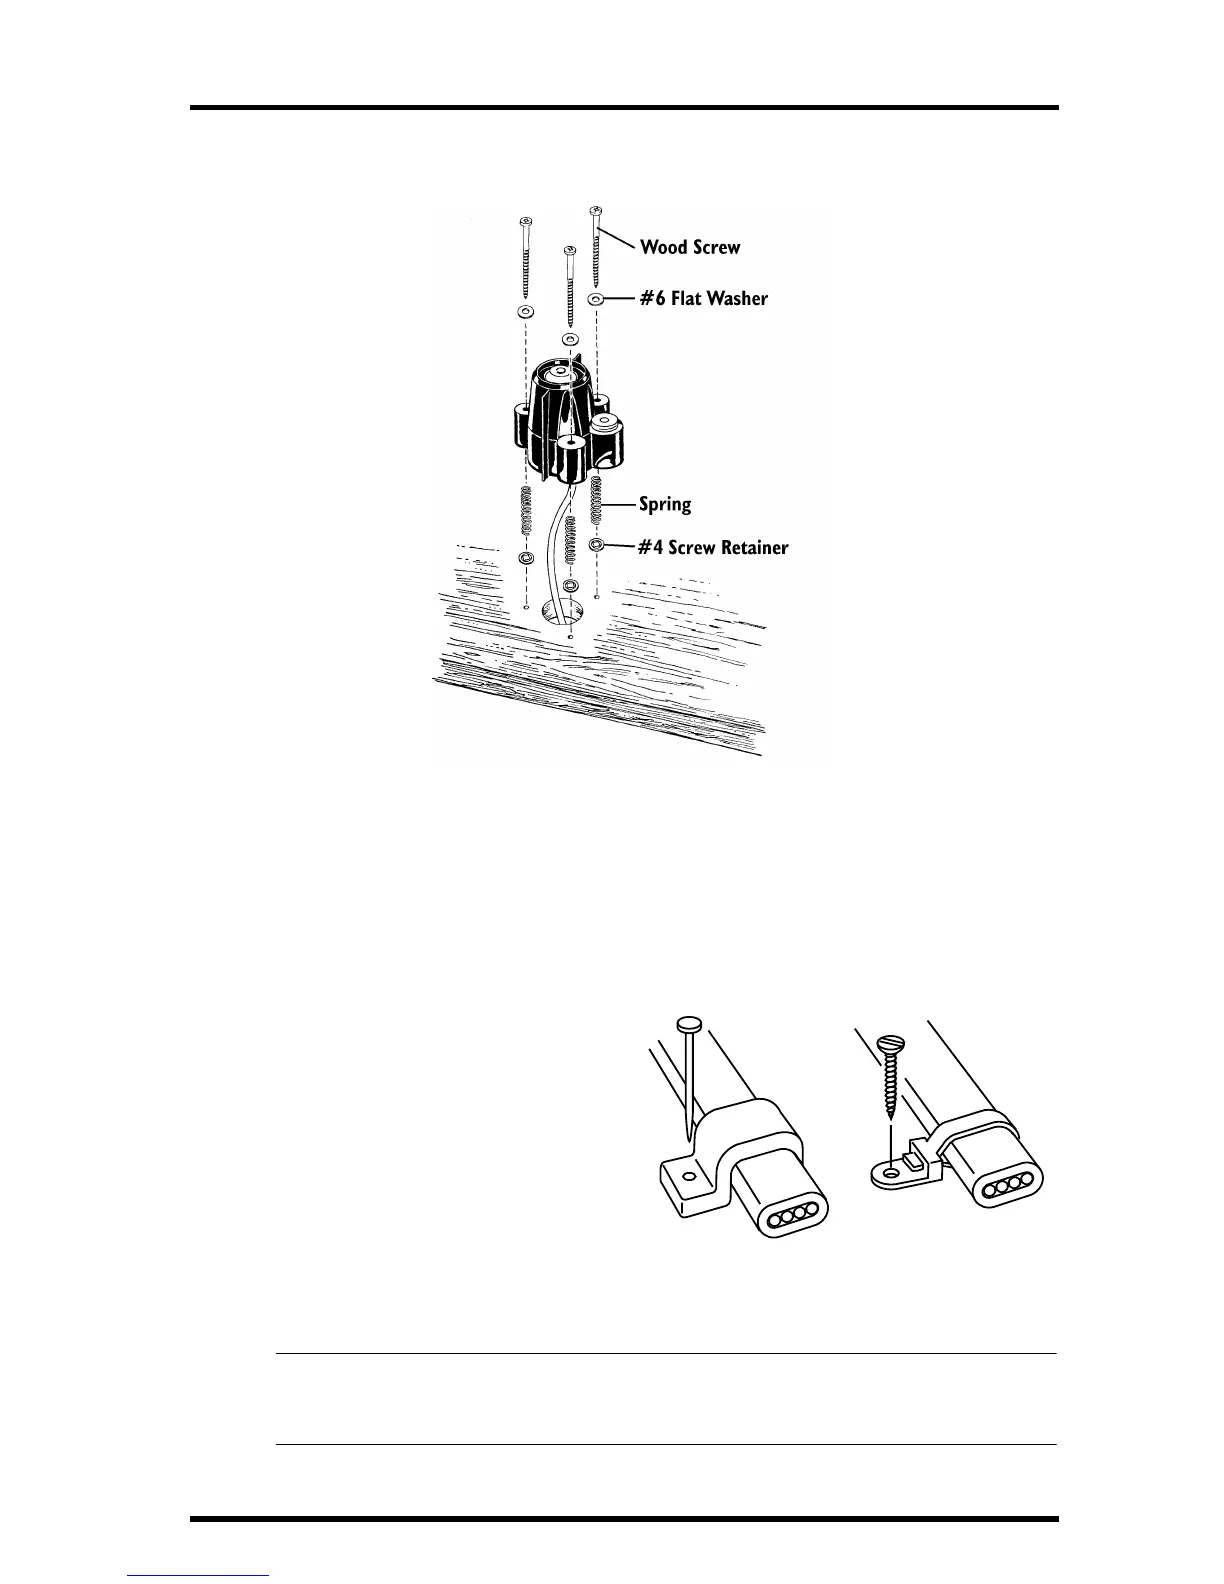
7. Secure the sensor to the mounting surface by driving the screws into the appropriate
holes as shown below.
MOUNTING THE UV SENSOR ON A WOOD SURFACE
8. Using the bubble level on the sensor as a guide, adjust the sensor until it is level by
tightening or loosening the screws as necessary.
9. Secure the sensor cable to the mounting surface. You may use the provided 3/16" cable
clamp, #8-32 x 3/4" screw, #8 hex nut, and #8 flat washer if possible.
Routing Sensor Cable
To prevent fraying or cutting of the
cable where it is exposed to weather,
secure it so it doesn’t whip about in
the wind. Use cable clips or weather
resistant cable ties to secure the
cable. Place clips or ties approxi-
mately every 3 to 5 feet (1 to 1.6 m).
Do NOT use metal staples or a staple
gun to secure cables. Metal staples—
especially when installed with a sta-
ple gun—have a tendency to cut the
cables.
Note:Try not to tug on the cable in such a way as to loosen the connections between cables. Also,
make sure the sensor cable is not so taut that connections loosen or pull free due to the
strain. Many sensor problems occur because cable connections come loose.
Cable Clip
Cable Tie