7
NOTE
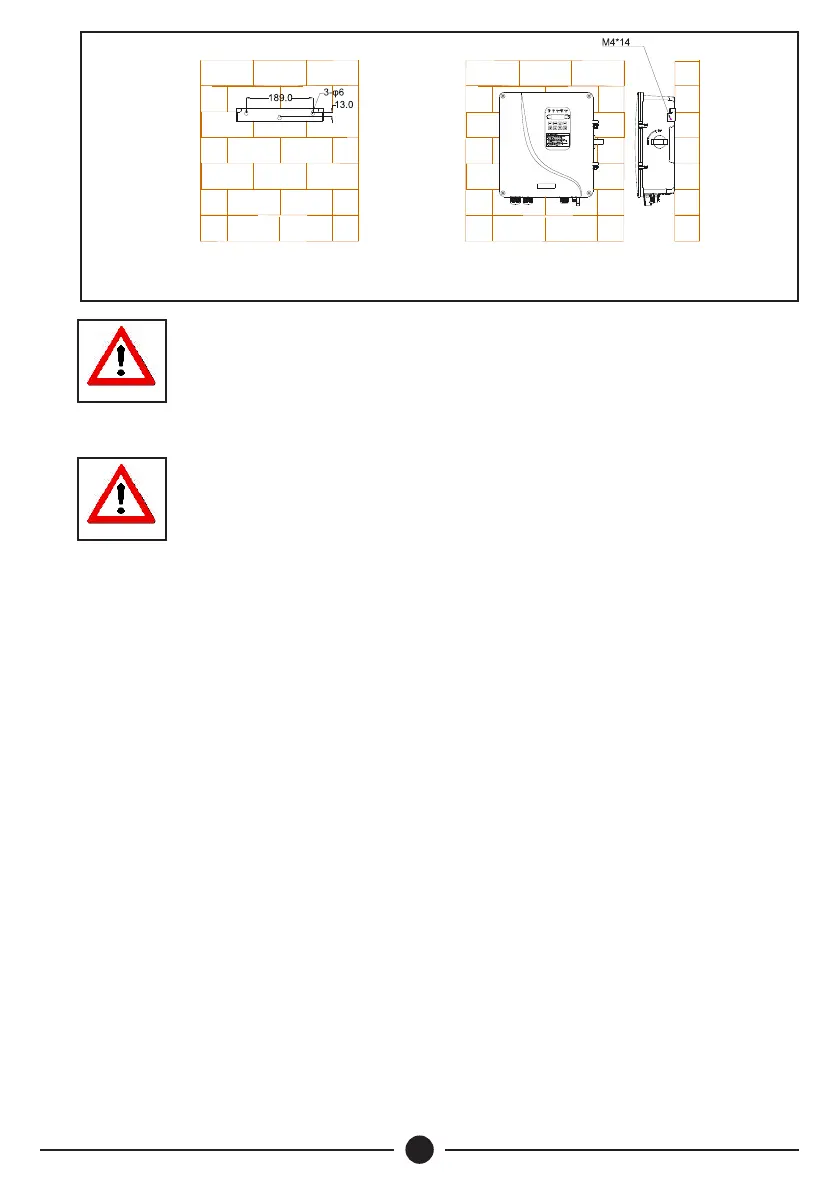
The installation surface should be at and closely attached to
the inverter bottom surface to ensure good heat dissipation.
If the installation surface is not at, a wind deector can be
installed on the back of the inverter in advance to enhance
the heat dissipation capacity.
NOTE
The expansion bolts provided by manufacturer are suitable
for installation on concrete walls. If the inverter is to be
mounted on wooden walls, select the expansion bolt suitable
for wooden wall mounting, and ensure the expansion bolts
are long enough to penetrate at least 1/2 of the wall
thickness.
Fig 2: Mounting Hole
Diagram
Fig 3: Inverter Mounting
Installation Diagram
 Loading...