EasyManua.ls Logo

DaytonAudio DCS165-4 User Manual

Default Icon
7 pages
To Next Page IconTo Next Page
Page #1 background imageLoading...
Page #1 background image
DCS165-4 Down-Firing Subwoofer Kit Assembly
Thank you for purchasing the DCS165-4 Down-Firing Subwoofer kit. This kit was precision cut
using CNC machinery for the best possible fit and finish. With a little time and patience, your
finished product will provide years of enjoyment. Please use the following instructions for the best
possible results.
Suggested tools and consumables:
Drill Rag or paper towels
5/64" drill bit Solder
Wood clamps (you can never have too many of these) Soldering iron
Sanding block and/or electric finishing sander Wood glue
Speaker or hook-up wire (14-16 gauge) Binding post/terminal cup
Pencil or Sharpie marker Phillips screwdriver
#8 x 3/4" Pan head wood screws Plate Amplifier
Package contents:
First, empty the contents of the package and review parts to ensure everything has been included
and is in good condition. If any parts are missing or damaged please contact our customer service
department at 1-800-338-0531.
Components:
A) 1 x Dayton Audio DCS165-4 6-1/2" Classic Subwoofer 4 Ohm
B) 1 x Port Tube 2" ID Adjustable
Question and Answer IconNeed help?

Do you have a question about the DaytonAudio DCS165-4 and is the answer not in the manual?

DaytonAudio DCS165-4 Specifications

General IconGeneral
Impedance4 ohms
Magnet Weight20 oz
Qes0.55
Qts0.49
Basket MaterialSteel
Surround MaterialFoam
Nominal Diameter6.5 in
Voice Coil Diameter1.5 in

Summary

Introduction and Preparation

Suggested Tools and Consumables

Lists essential tools and consumable items for assembling the subwoofer kit.

Package Contents

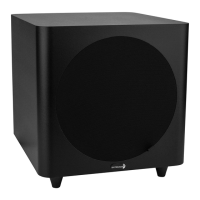
Details the components included in the subwoofer kit for verification.

Enclosure Identification

Enclosure Diagram and Parts

Diagram illustrating the enclosure panels and their labels.

Enclosure Assembly Steps

Steps 1-3: Initial Assembly

Covers panel preparation, cleaning, gluing, and initial clamping.

Enclosure Assembly Continuation and Finishing

Steps 4-6: Securing and Finishing

Securing the enclosure, allowing it to dry, and sanding/finishing.

Final Assembly and Tuning

Steps 7-10: Wiring and Mounting

Wiring terminals, mounting woofer and port tube, installing damping.

Step 11: Port Tuning

Determine and set the port length for desired tuning frequency.

Final Installation and Additional Parts

Steps 12-13: Completion and Enjoyment

Final woofer/port installation, and confirmation of assembly readiness.

Recommended Component List

List of specific part numbers for optional components used in the build.

Related product manuals