iNSTALLATiON
[]
[]
[]
[]
[]
[]
[]
[]
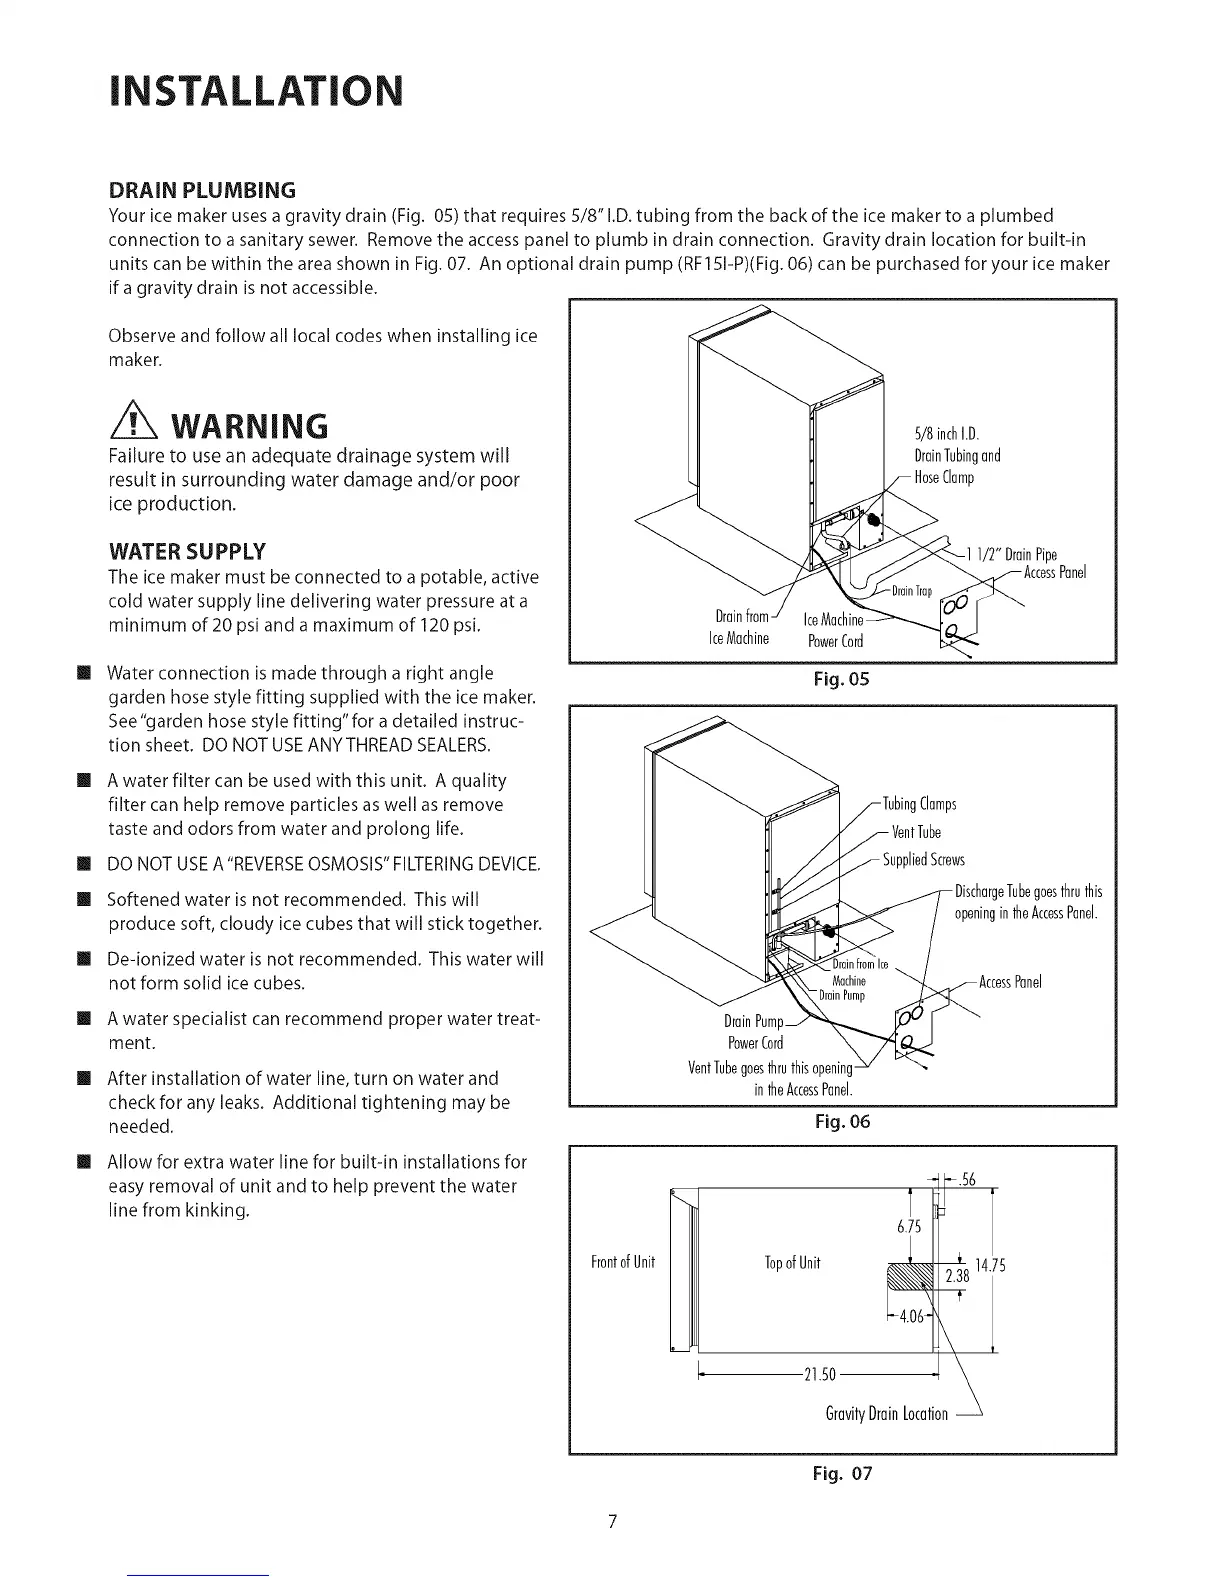
DRAIN PLUMBING
Your ice maker uses a gravity drain (Fig. 05) that requires 5/8" I.D. tubing from the back of the ice maker to a plumbed
connection to a sanitary sewer. Remove the access panel to plumb in drain connection. Gravity drain location for built-in
units can be within the area shown in Fig. 07. An optional drain pump (RF151-P)(Fig. 06) can be purchased for your ice maker
if a gravity drain is not accessible.
Observe and follow all local codes when installing ice
maker.
WARNING
Failure to use an adequate drainage system will
result in surrounding water damage and/or poor
ice production.
WATER SUPPLY
The ice maker must be connected to a potable, active
cold water supply line delivering water pressure at a
minimum of 20 psi and a maximum of 120 psi.
Water connection is made through a right angle
garden hose style fitting supplied with the ice maker.
See"garden hose style fitting"for a detailed instruc-
tion sheet. DO NOT USEANYTHREAD SEALERS.
A water filter can be used with this unit. A quality
filter can help remove particles as well as remove
taste and odors from water and prolong life.
DO NOT USE A"REVERSE OSMOSIS" FILTERINGDEVICE.
Softened water is not recommended. This will
produce soft, cloudy ice cubes that will stick together.
De-ionized water is not recommended. This water will
not form solid ice cubes.
A water specialist can recommend proper water treat-
ment.
After installation of water line, turn on water and
check for any leaks. Additional tightening may be
needed.
Allow for extra water line for built-in installations for
easy removal of unit and to help prevent the water
line from kinking.
FrontofUnit
5/8inchI.D.
DrainTubingand
HoseClamp
1/2"DrainPipe
Drain
IceMochine PowerCord
Fig. 05
,liedScrews
Tubegoesthruthis
openingintheAccessPanel.
DrainPum
PowerCord
VentTubegoesthruthisopenin!
intheAccessPanel.
Fig. 06
Panel
6.75
TopofUnit
21.50
GravityDrainLocation
3814.75
Fig. 07