PAGE 4 OF 12
Installation
Installation is the buyer’s responsibility. The manufacturer accepts no liability for this service.
Any action that the manufacturer has to take as a result of an erroneous installation will not be
covered by the warranty.
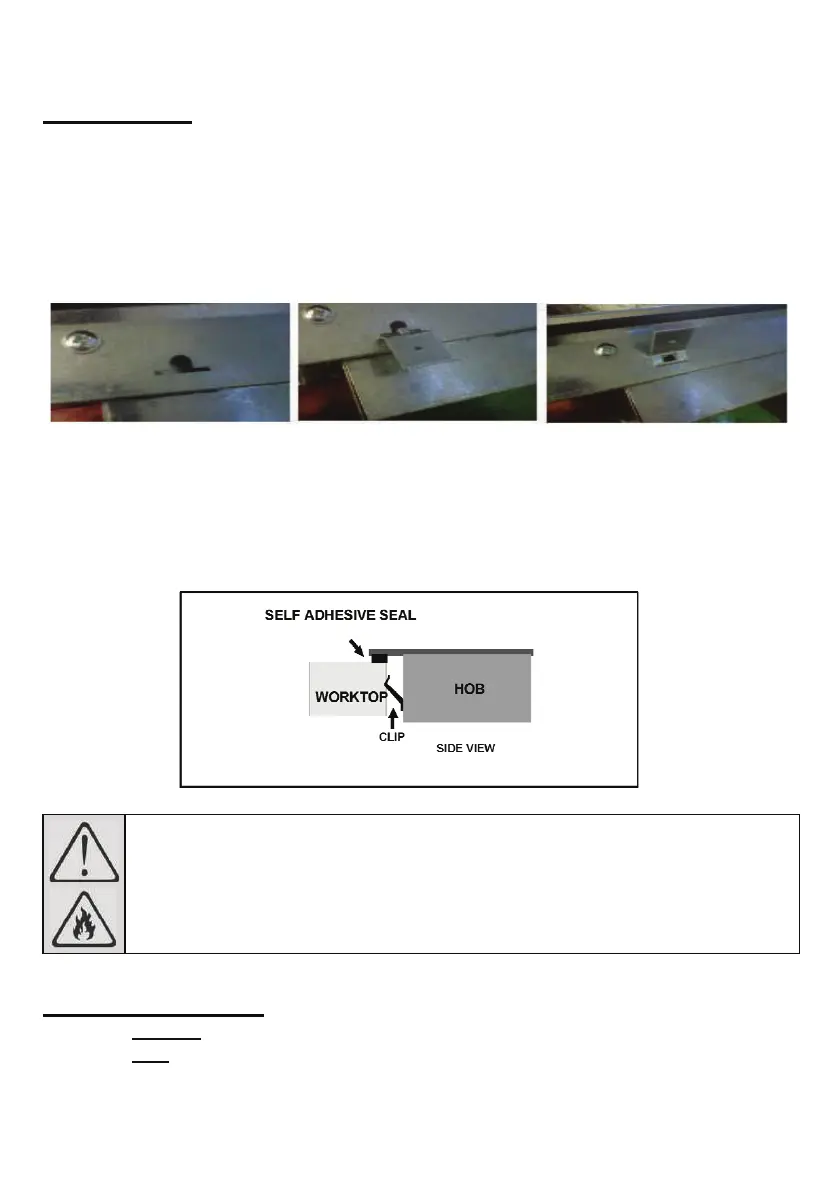
x The hob is supplied with securing clips.
x These fit into dedicated slots around the hob base . (see picture A)
x Insert the clips (as shown in picture B)
x Lift the clips up until they click into place. (as shown in picture C)
x To avoid liquid spills penetrating between the hob and the worktop, apply the supplied self-
adhesive seal to the perimeter of the aperture. Do not use a silicone sealer.
x Invert the hob on the worktop adjacent to the aperture before making the electrical
connection. This will ensure sufficient cable length for subsequent servicing.
x Position the hob into the aperture so that the securing clips are compressed between the hob
base and the worktop. ( see Sketch below)
A B C
Important notice
x Hobs without control panels should be installed directly above the oven.
x Hobs with control panels require additional installation instructions. See page 5.
Danger of fire: Do not store items on the cooking surface.
CAUTION: The cooking process has to be supervised. A
short term cooking process has to be supervised continuously.
WARNING: Unattended cooking on a hob with fat or oil can
be dangerous and may result in a fire.
 Loading...