↓
DekPro™ Presge Aluminum Rail System
Level Railing Installaon Instrucons
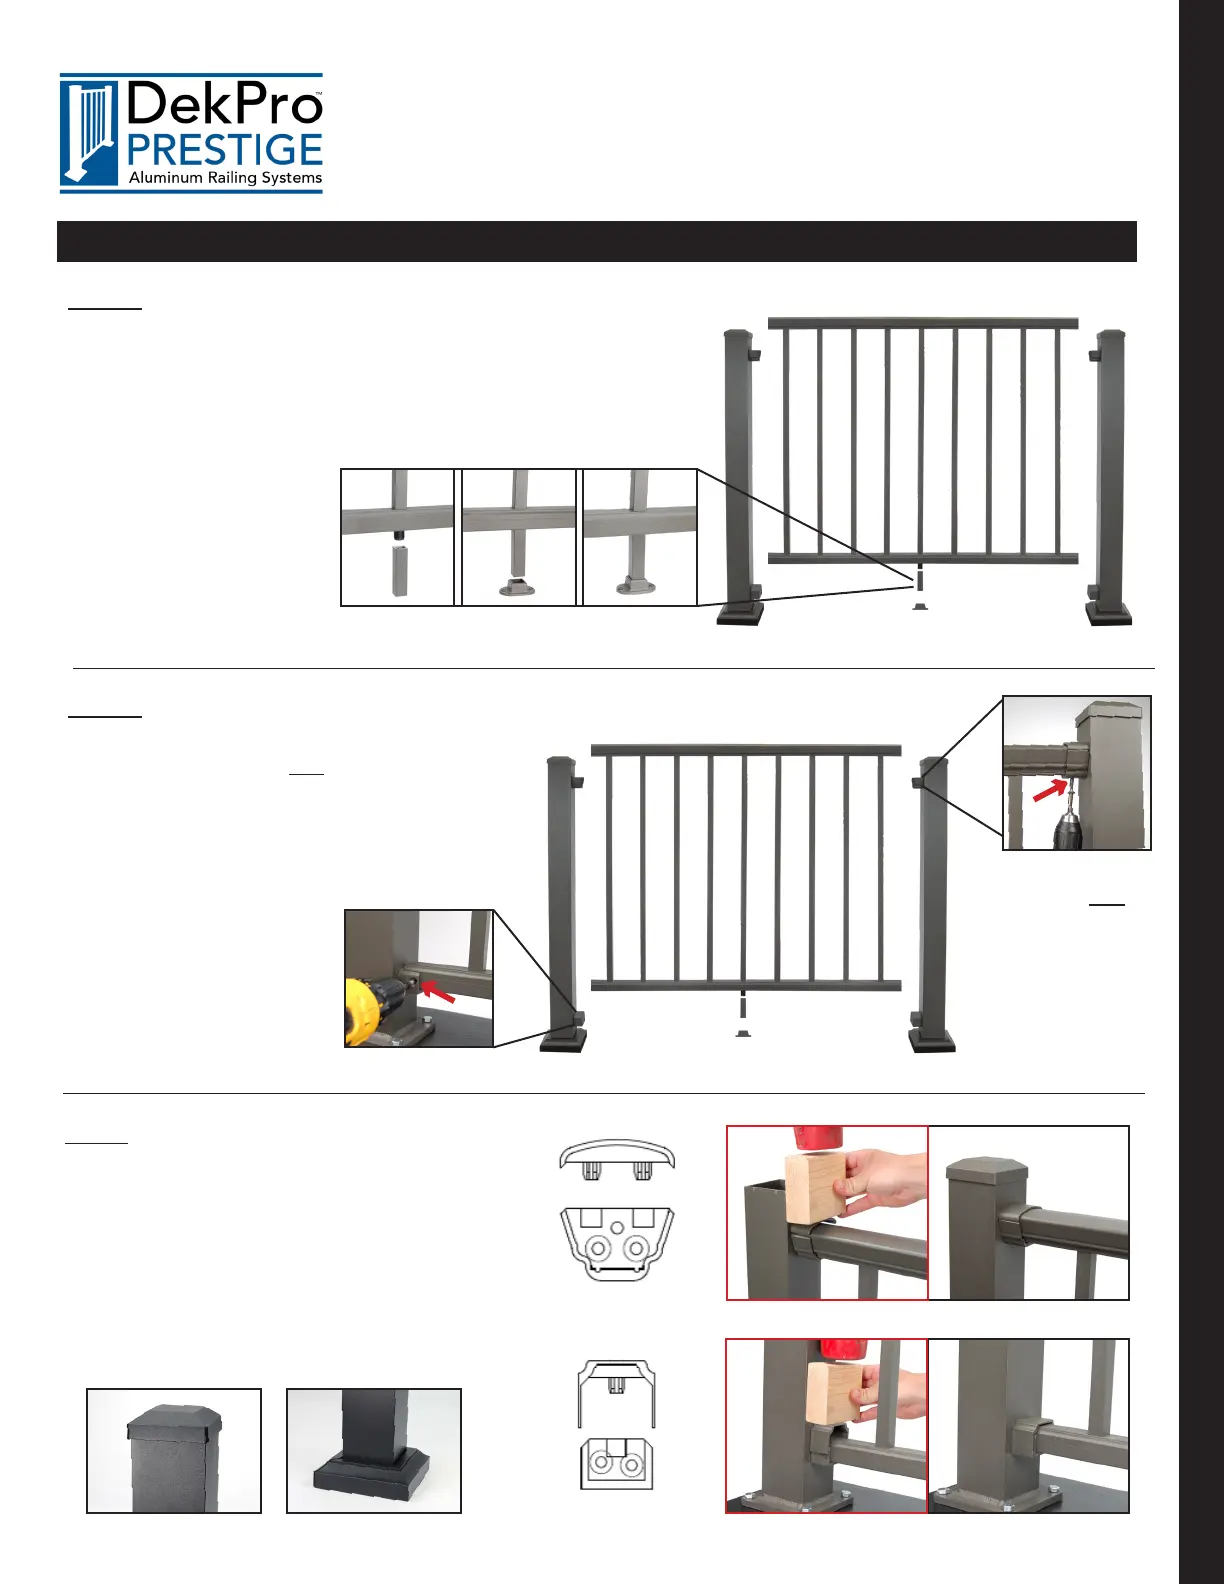
Level Rail Installaon (Connued)
Step 6b: Set Assembled Rail into Brackets
Set railing into brackets and secure with screws.
Install top bracket screw rst to pull rail down
ghtly into boom brackets. Screw boom
bracket to secure rails in place.
Step 7: Finish the Rail
↓
↓ ↓
↓
Install rail bracket covers using a mallet/hammer
and wood block to seat the bracket covers properly
onto the bracket (Remove post cap if installed).
IMPORTANT! - Bracket cover must be tapped
straight down. Bracket cover tabs may break
if driven down at an angle.
Install post cap and 2 pc. skirt.
↓
↓
↓
↓
→
→
*Note: Set screw gun on “Screw” mode
not “Drill” mode.
Set top bracket
screw rst
IMPORTANT!
Step 6a: Mounng Foot Block to Rail
• Center and install plasc connector to boom rail.
• Center foot block shoe between post and install to deck surface.
• Aach 3-1/8” foot block and set rail into place.
↓
↓ ↓
↓
↓
←
←
1 2 3
Installed Cap Installed Skirt
WWW.DEKPROMFG.COM
Level Rail
Page 5