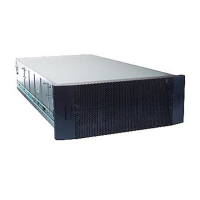
The port to shelf cabling is different for each controller. Cabling details such as
I/O port numbers can be found in the installation and configuration guide of
your Data Domain system.
Cable a set that contains multiple shelves
Procedure
1. Connect one SAS I/O module (for example, SAS I/O module 6 Port 0) on the
Data Domain system to the controller A's port 0 of the bottom of the DS60
using HD-mini-SAS cable.
2. Using another SAS I/O module (for example, SAS I/O module 3 Port 0),
connect a SAS port to the top shelf controller B's host port 0 using HD-mini-
SAS cable.
3. Cable the DS60 together by connecting Controller A Port 2 of the lower DS60
to Controller A port 0 of the next. The connect Controller B Port 0 of the lower
DS60 to Controller B port 2 of the next. Continue this for all of the DS60 in the
set.
l
Whenever you add a shelf to an existing set, remove the SAS I/O cable and
re-connect it to the current top/bottom shelf. The SAS I/O cables are
always connected to the top and bottom shelves in the set. Add shelves in
the installation order for your controller.
l
For redundancy, always cable Shelf Controller A to Shelf Controller A, and
Shelf Controller B to Shelf Controller B to create independent duplicate
paths.
l
Unused controller ports 1 and 3 have plastic fillers. This helps ensure correct
connections and makes it easier to install the cables. When replacing a DS60
controller, remove the fillers from the old and install in ports 1 and 3 of the
new controller.
Figure 6 on page 26 shows a cabling example for a DD9500 system. For Set 1,
the I/O 6 port of the system 0 is connected to the LCC A port 0 of the bottom
shelf, I/O 3 port 0 is connected to the LCC B port 0 of the top shelf and bottom
shelf LCC A port 2 is connected to top shelf LCC B port 0, and top shelf LCC B
port 2 is connected to bottom shelf LCC B port 0.
Installing the Shelves
Cabling shelves 25

 Loading...