The boot mode operation is completed successfully.
Aborting the consistency check
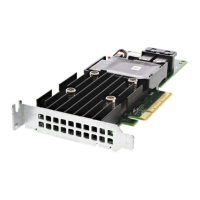
1 Enter the Dell PERC 10 Conguration Utility. See Navigating to Dell PERC 10 conguration utility.
2 Click Main Menu > Controller Management > Advanced Controller Properties.
3 In the Controller Properties section, set the Abort Consistency Check on Error option to Enabled.
4 Click Apply Changes.
The option to abort the consistency check operation on a redundant virtual disk is enabled if there is any inconsistency found in the
data.
Enabling boot support
1 Enter the Dell PERC 10 Conguration Utility. See Navigating to Dell PERC 10 conguration utility.
2 Click Main Menu > Controller Management.
3 From the Select Boot Device drop-down box, select the primary bootable device.
NOTE: Select Boot Device is only applicable in legacy BIOS mode.
NOTE: 4K boot support is only available in UEFI mode and managed by the boot loader.
NOTE: In Select Boot Device, you will not be able to view 4K devices. To view all the virtual disks created, navigate to the
Virtual Disk Management screen in HII. For more information, see Virtual disk management.
NOTE: If no boot device is selected, the rst virtual disk will be set as the boot device on the next reboot. A Non-RAID disk
will not be auto-selected as the boot device.
4 Click Apply Changes.
Boot support is enabled for the selected controller.
Virtual disk management
Virtual disk numbering
Virtual disks are numbered in ascending order beginning with zero in RAID mode, whereas in eHBA mode they are numbered in descending
order beginning with 239.
Viewing virtual disk properties
1 Enter the Dell PERC 10 Conguration Utility. See Navigating to Dell PERC 10 conguration utility.
2 Click Main Menu > Virtual Disk Management.
All the virtual disks associated with the RAID controller are displayed.
3 To view the properties, click on the virtual disk. You can view the following properties of the Virtual disk:
Option
Description
Operation List of operations you can perform on the selected virtual disk. The options are:
• Blink
• Unblink
• Delete Virtual Disk
• Recongure Virtual Disks
52 HII conguration utility
 Loading...