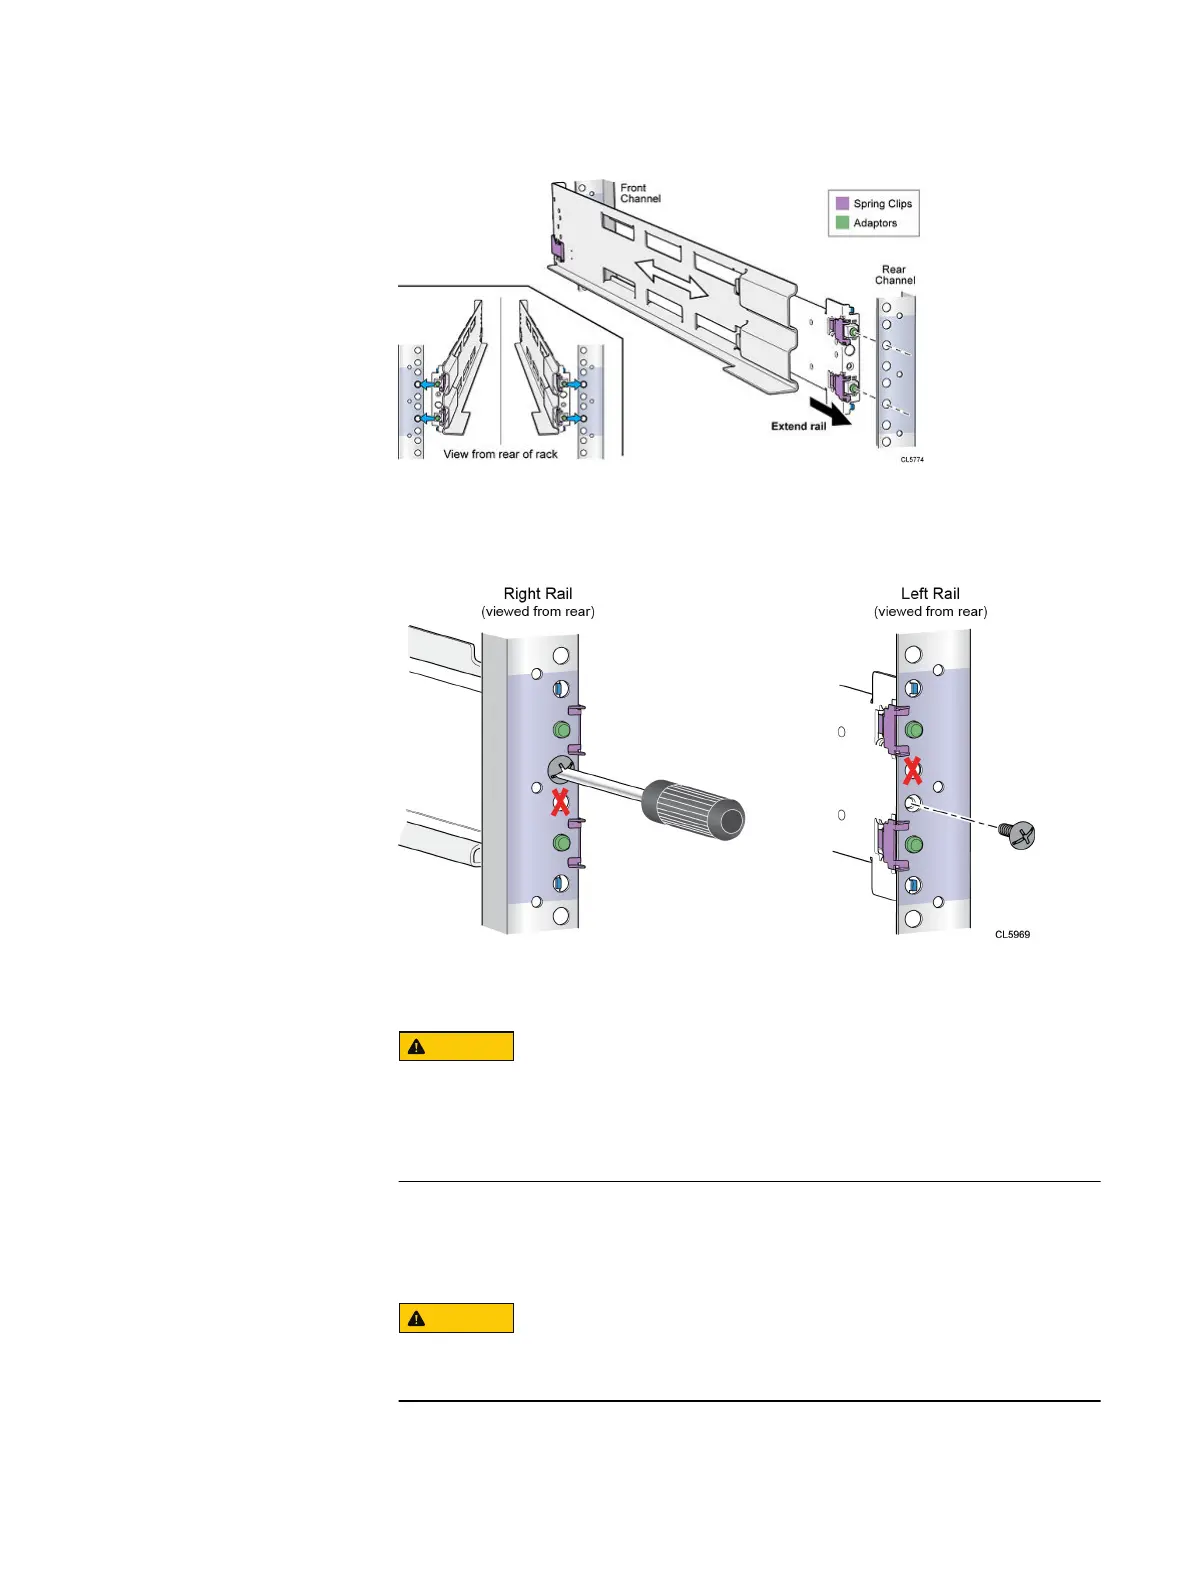
Figure 20 Push rail into rear channel mounting holes
4. From the rear of the cabinet, secure the rails in place using one M5 screw on
each rail.
Figure 21 Installing the M5 Screw
5. Working from the front of the cabinet, align the adaptor with the mounting hole
on the front of the rack as shown in Figure 22 on page 49.
Ensure the holes on the rail line up with the holes on the cabinet. This will
ensure proper alignment of the rails. Also, check that the rails are level
from front-to-back and left-to-right. Ensure you are using the same unit
markers from the front of the cabinet to the rear of the cabinet.
6. Push in on the spring clip while pulling the rail forward. When the spring clip is
forward of the front rack channel, and the adaptor is in the mounting holes,
release the spring clip so it holds the rail in place.
Ensure the spring clip is securely attached to the channel. It may be
necessary to push in on the clip to assist in snapping it into place.
Install your DAE components into a rack
48 Unity 300/300F, Unity 350F, Unity 380/380F, Unity 400/400F, Unity 450F, Unity 500/500F, Unity 600/600F
and Unity 650F Installation Guide