• Removing the micro-SIM card
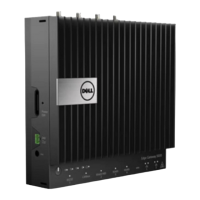
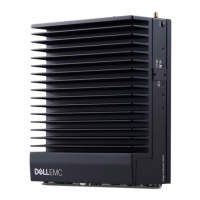
Powering on the Dell Edge Gateway
1 Install the Gateway on the wall mount using the Dell approved
wall mounting kit.
or
Install the Gateway on the rack infrastructure using the Dell approved
DIN-rail mounting brackets.
2 Connect the network cable.
or
Install the wireless antenna to enable the wireless connections
3 Connect a display to the Gateway (if required).
4 Connect a keyboard and mouse if accessing the Gateway directly.
5 Connect a SELV/limited energy circuit power source to the Dell Edge Gateway.
6 Connect a grounding cable to the Gateway if required.
7 Press the power button to power on the Gateway.
8 If setting up the system for the first time, complete the operating system setup.
NOTE: The Dell Edge Gateway is shipped with either Windows 10
Enterprise, Ubuntu Snappy, or Wind River Linux operating systems.
9 Connect and configure to devices using the RS422/RS485 ports.
NOTE: Turn on the corresponding dip switches to enable the
corresponding RS422/R485 ports.
Mounting the Dell Edge Gateway on the wall
You can mount the Dell Edge Gateway on a wall by using mounting brackets. The
brackets secure the Dell Edge Gateway to the wall.
1 Secure the two mounting brackets to the rear of the Dell Edge Gateway by
using four screws.
Setting up your Dell Edge Gateway 16