Adding Parts 73
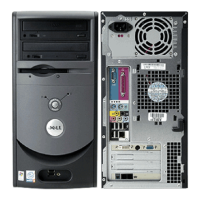
1 power connector Insert the power cable.
2 voltage selection switch
(may not be available on
all computers)
See the safety instructions on page 10 for more information.
3 parallel connector Connect a parallel device, such as a printer, to the parallel connector. If you have a USB
printer, plug it into a USB connector.
4 diagnostic lights (4) Use the lights to help you troubleshoot a computer problem based on the diagnostic
code. For more information, see page 54.
5 mouse connector Plug a standard mouse into the green mouse connector. Turn off the computer and any
attached devices before you connect a mouse to the computer. If you have a USB
mouse, plug it into a USB connector.
6 surround connector Use the black surround connector to attach multichannel-capable speakers.
(On computers with a sound card, use the connector on the card.)
7 line-in connector Use the blue line-in connector to attach a record/playback device such as a cassette
player, CD player, or VCR.
(On computers with a sound card, the line-in connector is on the card.)
8 video connector Plug the cable from your monitor into the blue connector.
9 optional sound
card connector
If you purchased the optional sound card, plug your sound equipment (speakers, a
microphone, and so on) into the appropriate sound card connectors.
10 network adapter
connector
To attach your computer to a network or modem, connect one end of a network cable
to either a network jack or your network device. Connect the other end of the network
cable to the network adapter connector on the back panel of your computer. A click
indicates that the network cable has been securely attached.
On computers with a network connector card, use the connector on the card.
It is recommended that you use Category 5 wiring and connectors for your network.
If you must use Category 3 wiring, force the network speed to 10 Mbps to ensure
reliable operation.
network jack modem jack

 Loading...
