This document serves as a service manual for the E2723HN monitor, with the regulatory model E2723HNc. It provides comprehensive information on general safety, exploded view diagrams, wiring connectivity, power and connectivity cable handling, disassembly and assembly procedures, and troubleshooting instructions.
Function Description
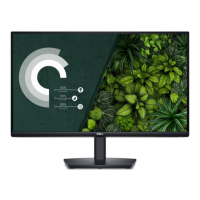
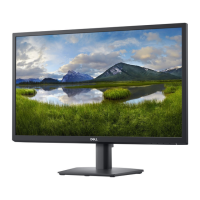
The E2723HN is a monitor designed for general use, providing visual output from a connected computer. It supports both VGA and HDMI connectivity, allowing for flexible integration with various systems. The monitor includes a self-test feature to diagnose display abnormalities, ensuring proper functioning.
Usage Features
General Safety:
- Placement: The monitor should be placed on a hard, level surface, maintaining a minimum of 10.2 cm (4 inches) clearance on all vented sides for proper airflow. Restricting airflow can lead to damage or fire.
- Avoid Stacking: Do not stack equipment or place it in a way that subjects it to recirculated or preheated air.
- Cable Management: Ensure that nothing rests on the monitor's cables and that cables are not located where they can be stepped on or tripped over. All cables must be connected to appropriate connectors to prevent confusion (e.g., telephone cable into a network connector).
- Environmental Considerations: Avoid placing the monitor in closed-in wall units, on beds, sofas, or rugs. Keep it away from radiators and heat sources, and ensure it is used within specified operating ranges to prevent damage from extreme temperatures.
- No Obstructions: Do not push any objects into the air vents or openings, as this can cause fire or electric shock. Avoid placing loose papers underneath the device.
- Wet Environments: Do not use the monitor in wet environments (e.g., near bathtubs, sinks, swimming pools, or in wet basements).
- Electrical Storms: Do not use AC-powered equipment during an electrical storm. Battery-powered devices may be used if all cables are disconnected.
- Spills: Do not spill food or liquids on the equipment.
- Abnormal Operation: If the monitor operates abnormally (unusual sounds or smells), unplug it immediately and contact an authorized dealer or service center.
Power Safety:
- Voltage Check: Before connecting to an electrical outlet, verify that the voltage rating matches the available power source.
- Damaged Cables: Do not plug in damaged power cables.
- Grounded Outlets (Norway and Sweden): If provided with a 3-prong power cable, connect it only to a grounded electrical outlet.
- Extension Cables/Power Strips: If using an extension power cable, ensure its total ampere rating is not exceeded. Connect extension cables or power strips to a wall power outlet, not to another extension cable or power strip. They must be designed for grounded plugs and plugged into a grounded wall outlet.
- Correct Plug Insertion: Use caution when plugging into multiple-outlet power strips to avoid incorrect insertion, which can cause damage, electric shock, or fire. Ensure the ground prong is inserted into the mating ground contact.
- Disconnecting: Grasp the plug, not the cable, when disconnecting from an electric socket.
- AC Adapter (if applicable): Use only Dell-provided AC adapters approved for the device. Place the adapter in a ventilated area and do not cover it. The adapter may become hot during normal operation; handle with care. If the green light goes off, disconnect and reconnect the power cord after ten seconds.
- Japan Only: Use only Dell-provided AC power cables with the AC adapter.
Connectivity:
- Connecting to Computer: Turn off the computer and disconnect its power cable. Connect the VGA or HDMI cable from the monitor to the computer. Then, connect the power cables from both the computer and monitor to a wall outlet.
- Cable Management Clip: It is recommended to route cables through the cable-management clip before connecting them to the monitor. Do not connect all cables to the monitor simultaneously.
Maintenance Features
Cleaning:
- Disconnect Power: Always unplug the monitor power cable from the electrical outlet before cleaning.
- Soft Cloth: Clean the monitor with a soft cloth dampened with water. Do not use liquids or aerosol cleaners containing flammable substances.
- Display Cleaning: For the display, apply water to a soft, clean cloth and stroke it across the display in one direction (top to bottom). Remove moisture quickly and keep the display dry.
- Avoid Commercial Cleaners: Do not use commercial window cleaners on the display, as long-term exposure to moisture can damage it.
- Dell Monitor Screen: For the Dell Monitor screen, lightly dampen a soft, clean cloth with water. If possible, use a special screen-cleaning tissue or solution suitable for the Dell Monitor screen.
- Avoid Harsh Chemicals: Do not use detergents or chemicals such as benzene, thinner, ammonia, abrasive cleaners, alcohol, or compressed air.
- Direct Spraying: Do not directly spray cleaning solution or water onto the monitor surface. Liquid can roll down to the bottom, corroding electronics and causing permanent damage. Apply solution or water to a soft cloth instead.
- Cleaner Effects: Be aware that using certain cleaners may cause color fading, milky film, deformation, uneven dark shade, and screen surface peeling.
- White Powder: If white powder is noticed upon unpacking, wipe it off with a cloth.
- Scuff Marks: Handle the black-colored monitor with care to avoid scratches and white scuff marks.
- Image Quality: To maintain optimal image quality, use a dynamically changing screen saver and turn off the monitor when not in use.
Electrostatic Discharge (ESD) Protection:
- Discharge Static: ESD can harm electronic components. Discharge static electricity from your body by touching a metal grounded object (e.g., unpainted metal surface on your computer's I/O panel) before interacting with internal electronic components.
- Peripheral Connection: When connecting peripherals, ground both yourself and the peripheral first. Periodically discharge any static charge while working inside the equipment.
- Component Handling:
- Do not remove static-sensitive components from antistatic packing material until ready to install.
- Before unwrapping antistatic packaging, discharge static electricity from your body.
- Transport sensitive components in an antistatic container or packaging.
- Handle all electrostatic-sensitive components in a static-safe area, using antistatic floor pads and work bench pads if possible.
Troubleshooting (Self-Test):
- Purpose: The built-in diagnostic tool helps determine if screen abnormalities are inherent to the monitor or related to the computer/video card.
- Procedure:
- Ensure the screen is clean.
- Unplug all video cables from the monitor (it will enter self-test mode).
- Turn on the monitor. If working correctly, it will display a "No VGA Cable" or "No HDMI Cable" message, and the power LED will remain white.
- Press and hold the Exit button (button 4) for four seconds to enter the OSD lock/unlock menu.
- Select the diagnostic icon to run the built-in diagnostics.
- Carefully inspect the screen for abnormalities.
- Press the Up button (button 1) to change the screen color to grey.
- Inspect for abnormalities.
- Repeat steps 6 and 7 to inspect red, green, blue, black, white, and text pattern screens.
- The test completes with a text pattern screen. Press the Up button (button 1) again to exit.
- Interpretation: If no abnormalities are detected, the monitor is functioning properly; check the video card and computer.
Common Problem Solutions:
- No Video/Power LED off: Ensure video cable is connected, power outlet is working, power button is pressed, and correct input source is selected.
- No Video/Power LED on: Increase brightness/contrast, perform self-test, check for bent/broken pins in video cable, run built-in diagnostics, ensure correct input source.
- Poor Focus: Eliminate video extension cables, reset to Factory Settings, change video resolution.
- Shaky/Jittery Video: Reset to Factory Settings, check environmental factors, relocate monitor.
- Missing Pixels: Cycle power, note that permanently off pixels are natural in LCDs. Refer to Dell's pixel guidelines.
- Stuck-on Pixels: Cycle power, note that permanently off pixels are natural in LCDs. Refer to Dell's pixel guidelines.
- Brightness Problems: Reset to Factory Settings, adjust brightness/contrast via OSD.
- Geometric Distortion: Reset to Factory Settings, adjust horizontal/vertical controls via OSD.
- Horizontal/Vertical Lines: Reset to Factory Settings, perform self-test, check for bent/broken pins, run built-in diagnostics.
- Synchronization Problems: Reset to Factory Settings, perform self-test, check for bent/broken pins, restart computer in safe mode.
- Safety Related Issues: Do not troubleshoot; contact Dell immediately.
- Intermittent Problems: Ensure video cable is secure, reset to Factory Settings, perform self-test.
- Missing Color: Perform self-test, ensure video cable is secure, check for bent/broken pins.
- Wrong Color: Try different Preset Modes in Color settings OSD, adjust R/G/B in Custom Color, change Input Color Format (RGB or YCbCr/YPbPr), run built-in diagnostics.
- Image Retention: Set screen to turn off after idle time (Windows Power Options or Mac Energy Saver), use a dynamically changing screensaver.
- Video Ghosting or Overshooting: Change Response Time in Display OSD to Normal or Fast.