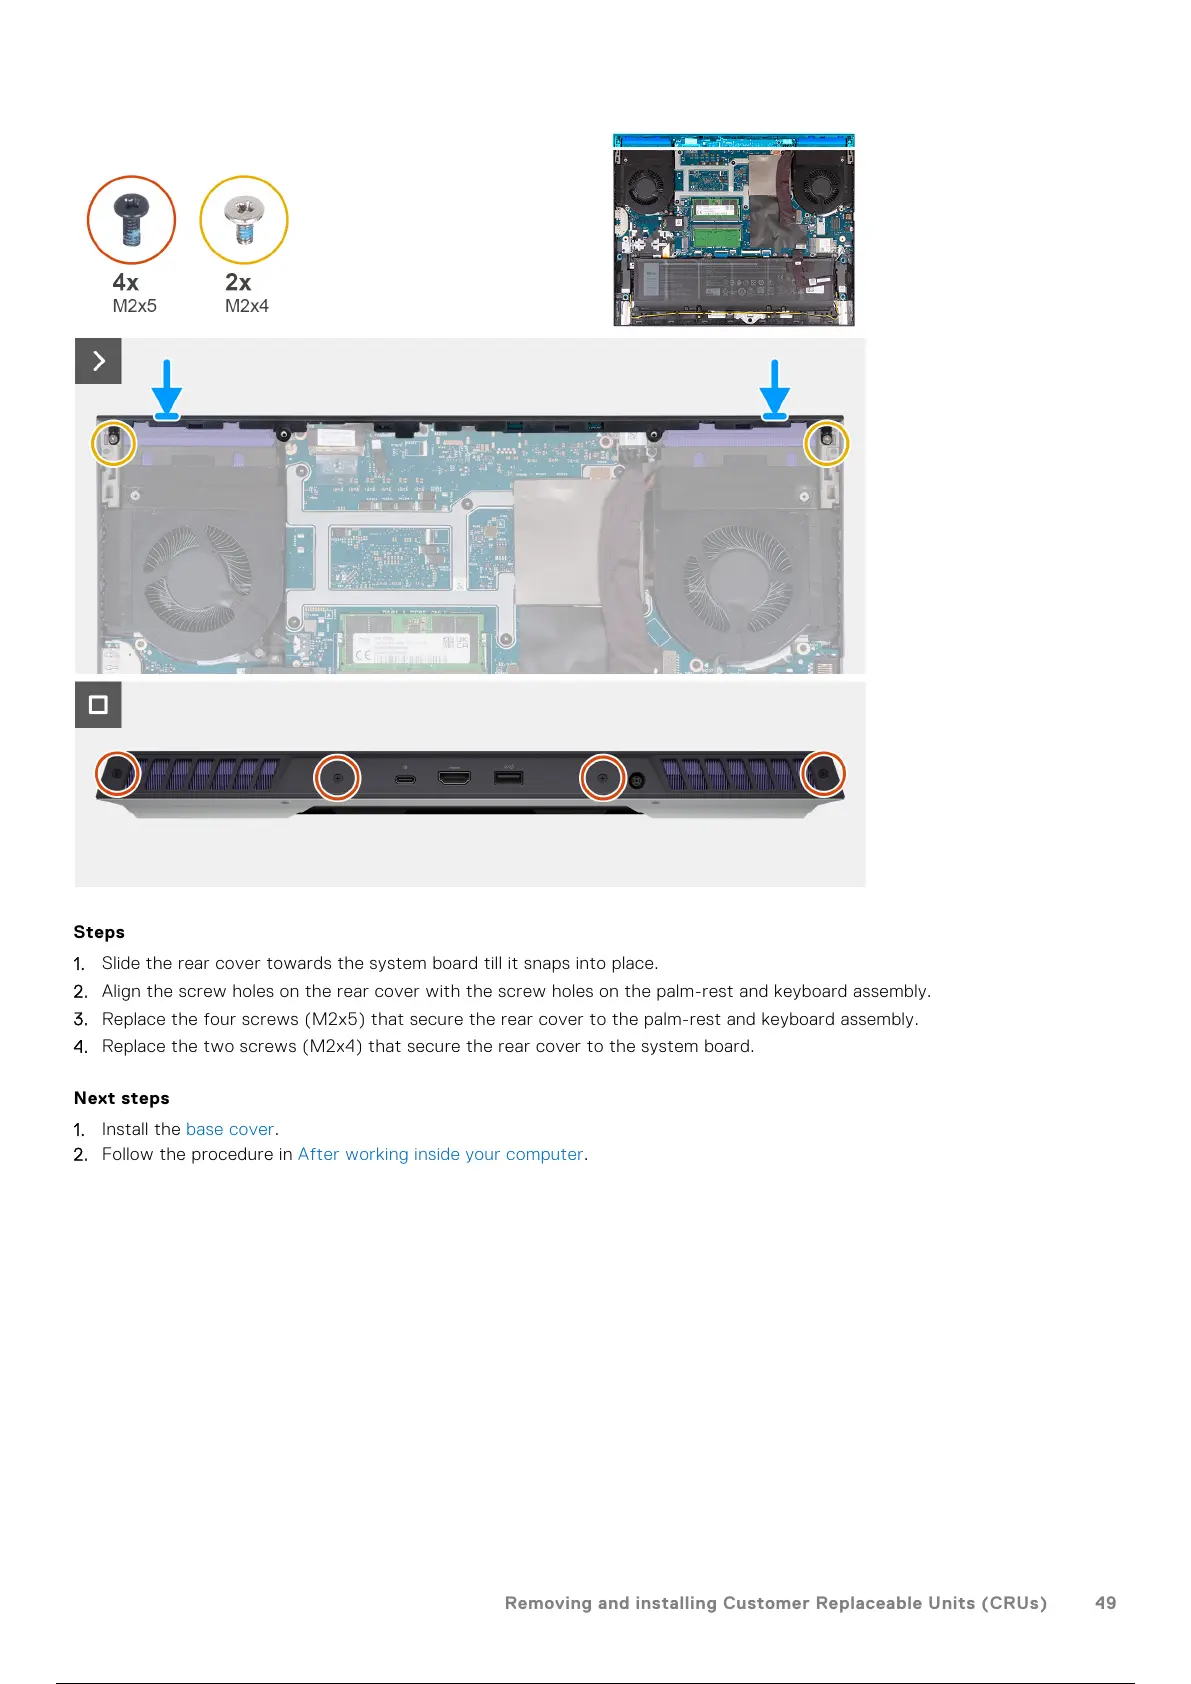
Steps
1. Slide the rear cover towards the system board till it snaps into place.
2. Align the screw holes on the rear cover with the screw holes on the palm-rest and keyboard assembly.
3. Replace the four screws (M2x5) that secure the rear cover to the palm-rest and keyboard assembly.
4. Replace the two screws (M2x4) that secure the rear cover to the system board.
Next steps
1. Install the base cover.
2. Follow the procedure in After working inside your computer.
Removing and installing Customer Replaceable Units (CRUs)
49
50 / 101 49 / 99 50 / 101