Do you have a question about the Dell OptiPlex 3080 and is the answer not in the manual?
Configure dust filter maintenance reminders in the BIOS setup for periodic cleaning alerts.
Information on how to contact Dell for sales, technical support, or customer service.
The OptiPlex 3080 Micro Dust Filter is an accessory designed to protect the OptiPlex 3080 Micro system from fine dust particles, thereby enhancing its longevity and maintaining optimal performance. This install guide provides comprehensive instructions for installing, configuring, and maintaining the dust filter, ensuring users can effectively safeguard their system.
The primary function of the OptiPlex 3080 Micro Dust Filter is to act as a physical barrier against fine dust particles. These particles, if allowed to accumulate inside the computer system, can lead to various issues such as overheating, reduced component lifespan, and potential system failures. By filtering out dust, the accessory helps to keep the internal components clean, allowing for better airflow and heat dissipation. This protective measure is particularly beneficial in environments where dust is prevalent, such as offices, workshops, or homes with pets. The filter is designed to fit snugly over the OptiPlex 3080 Micro system, ensuring comprehensive coverage and effective dust capture. Its integration is seamless, becoming an integral part of the system's protective shell.
The installation process for the OptiPlex 3080 Micro Dust Filter is straightforward and user-friendly, requiring minimal technical expertise. Before beginning the installation, users are advised to save and close all open files and applications, then shut down their system properly. This involves navigating to Start > Power > Shut down on Windows systems. For Linux users, the guide recommends consulting their operating system's documentation for shutdown instructions. Following the shutdown, it is crucial to disconnect the system and all attached devices from their electrical outlets. This includes unplugging all network devices and peripherals such as keyboards, mice, and monitors. A specific caution is provided for disconnecting network cables: always unplug from the system first, then from the network device, to prevent potential damage. If the system unit or adapter is installed on a monitor, users must also disconnect power and display cables from the monitor, then remove the stand and place the monitor on a clean, soft surface. These preliminary steps ensure safety and prevent accidental damage during the installation.
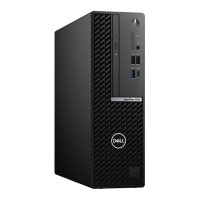
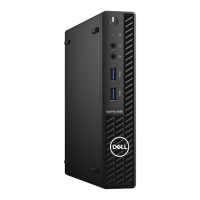
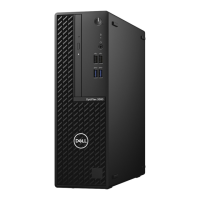
Once the system is prepared, the physical installation of the dust filter involves a few simple steps. First, align the top edge of the dust filter with the top edge of the OptiPlex 3080 Micro system. This ensures proper positioning and fit. Next, gently press the lower edge of the dust filter to close it over the system. Finally, press down gently on the filter to ensure it fits snugly onto the system, leaving no gaps for dust to enter. The guide includes visual aids (images 1, 2, and 3) that clearly illustrate these steps, making the process even easier to follow.
After the physical installation, users need to configure the dust filter settings within the system's BIOS. This involves restarting the system and pressing F2 at the Dell splash screen to enter the BIOS Setup menu. Within the BIOS, navigate to "System Configuration" and then select "Dust Filter Maintenance." Here, users can choose from various cleaning or replacement reminder intervals: 15, 30, 60, 90, 120, 150, or 180 days. By default, this setting is disabled, so users must actively select an interval to activate the reminder feature. It is important to note that these alerts are generated only during a system reboot and not during normal operating system operation. This feature helps users remember to perform maintenance on the dust filter, ensuring its continued effectiveness.
Once the dust filter is installed and configured, the final steps involve reconnecting all external devices, peripherals, and cables that were removed earlier. Users should also ensure that all screws are replaced and no stray screws remain. After connecting the system and all attached devices to their electrical outlets, the system can be turned on.
The OptiPlex 3080 Micro Dust Filter is designed for easy maintenance, which is crucial for its long-term effectiveness. The BIOS reminder feature, as described above, plays a significant role in prompting users to perform regular maintenance. When a reminder interval is set, the system will alert the user during a reboot that it's time to clean or replace the dust filter.
Cleaning the dust filter is a simple process. The guide advises users to brush or gently vacuum the filter to remove accumulated dust. Following this, the external surfaces of the filter can be wiped down with a moist cloth. This routine cleaning helps to maintain optimal airflow and dust-capturing capability, preventing the filter from becoming clogged and impeding the system's cooling. Regular maintenance ensures that the OptiPlex 3080 Micro system remains protected from dust, contributing to its stable operation and extended lifespan. The ease of cleaning means that users do not need specialized tools or extensive technical knowledge to keep the filter in good condition.
In summary, the OptiPlex 3080 Micro Dust Filter is an essential accessory for protecting the OptiPlex 3080 Micro system. Its straightforward installation, user-configurable maintenance reminders, and easy cleaning procedures make it a practical and effective solution for safeguarding the system against dust-related issues, ultimately contributing to better performance and longevity.
| Processor cache | 6 MB |
|---|---|
| Processor cores | 4 |
| Processor model | i3-10100 |
| Processor family | Intel® Core™ i3 |
| Processor frequency | 3.6 GHz |
| Processor manufacturer | Intel |
| Processor boost frequency | 4.3 GHz |
| Number of processors installed | 1 |
| Non-ECC | Yes |
| Memory slots | 2x DIMM |
| Internal memory | 8 GB |
| Memory clock speed | 2666 MHz |
| Internal memory type | DDR4-SDRAM |
| Maximum internal memory | 64 GB |
| Memory layout (slots x size) | 1 x 8 GB |
| HDMI version | 1.4 |
| Microphone in | No |
| USB 2.0 ports quantity | USB 2.0 ports have a data transmission speed of 480 Mbps, and are backwards compatible with USB 1.1 ports. You can connect all kinds of peripheral devices to them. |
| USB 3.2 Gen 1 (3.1 Gen 1) Type-C ports quantity | 0 |
| Power supply | 200 W |
| Power supply input voltage | 90 - 264 V |
| Power supply input frequency | 47 - 63 Hz |
| Non-operating shock | 105 G |
| Operating vibration | 0.26 G |
| Non-operating vibration | 1.37 G |
| Storage temperature (T-T) | -40 - 65 °C |
| Operating temperature (T-T) | 10 - 35 °C |
| Storage relative humidity (H-H) | 5 - 95 % |
| Operating relative humidity (H-H) | 20 - 80 % |
| Cabling technology | 10/100/1000Base-T(X) |
| Ethernet LAN data rates | 10, 100, 1000 Mbit/s |
| SSD capacity | The Solid State Drive's storage capacity in Gigabytes. |
| SSD interface | NVMe, PCI Express |
| Storage media | SSD |
| SSD form factor | M.2 |
| Optical drive type | DVD±RW |
| Total storage capacity | 256 GB |
| Operating system architecture | 64-bit |
| Cables included | AC |
| Volume | 7.86 L |
| Chassis type | SFF |
| Product color | Black |
| Placement supported | Horizontal/Vertical |
| Cable lock slot type | Kensington |
| Discrete graphics card model | Not available |
| On-board graphics card model | Intel® UHD Graphics 630 |
| Audio chip | Realtek ALC3246 |
| Audio system | High Definition Audio |
| Product type | PC |
| Market positioning | Business |
| Motherboard chipset | Intel B460 |
| Trusted Platform Module (TPM) version | 2.0 |
| Depth | 292.8 mm |
|---|---|
| Width | 92.6 mm |
| Height | 290 mm |
| Weight | 5020 g |