About this task
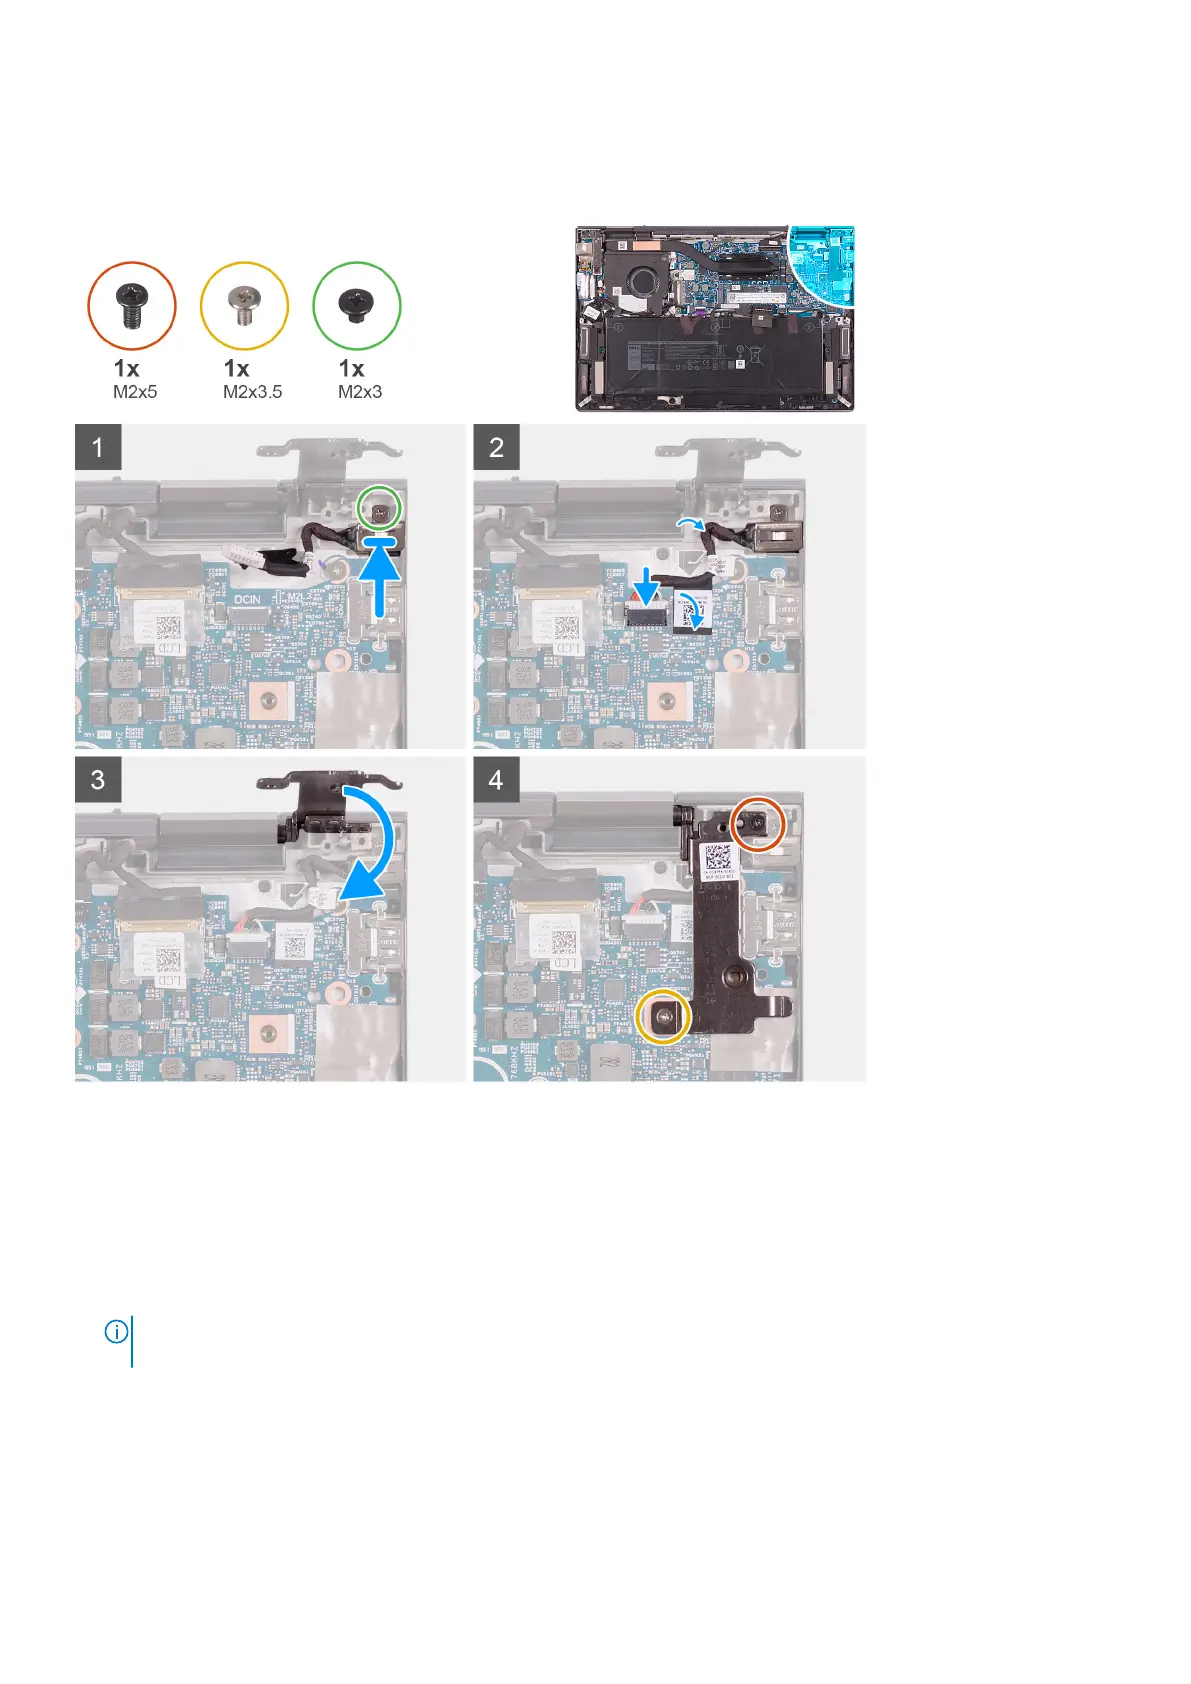
The following image(s) indicate the location of the power-adapter port and provides a visual representation of the installation
procedure.
Steps
1. Place the power-adapter port into the slot on the palm-rest assembly.
2. Replace the screw (M2x3) that secures the power-adapter port to the palm-rest assembly.
3. Route the power-adapter port cable through the routing guide on the palm-rest assembly.
4. Connect the power-adapter port cable to the system board.
5. Adhere the tape that secures the power-adapter port cable to the system board.
6. Close the right display-hinge.
NOTE:
Ensure that the screw holes on the left display-hinge are aligned with the screw holes on the system board and
palm-rest assembly
7. Replace the screw (M2x5) that secures the right display-hinge to the palm-rest assembly.
8. Replace the screw (M2x3.5) that secures the right display-hinge to the system board and palm-rest assembly.
Next steps
1. Install the base cover.
Removing and installing components
29