3. Slide the memory module firmly into the memory-module slot at an angle.
4. Press down on the memory module to snap it into place on the system board. Ensure that the memory-module retention
clips have locked the memory module into place.
NOTE: If you do not hear the click, remove the memory module and reinstall it.
Next steps
1. Install the base cover.
2. Follow the procedure in After working inside your computer.
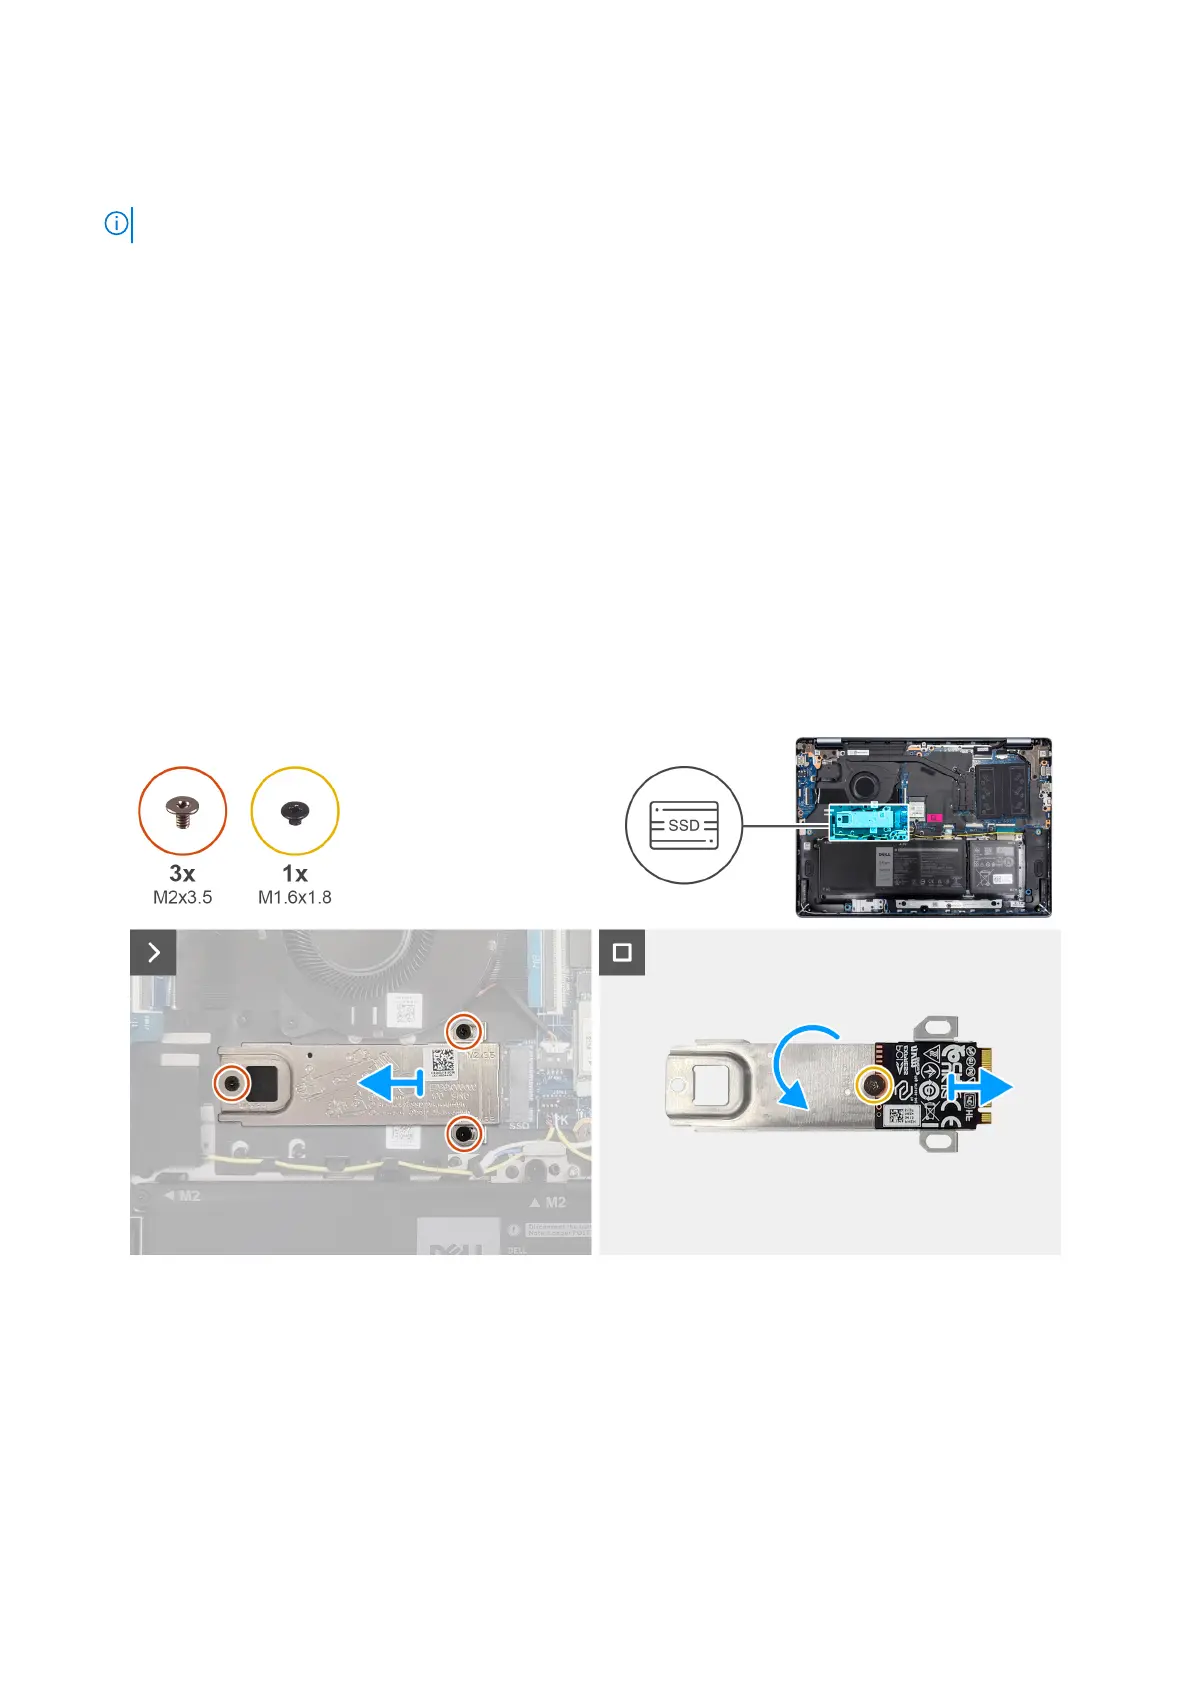
M.2 solid-state drive
Removing the solid-state drive
Prerequisites
1. Follow the procedure in Before working inside your computer.
2. Remove the base cover.
About this task
The following images indicate the location of the solid-state drive and provide a visual representation of the removal procedure.
Figure 12. Removing the solid-state drive
Steps
1. Remove the three screws (M2x3.5) that secure the solid-state drive assembly to the system board.
2. Slide and lift the solid-state drive assembly from the M.2 card slot (SSD) on the system board.
3. Flip over the solid-state drive assembly and remove the screw (M1.6x1.8) that secures the solid-state drive to the thermal
plate.
4. Lift the solid-state drive off the thermal plate.
Removing and installing Customer Replaceable Units (CRUs)
43