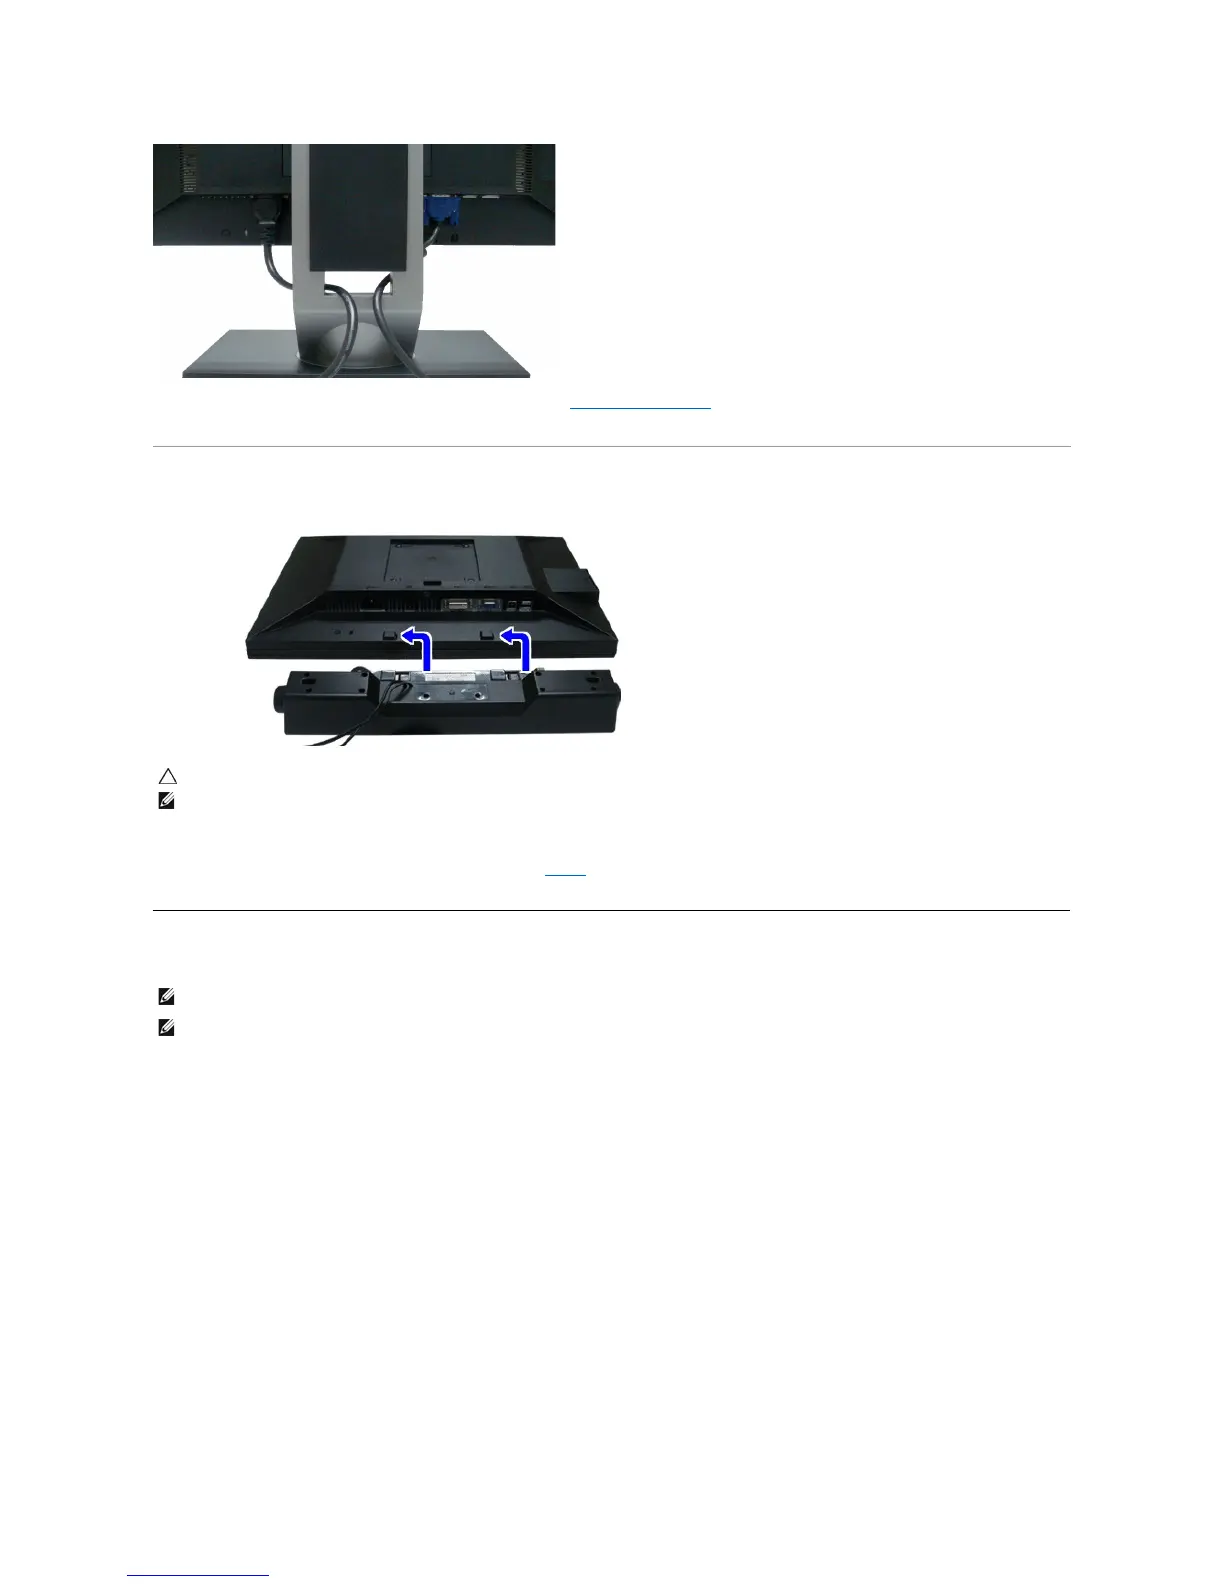
After attaching all necessary cables to your monitor and computer, (See Connecting Your Monitor for cable attachment,) use the cable management slot
toorganizeallcablesasshownabove.
Attaching the Dell Soundbar
Removing the Stand
CAUTION: Do not use with any device other than Dell Soundbar.
NOTE:SoundbarPowerConnector+12VDCoutputisforoptionalDellSoundbaronly.
Working from the rear of the monitor, attach the Soundbar aligning the two slots with the two tabs along the bottom rear of the monitor.
Slide the Soundbar to the left until it snaps into place.
Connect the soundbar to the Audio Power DC-out socket (see bottom view for details).
Insert the lime-green mini stereo plug from the rear of the Soundbar into the computer's audio output jack.
NOTE: To prevent scratches on the LCD screen while removing the stand,ensure that the monitor is placed on a clean surface.
NOTE:Thisisapplicableforamonitorwithastand.WhentheOptiPlex™USFF780/OptiPlex™SFF980AIO stand is bought, please refer to the
respective AIO stand setup guide for set up instructions.