Installing System Components 77
2
Open the system. See "Opening the System" on page 43.
3
Locate the memory module sockets. See "System Board Connectors" on page 118.
4
Press the ejectors on the memory module socket down and out, as shown in Figure 3-21, to allow the
memory module to be inserted into the socket.
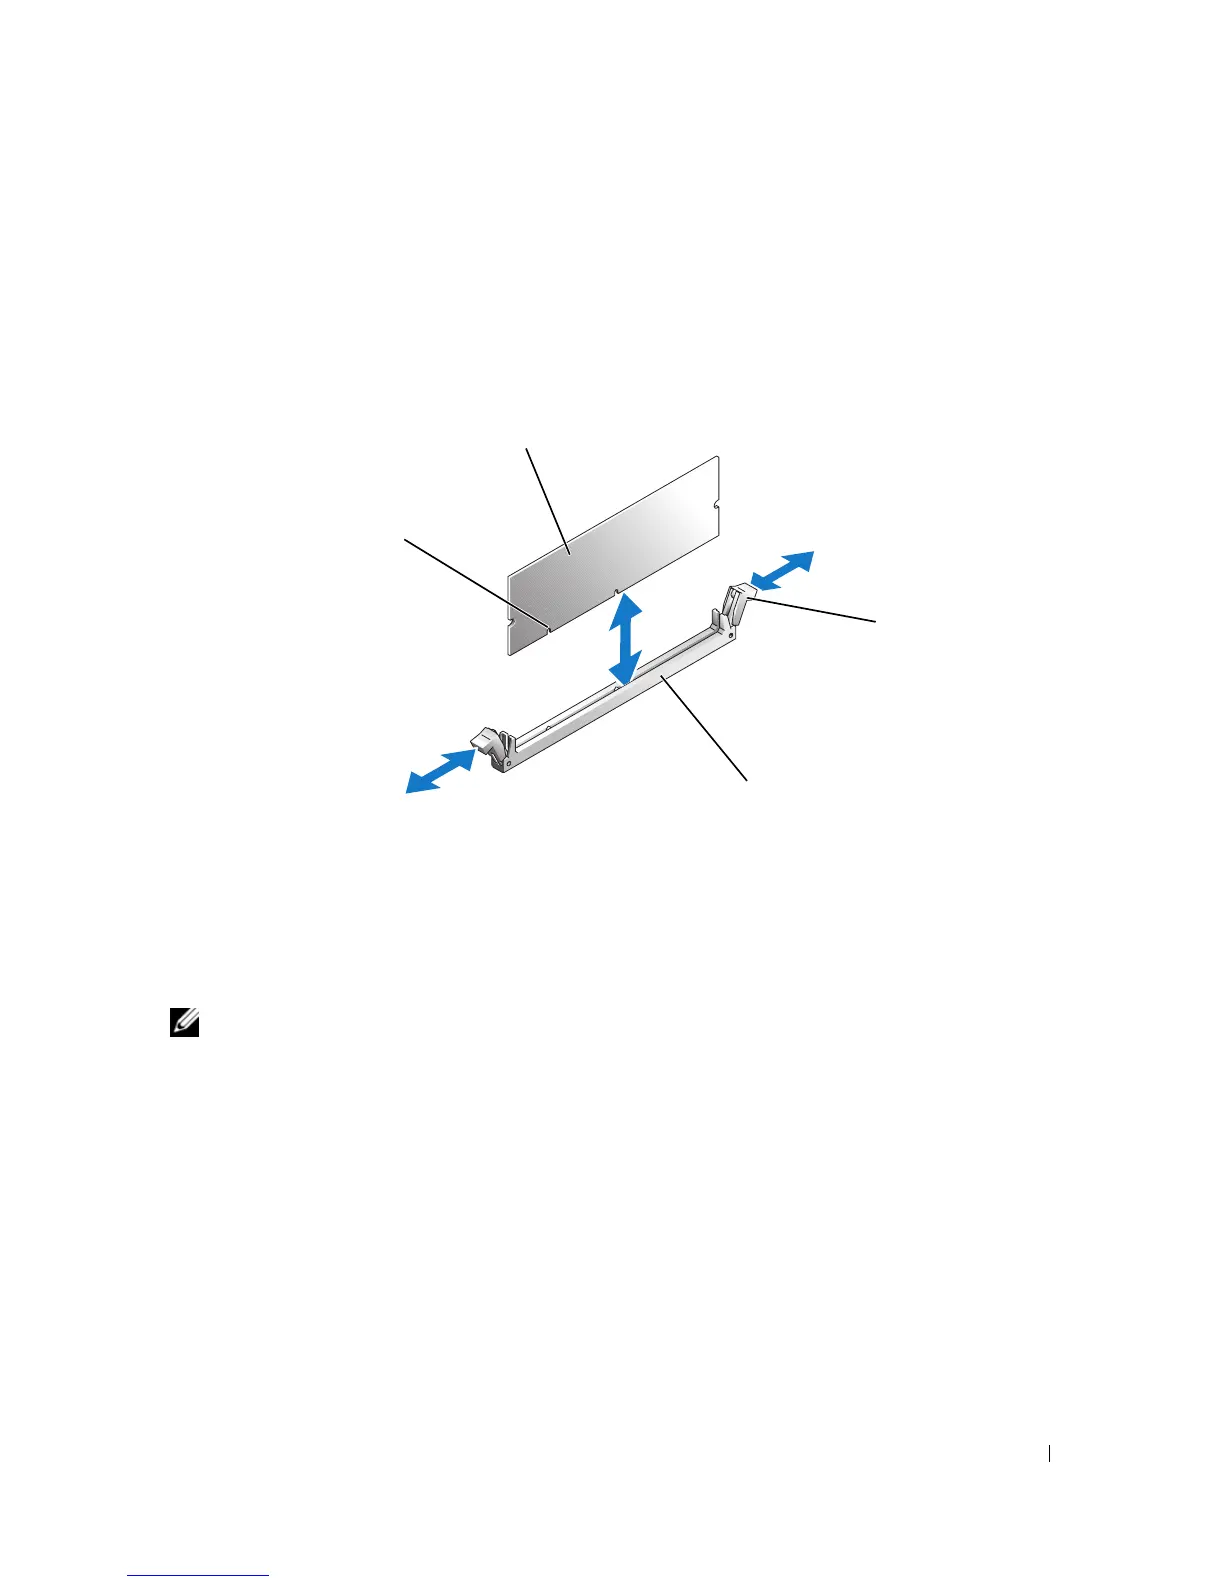
Figure 3-21. Installing and Removing a Memory Module
5
Align the memory module's edge connector with the alignment keys on the memory module socket,
and insert the memory module in the socket.
NOTE: The memory module socket has alignment keys that ensure correct insertion of the memory module in
the socket.
6
Press down on the memory module with your thumbs while pulling up on the ejectors with your index
fingers to lock the memory module into the socket.
When the memory module is properly seated in the socket, the ejectors on the memory module socket
align with the ejectors on the other sockets that have memory modules installed.
7
Repeat this procedure to install the remaining memory modules. See Table 3-2 for sample memory
configurations.
8
Close the system. See "Closing the System" on page 47.
9
Stand the system upright.
10
Reconnect the system to its electrical outlet and turn the system on, including any attached
peripherals.
1 memory module 2 memory module socket
ejectors (2)
3 socket
4 alignment keys (2)
2
4
1
3