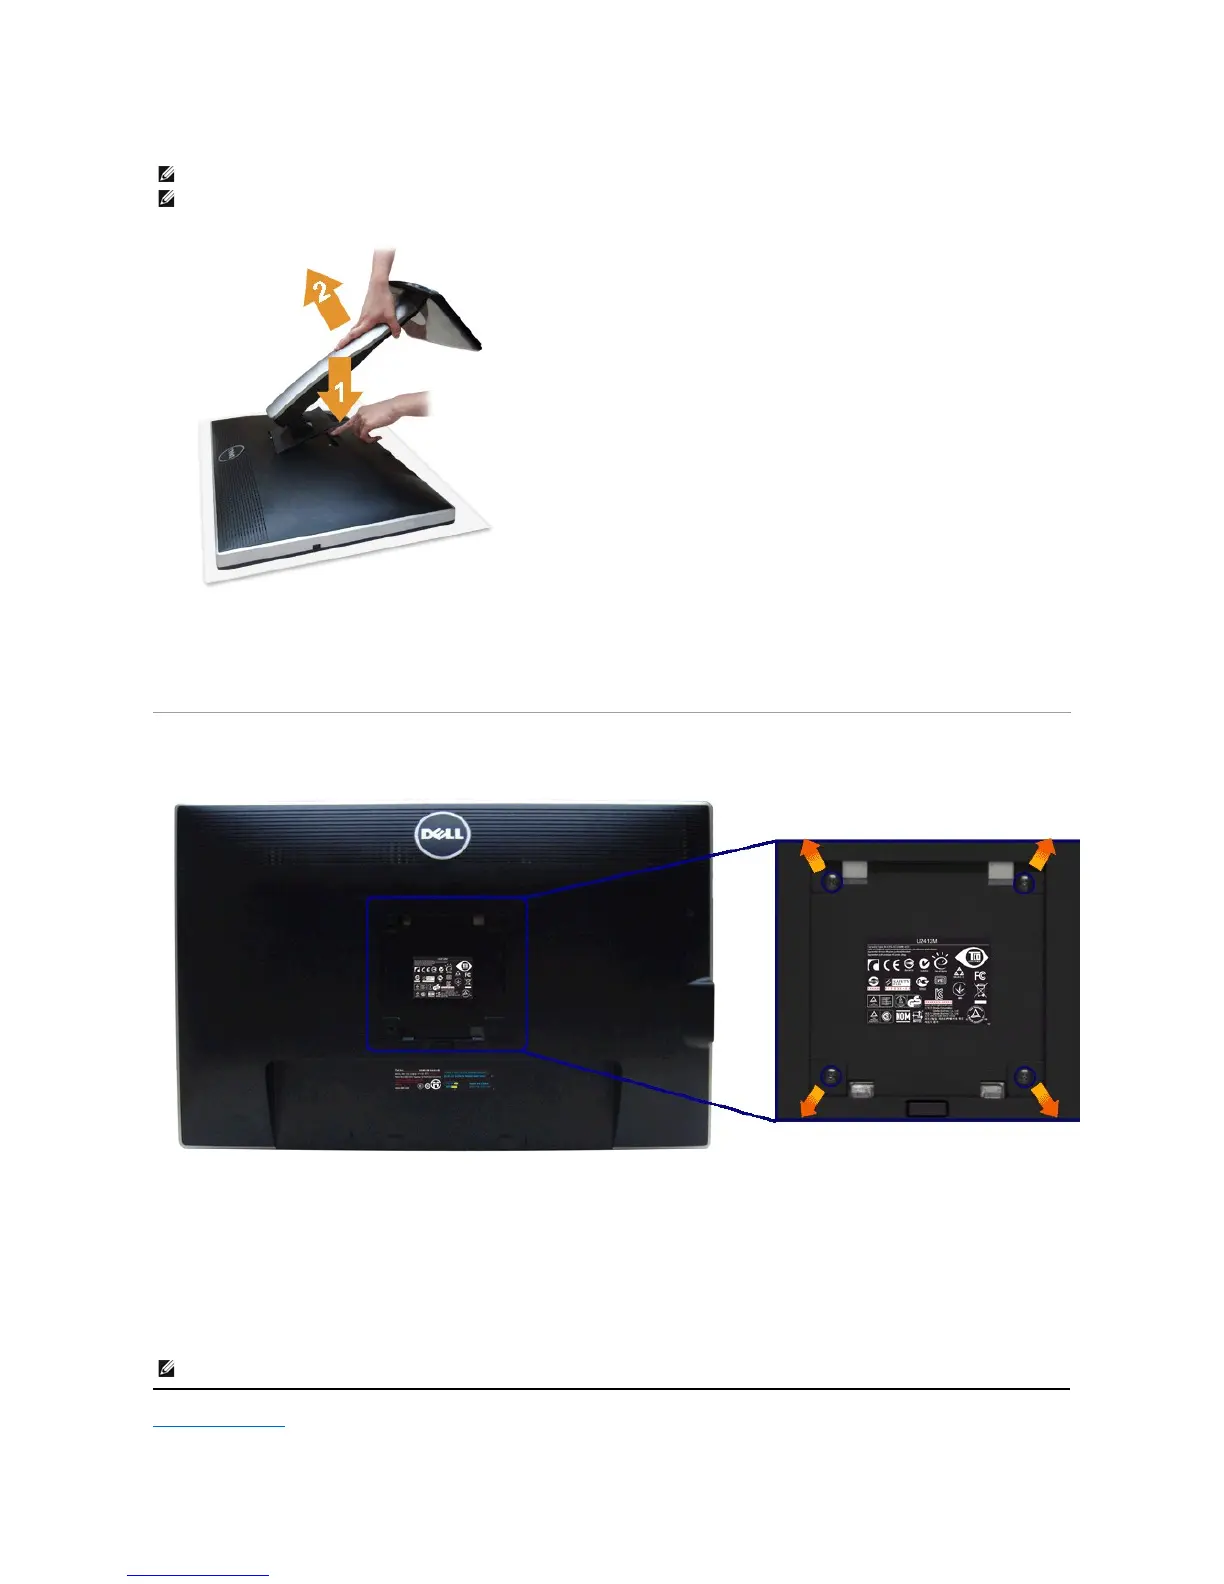
To remove the stand:
1. Place the monitor on a flat surface.
2. Press and hold the stand release button.
3. Lift the stand up and away from the monitor.
Wall Mounting (Optional)
(Screw dimension: M4 x 10 mm).
Refer to the instructions that come with the VESA-compatible wall mounting kit.
1. Place the monitor panel on a soft cloth or cushion on a stable, flat table.
2. Remove the stand.
3. Use a Philips crosshead screwdriver to remove the four screws securing the plastic cover.
4. Attach the mounting bracket from the wall mounting kit to the monitor.
5. Mount the monitor on the wall by following the instructions that came with the wall mounting kit.
Back to Contents Page
NOTE: To prevent scratches on the LCD screen while removing the stand, ensure that the monitor is placed on a soft, clean surface.
 Loading...