This document provides a comprehensive guide for setting up and understanding your Dell Vostro 5320 laptop, including its various features, usage instructions, and maintenance tips.
Setting Up Your Vostro 5320
To begin using your Vostro 5320, connect the power adapter to the laptop and then press the power button. It's important to note that to conserve battery power, the laptop might enter a power-saving mode. If this occurs, simply connect the power adapter and press the power button to turn on the computer. After powering on, you will be guided through the operating system setup. Dell recommends connecting to a network for Windows updates during this process. If you're connecting to a secured wireless network, you'll be prompted to enter the password. You can sign in with or create a Microsoft account if connected to the internet, or create an offline account if not. The "Support and Protection" screen will ask for your contact details. Once the setup is complete, you can access various Dell applications from the Windows Start menu, including Dell Product Registration, Dell Help & Support, My Dell, SupportAssist, Dell Update, and Dell Digital Delivery.
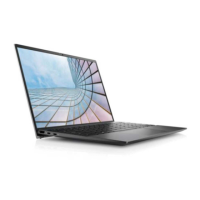
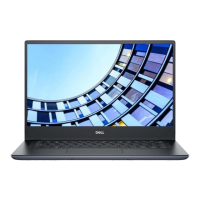
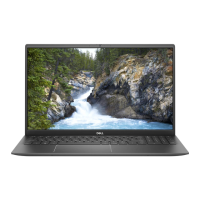
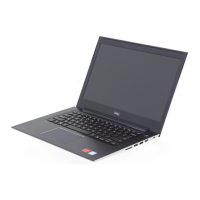
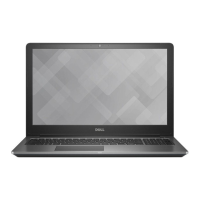
Views of Your Vostro 5320
The Vostro 5320 features a thoughtful design with various components strategically placed for optimal functionality.
Front View:
On the front, above the display, you'll find the Left microphone and Right microphone, which provide digital sound input for audio recording and voice calls. Centered between them is the Camera, enabling video chats, photo capture, and video recording. For privacy, a Privacy shutter is integrated, allowing you to cover the camera lens when not in use. A Camera-status light illuminates when the camera is active.
Right Side View:
The right side of the laptop includes a USB 3.2 Gen 1 port, designed for connecting external storage devices and printers, offering data transfer speeds of up to 5 Gbps. Additionally, a Headset port allows you to connect headphones or a headset for audio input and output.
Left Side View:
On the left side, you'll find an HDMI port for connecting to a TV, external display, or other HDMI-in enabled devices, providing both video and audio output. Two Thunderbolt 4.0 ports with Power Delivery and DisplayPort are also present. These versatile ports support USB4, DisplayPort 1.4, and Thunderbolt 4, enabling connections to external displays using a display adapter and offering data transfer rates of up to 40 Gbps. You can connect a Dell Docking Station to these ports. A USB Type-C to DisplayPort adapter (sold separately) is required for DisplayPort devices. These ports are backward compatible with USB 3.2, USB 2.0, and Thunderbolt 3, and support two 4K displays or one 8K display. A Battery-status light indicates the battery's charge status: solid white when the power adapter is connected and the battery has more than 5% charge, amber when running on battery with less than 5% charge, and off when the power adapter is disconnected or the battery is fully charged.
Top View (Keyboard and Touchpad):
The top view showcases the keyboard and touchpad. The Touchpad allows you to move the mouse pointer by sliding your finger, with a tap for left-click and two fingers for right-click. Dedicated Left-click area and Right-click area are also available. The Power button with optional fingerprint reader turns the computer on or off, puts it to sleep, or into hibernate state. Pressing it for four seconds forces a shut-down. If equipped with a fingerprint reader, you can use your finger to log in. The behavior of the power button can be customized in Windows.
Bottom View:
The bottom of the laptop features Left speaker and Right speaker for audio output. A Service Tag label provides a unique alphanumeric identifier, crucial for Dell service technicians to identify hardware components and access warranty information.
Battery Charge and Status Light Behavior:
The battery charge and status light provides visual cues about your laptop's power state. When connected to an AC adapter, the light is off if fully charged (S0-S5 system power state) and solid white if less than fully charged (S0-S5). When running on battery, the light is off if the charge is greater than low/critical (S0-S5) and solid amber if the charge is low/critical (S0-S3). S0 (ON) means the computer is turned on, S3 (Sleep) means it's in sleep mode, S4 (Hibernate) means it's in a low-power state with context data written to the hard drive, and S5 (OFF) means it's shut down.
Dell ComfortView and Dell CinemaColor
Dell ComfortView is a feature designed to optimize eye comfort by reducing blue light emissions from the display. Prolonged exposure to blue light can disrupt sleep patterns, cause eye strain, and potentially lead to long-term eye fatigue or damage. Dell low blue light displays offer a flicker-free screen, and ComfortView can be enabled and configured through the Dell CinemaColor (DCC) application. Dell ComfortView is certified by TÜV Rheinland as a low blue light software solution.
Dell CinemaColor (DCC) enhances visuals with vibrant colors by combining hardware and software. It offers four color profiles: Movie (default), ComfortView, Sports, and Animation, which optimize display settings based on content and surroundings. The ComfortView Profile within DCC specifically uses a Low Blue Light software solution to meet TÜV standards for reducing harmful blue light, making extended screen time more comfortable. You can further customize the Saturation, Temperature, and Contrast values in ComfortView mode.
ComfortView Plus is an optional hardware feature, configured at the point of sale, that is built-in, always-on, and virtually unnoticeable. It employs a hardware-based design for a wider blue spectrum with lower peak and reduced intensity, also certified by TÜV Rheinland as a low blue light hardware solution and enabled at the factory.
To minimize eye strain, it's recommended to position the display at a comfortable distance (20-28 inches or 50-70 cm), blink frequently, moisten your eyes, look away at a distant object (20 feet or 609.60 cm) for at least 20 seconds during breaks, and take an extended 20-minute break every two hours.
Keyboard Shortcuts
The Vostro 5320 keyboard offers various shortcuts to enhance productivity. Some keys have two symbols, allowing you to type alternate characters by pressing Shift or perform secondary functions by pressing Fn. The F1-F12 keys at the top row are function keys for multi-media control, indicated by icons. Pressing a function key directly invokes its task (e.g., F1 mutes audio). If specific software applications require the F1-F12 keys for their primary functions, multi-media functionality can be disabled by pressing Fn + Esc. Subsequently, multi-media control can be invoked by pressing Fn and the respective function key (e.g., Fn + F1 for mute audio). You can also define the primary behavior of the function keys (F1-F12) in the BIOS setup program under "Function Key Behavior."
List of Keyboard Shortcuts:
- F1 / Fn + F1: Mute audio
- F2 / Fn + F2: Decrease volume
- F3 / Fn + F3: Increase volume
- F4 / Fn + F4: Play/Pause
- F5 / Fn + F5: Click keyboard backlight (optional). Non-backlight keyboards have F5 without the backlight icon and do not support toggling backlight. For backlight keyboards, this toggles through off, low-backlight, and high-backlight.
- F6 / Fn + F6: Decrease brightness
- F8 / Fn + F8: Increase brightness
- F10 / Fn + F10: Print Screen
- F11 / Fn + F11: Home
- F12 / Fn + F12: End
The Fn key is also used with selected keys for other secondary functions:
- Fn + PrtScr: Turn off/on wireless
- Fn + B: Pause/Break
- Fn + Insert: Sleep
- Fn + S: Toggle scroll lock
- Fn + R: System request
- Fn + Ctrl: Open application menu
- Fn + Esc: Toggle Fn-key lock
- Fn + PgUp: Page up
- Fn + PgDn: Page down
- Fn + Home: Home
- Fn + End: End
- Fn + T: Toggle Ultra performance mode with on-screen notification
Dell provides various self-help resources for information and support. You can visit www.dell.com for general information about Dell products and services. The My Dell app offers a centralized location for key Dell applications, help articles, warranty status, recommended accessories, and software updates. For operating system help, search "Contact Support" in Windows. For comprehensive support, including diagnostics, drivers, and manuals, visit www.dell.com/support. Your Dell computer is uniquely identified by a Service Tag or Express Service Code, which you can enter on the support website to access relevant resources. Information on how to locate your Service Tag is also available. Dell's Knowledge Base (accessible via Support > Knowledge Base on www.dell.com/support) contains articles on various computer concerns; you can search by keyword, topic, or model number.
To contact Dell for sales, technical support, or customer service, visit www.dell.com/contactdell. Availability of services may vary by country/region and product. If you don't have an active internet connection, you can find contact information on your purchase invoice, packing slip, bill, or Dell product catalog.