Do you have a question about the Dell WM118t and is the answer not in the manual?
Details on keyboard components like LED, feet, and battery cover.
Overview of mouse buttons, scroll wheel, sensor, and power switch.
Step-by-step guide for installing batteries in the wireless keyboard.
Instructions for installing batteries and powering on the wireless mouse.
How to connect the wireless keyboard and mouse using the USB receiver.
Details on keyboard's general, electrical, physical, environmental, and wireless specs.
Specs for the mouse including general, electrical, physical, environmental, and wireless data.
Solutions for general device non-responsiveness.
Resolving connection problems, button issues, and pointer movement.
Tips for improving mouse cursor speed and tracking.
Information on limited hardware warranty and return policies for different regions.
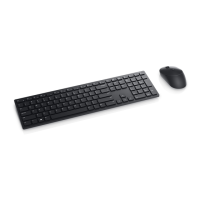
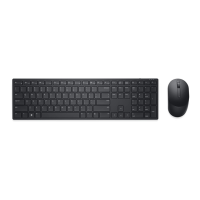
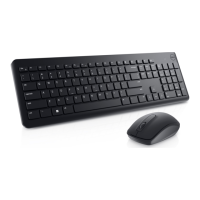
The Dell Wireless Keyboard and Mouse KM3322W is a peripheral set designed for seamless wireless connectivity with your computer, offering a comfortable and efficient user experience. This guide provides comprehensive instructions for setting up, using, and troubleshooting your new keyboard and mouse.
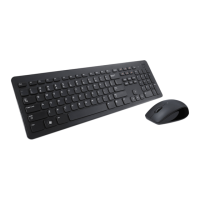
The Dell Wireless Keyboard and Mouse KM3322W provides a full-sized keyboard and a responsive optical mouse, both connecting wirelessly to your computer via a single USB receiver. This setup eliminates cable clutter and offers flexibility in your workspace. The keyboard is designed for comfortable typing, while the mouse offers precise cursor control for various tasks. Both devices are engineered to enter an auto power-save mode when not in use, helping to conserve battery life.
To begin using your wireless keyboard, you'll first need to install the batteries. The keyboard uses two AAA batteries. To do this, locate the battery cover on the bottom of the keyboard. Using your fingertip, gently pry open the cover. Insert the AAA batteries into the battery compartment, ensuring they are oriented correctly with the "+" and "-" ends matching the indicators inside the compartment. Once the batteries are in place, close the battery cover securely. The keyboard features a low battery status LED, which will blink in an amber color when the battery capacity is low, signaling that it's time to replace the batteries. When not in use, the keyboard will automatically enter a power-save mode to extend battery life.
Setting up your wireless mouse is a straightforward process. The mouse requires one AA battery. To install the battery, locate the slot on the side of the mouse cover. Use your fingertip to pry open the cover. Insert the AA battery into the battery compartment, making sure to align the "+" and "-" terminals correctly as indicated. After installing the battery, close the mouse cover firmly. To turn on the mouse, slide the power switch, located on the bottom of the mouse, to the "ON" position. The mouse also includes a low battery status LED, which will blink amber when the battery capacity is low. To further conserve battery life, it is recommended to turn off the power switch when the mouse is not in use for extended periods. Like the keyboard, the mouse will enter an auto power-save mode if it remains idle.
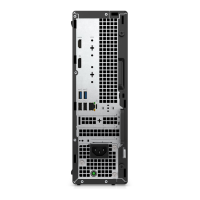
Both the keyboard and mouse connect to your computer using a single USB receiver. This receiver is typically stored within the mouse or keyboard packaging. First, detach the receiver tag from the USB receiver. Next, insert the USB receiver into an available USB port on your computer. This can be either a laptop or a desktop computer. For optimal performance and to avoid connectivity issues, it is recommended to connect the USB receiver directly to your computer's USB port, rather than using port replicators or USB hubs. Once the USB receiver is connected, ensure that both the keyboard and mouse are turned on. The devices are pre-paired with the USB receiver, so they should automatically connect to your computer. A notification on your screen may confirm that the mouse and keyboard are connected. The wireless connection operates on a 2.4 GHz RF frequency, providing a reliable connection within a range of up to 10 meters.
Regularly check the battery status LEDs on both your keyboard and mouse. When the LED blinks amber, it indicates low battery power, and it's time to replace the batteries. For the keyboard, replace the two AAA batteries, and for the mouse, replace the single AA battery. Always ensure that new batteries are inserted with the correct polarity. If you are using rechargeable batteries, make sure they are fully charged before insertion.
If your keyboard or mouse is not functioning, start by checking the battery level. Ensure that the batteries are correctly inserted and are not depleted. If the battery-status light flashes amber 10 times, it indicates low power. If the batteries are fully depleted, the light will not turn on at all. Try turning the device off and then back on. Restarting your computer can also resolve some connectivity problems. Verify that the USB receiver is securely connected to a USB port on your computer. If you are using a port replicator or USB hub, try connecting the receiver directly to the computer. You might also try inserting the USB receiver into a different USB port, especially one closer to the keyboard or mouse, to improve the signal. Ensure that the distance between your computer and the wireless devices is within the recommended 10-meter range.
If your mouse pointer is not moving or is moving slowly, first check if the optical sensor on the bottom of the mouse is obstructed or dirty. Clean it gently if necessary. Note that glass or very smooth, glossy surfaces are not ideal for the mouse sensor's tracking. Using a dark-colored fabric mouse pad can significantly improve tracking performance. You can also adjust the pointer speed through your computer's operating system settings. On Windows, you can typically access these settings by typing "main.cpl" into the Search box, opening the Mouse Properties dialog, navigating to the Pointer Options tab, and adjusting the slider in the Motion section.
By following these guidelines, you can ensure optimal performance and longevity for your Dell Wireless Keyboard and Mouse KM3322W.
| Brand | Dell |
|---|---|
| Model | WM118t |
| Category | Computer Accessories |
| Type | Wireless Mouse |
| Connectivity Technology | Wireless |
| Interface | USB |
| Tracking Method | Optical |
| Buttons Qty | 3 |
| Scroll Wheel | Yes |
| Movement Resolution | 1000 DPI |
| Battery Type | AA |
| Number of Batteries | 1 |
| Battery Life | Up to 12 months |
| Color | Black |
| Weight | 100 g |