Set up your XPS 13 2-in-1 (9310 2n1)
NOTE: The images in this document may differ from your computer depending on the configuration you ordered.
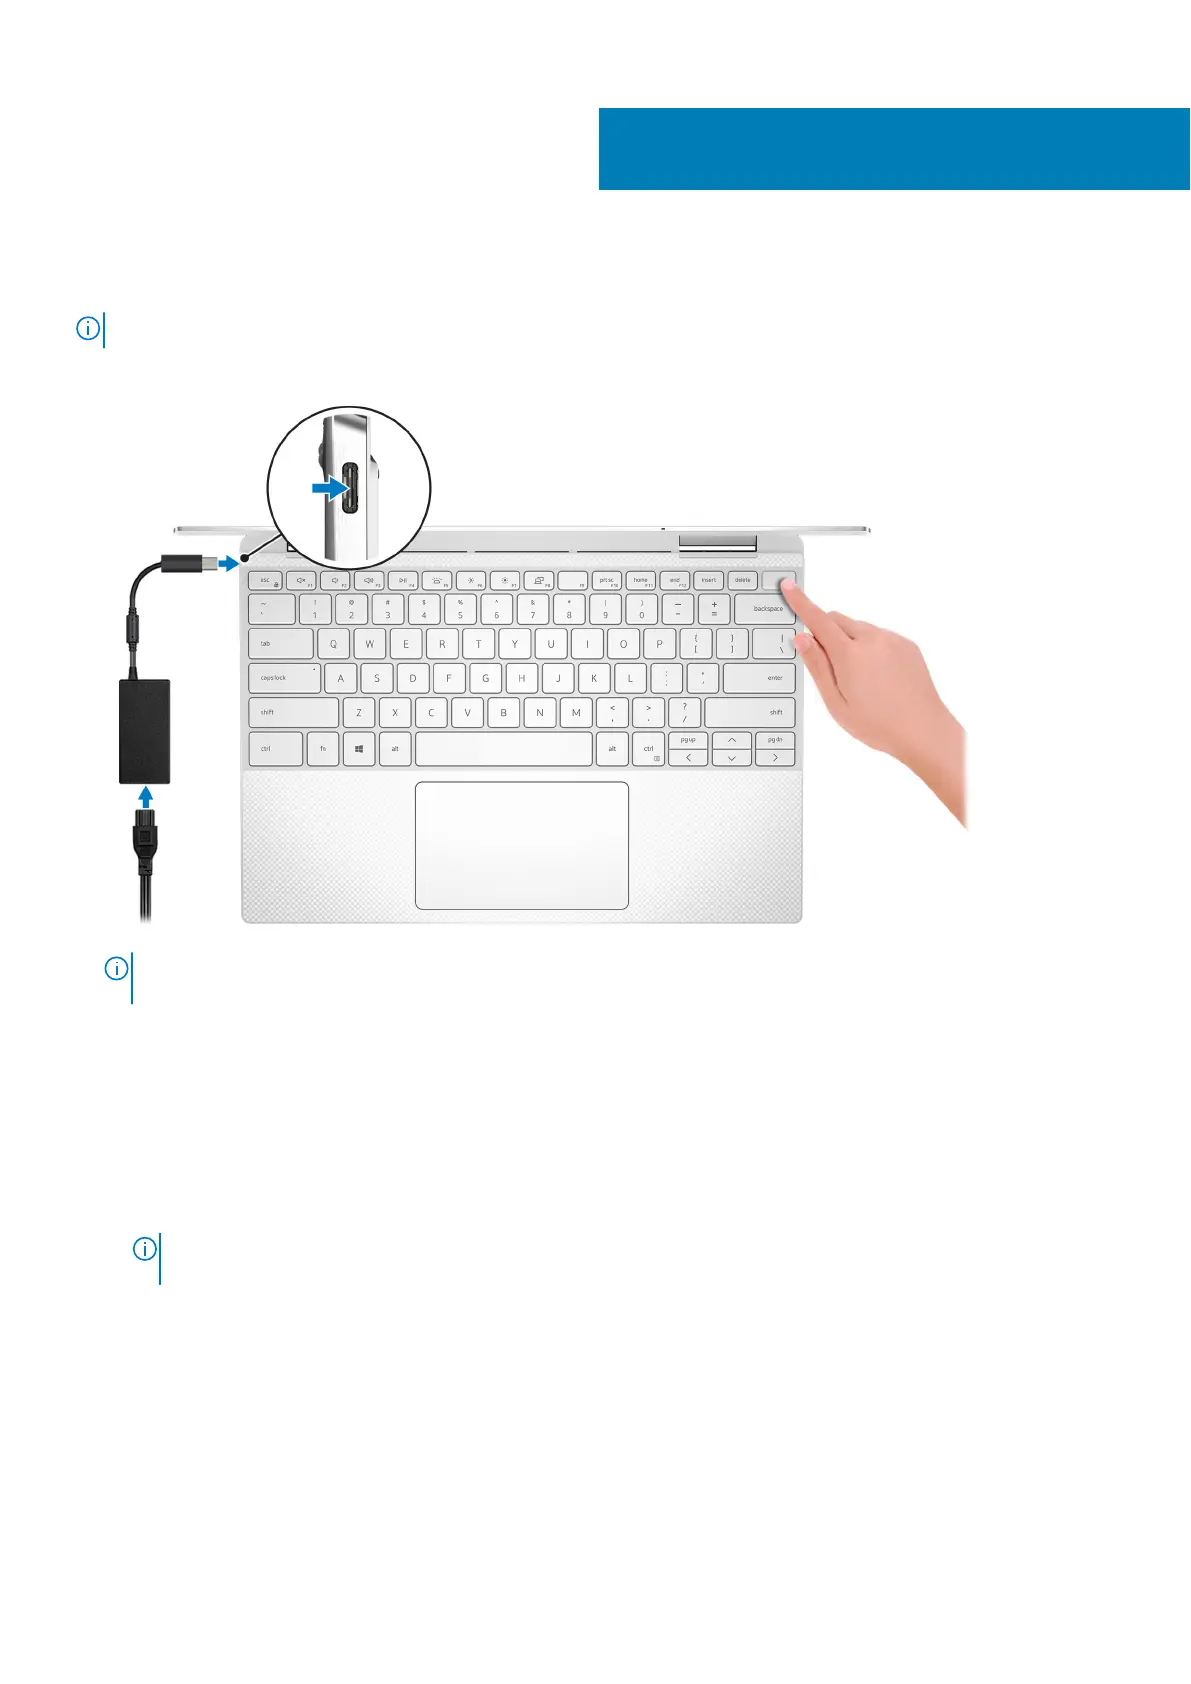
1. Connect the power adapter and press the power button.
NOTE: To conserve battery power, the battery might enter power saving mode. Connect the power adapter and press
the power button to turn on the computer.
2. Finish operating system setup.
For Ubuntu:
Follow the on-screen instructions to complete the setup. For more information about installing and configuring Ubuntu, see
the knowledge base articles SLN151664 and SLN151748 at www.dell.com/support.
For Windows:
Follow the on-screen instructions to complete the setup. When setting up, Dell recommends that you:
● Connect to a network for Windows updates.
NOTE:
If connecting to a secured wireless network, enter the password for the wireless network access when
prompted.
● If connected to the internet, sign-in with or create a Microsoft account. If not connected to the internet, create an
offline account.
● On the Support and Protection screen, enter your contact details.
3. Locate and use Dell apps from the Windows Start menu—Recommended.
1
4 Set up your XPS 13 2-in-1 (9310 2n1)

 Loading...