Page 10
Hotshot Gas Fireplace Insert
P/N XG0511
MaintenanceOperation
Lighting Instructions
See page 9.
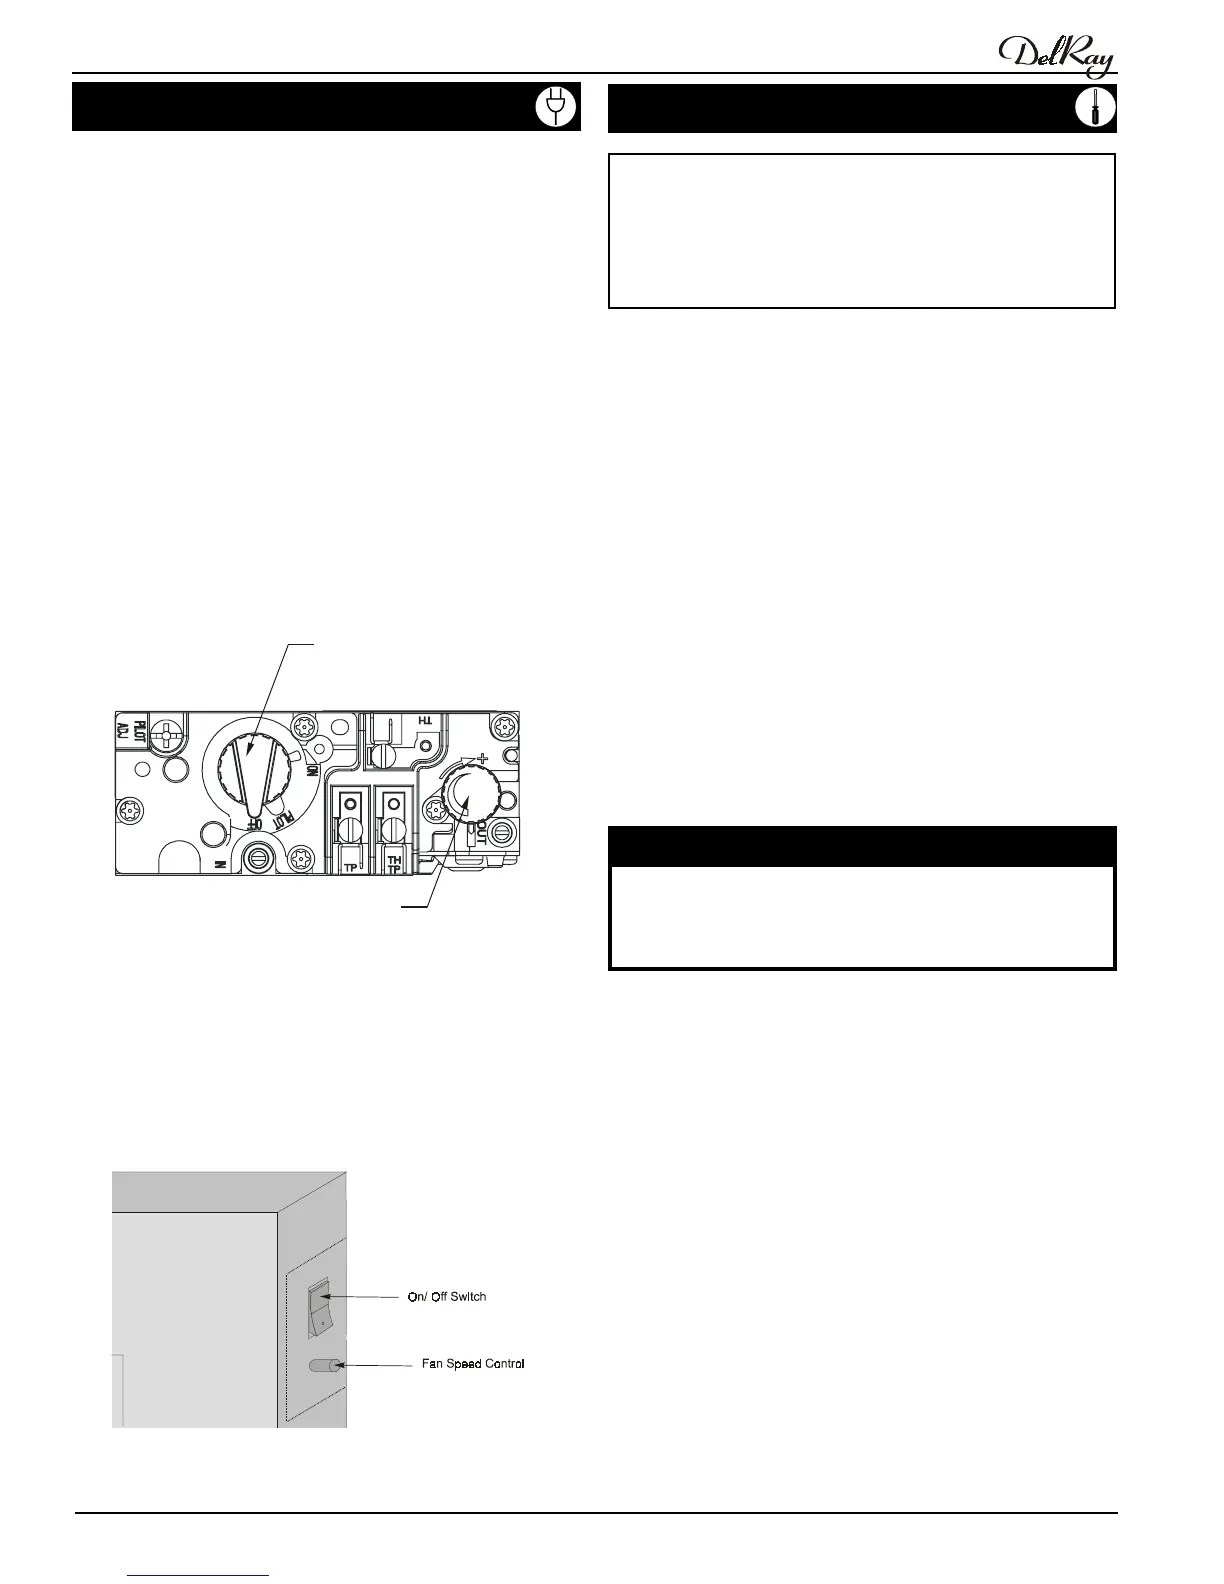
On/Off Switch
The On/ Off Switch is located on the top right-hand side of the
Hotshot Fireplace. Once the pilot is lit, and the gas control knob is
in the 'ON' position, pushing this switch will toggle the main burner
on or off.
(See figure 16.)
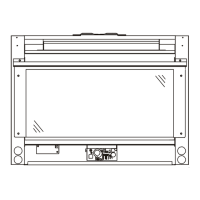
Burner Adjustment
Hotshot inserts are equipped with an adjustable burner, allowing
you to increase or decrease the amount of flames and heat output.
To adjust the flames, locate the black knob marked 'Hi-Lo', on the
right side of the gas control valve (See Figure 15).
n To raise the flame height, turn the black knob (located behind
the lower trim) clockwise.
n To lower the flame height, turn counterclockwise.
Figure 15. 'Hi-Lo' Adjustment on the Hotshot inset's gas valve.
H
I
L
O
Gas control knob
(shown in “Off” position”)
Hi/Lo control knob
Fan Adjustment
The fan installed in this fireplace will turn on and off automatically,
depending the appliance's temperature. You can adjust the speed at
which this fan operates by turning the fan's speed control clockwise or
counterclockwise, located on the top right-hand side of the fireplace
faceplate. (See figure 16.)
Figure 16. The Hotshot's On/Off switch and fan speed control.
CAUTIONS
n Fireplace gas control must be in the “OFF” position and pilot
and main burners extinguished when cleaning appliance with
a vacuum.
n Doors and logs can get very hot. Handle only when cool.
General
n Have the fireplace installation inspected yearly, including a
visual check of the insert and vent system, the burner and the
pilot flame. For your convenience a 1/8" manifold pressure tap
is supplied on the gas valve for a test gauge connection. See
Figure 15.
n For Natural Gas this appliance requires a minimum inlet
pressure of 5.5" W.C. and a manifold pressure of 3.5" W.C.
n For Propane Gas this appliance requires a minimum inlet
pressure of 11" W.C. and a manifold pressure of 10" W.C.
n Always keep the fireplace area clear and free of combustible
materials, as well as gasoline and other flammable vapours and
liquids.
n Do not use this appliance if any part has been under water.
Immediately call a qualified service technician to inspect the
appliance and to replace any part of the control system and any
gas control which has been under water.
Cleaning
WARNING:
Do not attempt to clean glass when hot.
Do not clean glass with abrasive materials as any glass
etching may cause premature glass failure.
When the fireplace is first activated, there may be some smoking
and a visible film may be left on the glass. This is a normal
condition, and is the result of burning of protective coatings on new
metal.
n Glass must be cleaned periodically to remove any film (which is
a normal biproduct of combustion) which may be visible. Film
can easily be removed by removing the door, as shown on
page 7. Handle the door carefully, and clean it with non-
abrasive glass cleaners. One of the most effective products is
Kel Kem.
n Silicone seals on inner door during initial firing will "off gas",
leaving a visual deposit of a white substance on combustion
chamber walls. This can easily be removed using normal
household products.
n Use a vacuum cleaner or whisk broom to keep the control
compartment, burner, and firebox free from dust and lint.
n The logs may be cleaned periodically with a vacuum to remove
dirt, dust and other contaminates. If the logs shift during
cleaning, refer to page 8 for proper positioning.