ASSEMBLY
OPERATION AND ADJUSTMENTS
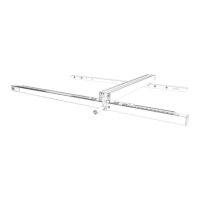
1. Attach the Fence Guide Tube (3) to the Front Guide
Rail (1) using four (for 30” versions) or six (for 52”
versions) 1/4” Pan Head Screw With Washer (d) through
the Holes (B) on the bottom side of the Front Rail.
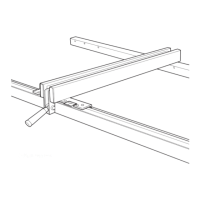
1. Move the Fence (4) until the bottom edge
of the Fence is in line with the edge of
one of the Miter Gauge Slots (C).
2. Push down on the Fence Clamping Lever (B) to
lock the Fence in place. The edge of the Fence
should be parallel to the Miter Gauge Slot.
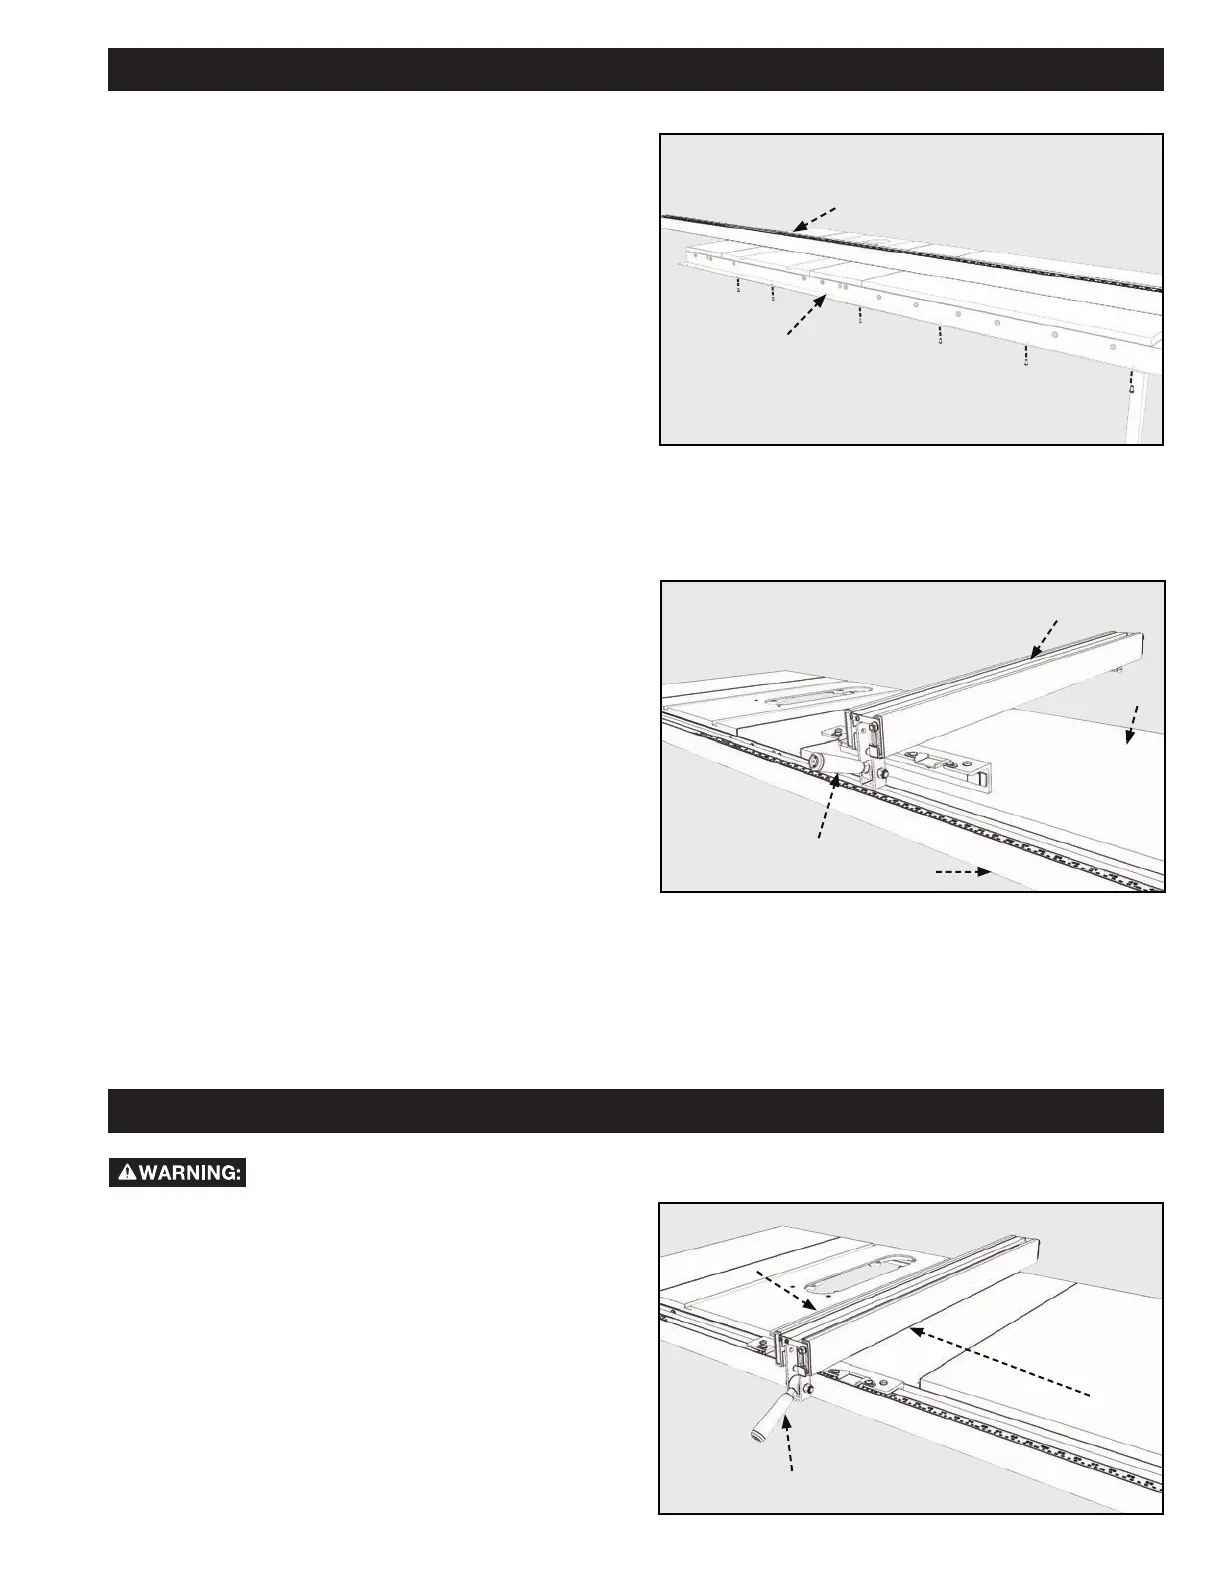
1. Place the Fence (4) on the Guide Tube
(3) and lift the Clamping Lever (A).
2. Guide the Fence over the Rear Guide Rail
(2), as shown in Figure 11, and gently
push the Fence on the Guide Tube (3).
NOTE: If you removed the Spreader Bar when disassembling
the old fence system, re-install it now.
Make sure that the clip on the back of the Fence engages the
Rear Guide Rail.
To reduce the risk of injury, turn unit off and disconnect it from power source before installing/removing
accessories, adjusting, or making repairs. An accidental start-up can cause injury.
FIGURE 12
FIGURE 11
FIGURE 10
A
4
3
2
C
1
3
B
ATTACH GUIDE TUBE
INSTALL THE FENCE
ALIGNING THE FENCE TO THE
MITER GAUGE SLOTS
3. Push down on fence Clamping Lever
to lock the Fence in place.
4
9