36
56
*Inside Enclosure*
*Dentro del recinto*
Use silicone caulk to seal the inside of the center guide
and the inside of the dam strip (as shown in figure 56).
Ensure that the connection point between dam
strip and dam strip support is fully sealed.
Follow manufacturer’s recommendation for curing time
on silicone.
Utilice masilla de silicona para sellar el interior de la
guía central y el interior de la barrera (como se muestra
en la figura 56).
Asegurarse de que el punto de conexión
entre la barrera y el apoyo de la barrera esté
completamente sellado.
Siga las recomendaciones del fabricante para el tiempo
de curado de la silicona.
1
4
3
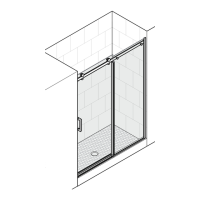
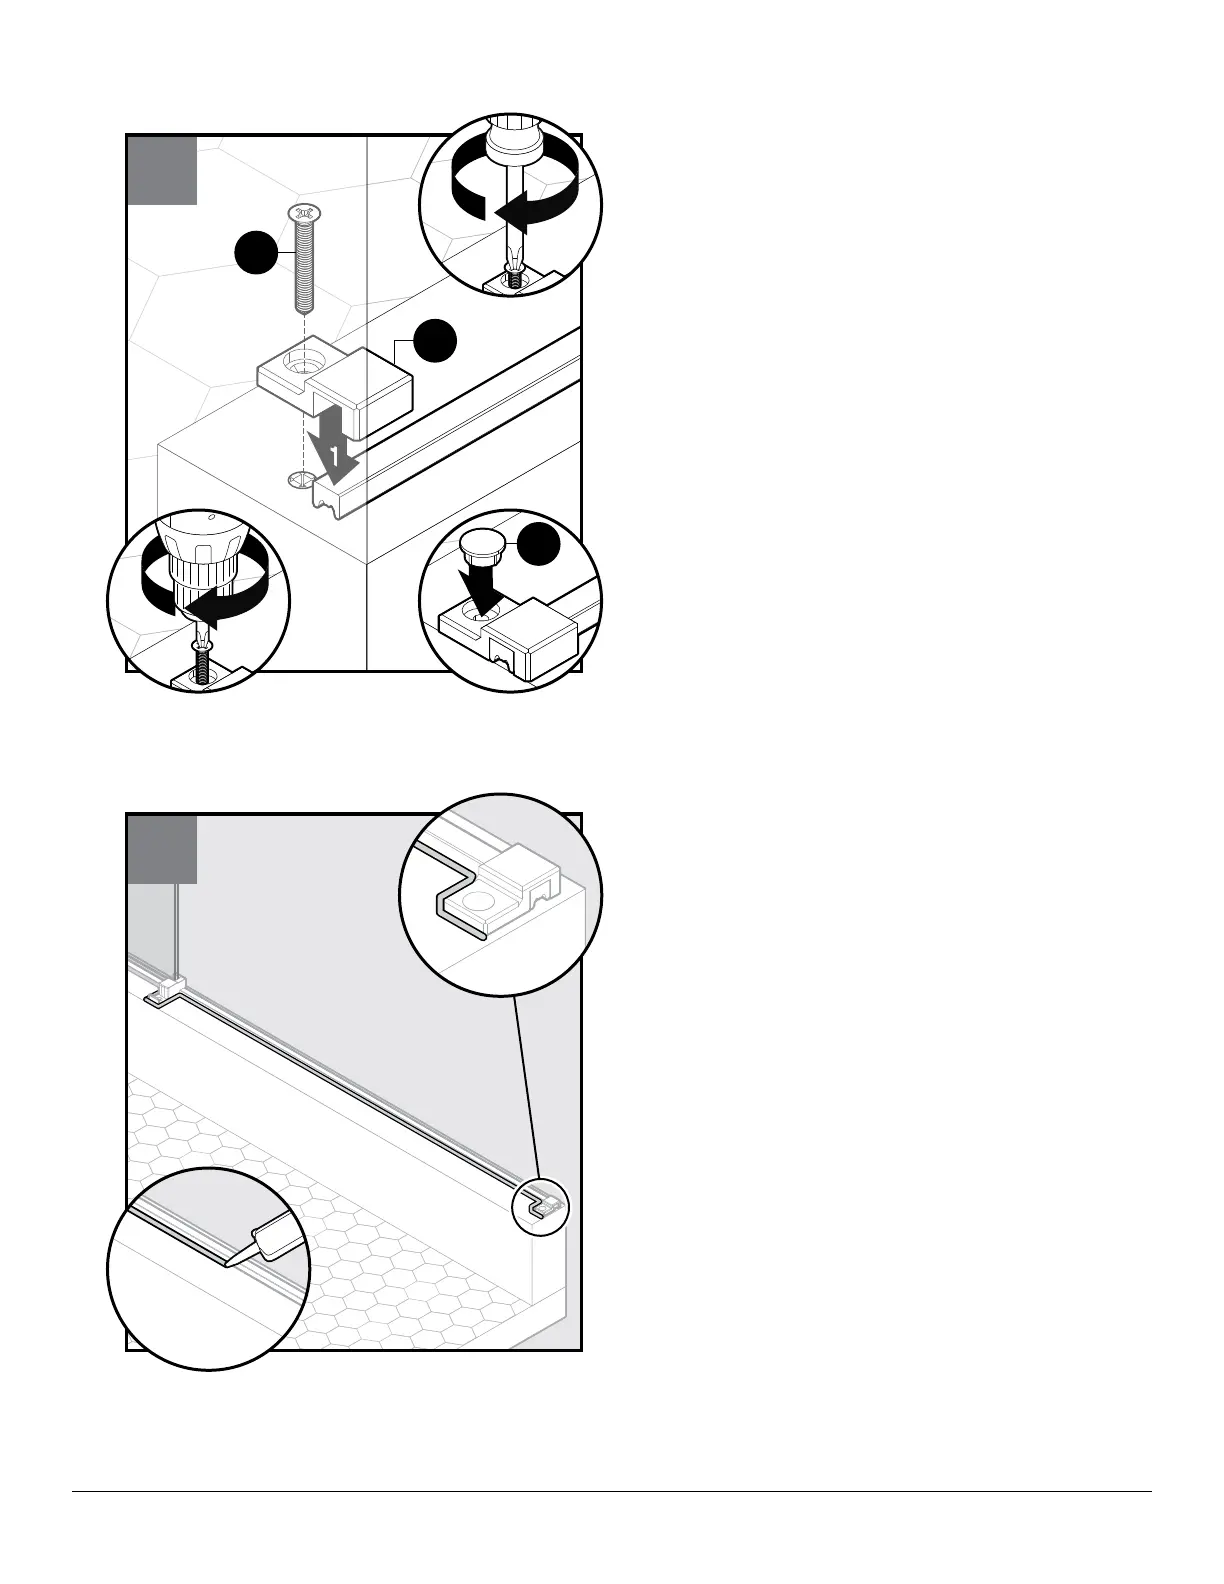
55
O
X
W
Reinstall the dam strip support (O). Use drill to start
M4 x 30 FH screw (X) into anchor. Apply silicone sealant
under and around dam strip support (O).
Next, use a screwdriver to hand tighten until secure.
Install screw cap (W) into screw hole, a dot of silicone
can be applied over the screw head to secure.
Vuelva a instalar el apoyo de la barrera (O). Utilice
la broca para abrir camino al tornillo FH M4 x 30 (X)
hacia el anclaje. Aplique sellador de silicona debajo y
alrededor del apoyo de la barrera (O).
Luego, utilice un destornillador para apretarlos a mano
y asegurarlos completamente.
Instale la tapa de tornillo (W) en el orificio de tornillo,
puede aplicarse un punto de silicona sobre la cabeza
del tornillo para asegurarla.