DEMA NITRO/NITRO EXPRESS REPLACEMENT GUIDE
INSTALLATION INSTRUCTIONS
I-993 Pg. 5 of 6
Rev. -- 10/01/09
To replace the motor, disconnect all power to the unit and machine. Unplug the motor from the control board. Take the
screws out that secure the motor to the cover. Place the new drive adapter on the motor and place the new motor in place
in the cover. Use the screws provided to secure the motor to the cover and plug the motor wires into the proper
terminals. For assistance with this, see the wiring diagram on page 2.
KIT 81.316.12 – NITRO CONTROL BOARD REPLACEMENT KIT
KIT INCLUDES: NITRO CONTROL BOARD (81.282.1),
AND #4 SCREWS
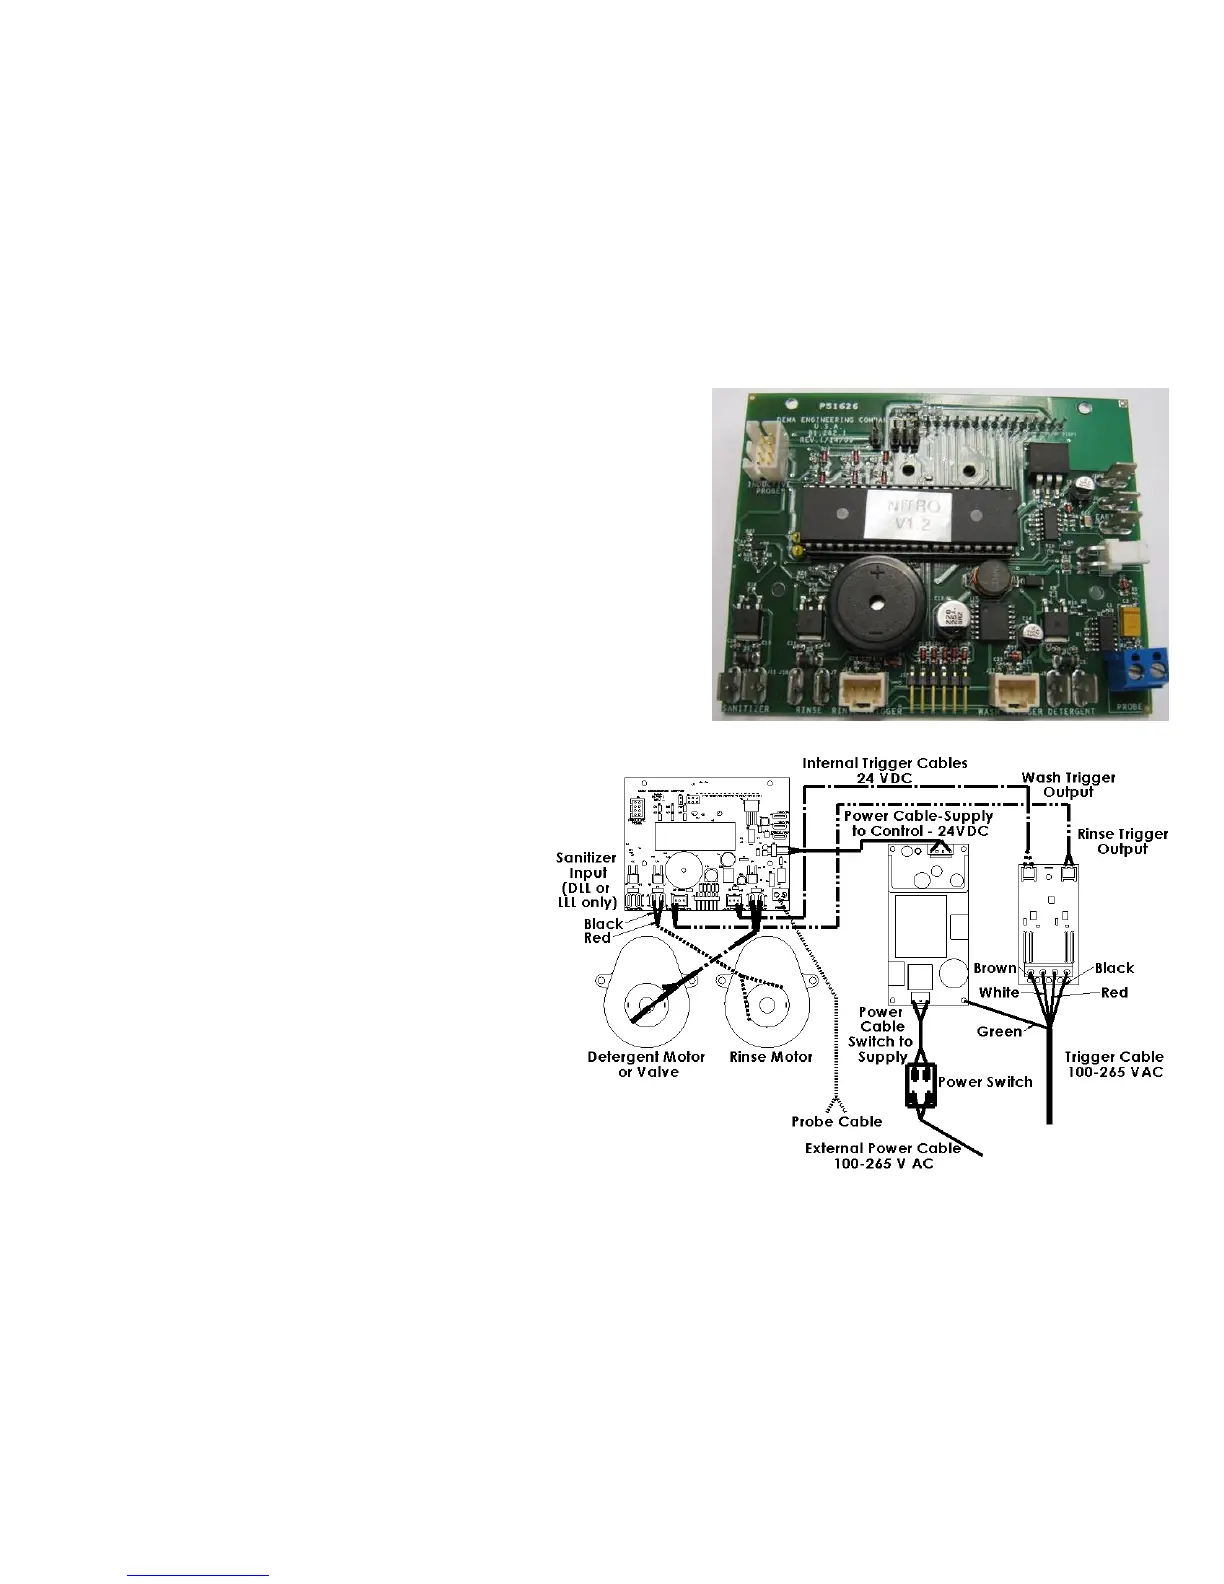
To replace the control board, remove all power from the unit and
from the dish machine to which the unit is connected. Then,
remove all wiring from the old board. Make note where the wiring
is at and which cables plug in to which spots. Unscrew the 4
screws securing the control board. Place the new control board in
the unit and secure the control board with the 4 screws. Use the
diagram on the following page to help reconnect the wires to the
proper places.
The internal power cables should have labels
on them to denote which is the rinse power
cable and which is the wash power cable. The
rinse power cable gets hooked onto the left
connection point for a two prong connection
and the wash power cable gets hooked onto
the right connection point. The rinse motor
and detergent motor or valve should always
get hooked up with the black wire hooked to
the left spade connection and the red wire
hooked to the right spade connection. The
probe cable (if the unit is being run in
concentration mode will get hooked into the
probe cable inlet which is a blue box with
screw down terminals. Once everything is
replaced, the unit will need to be programmed
to the specifications that the last board was
running. If the unit is a three product unit, wires from the sanitizer pump will need to be plugged into the proper spots
as well as shown on the diagram.