13
AVR-4802
13
AVR-4802/AVC-A11SR
SEMICONDUCTORS
IC’s
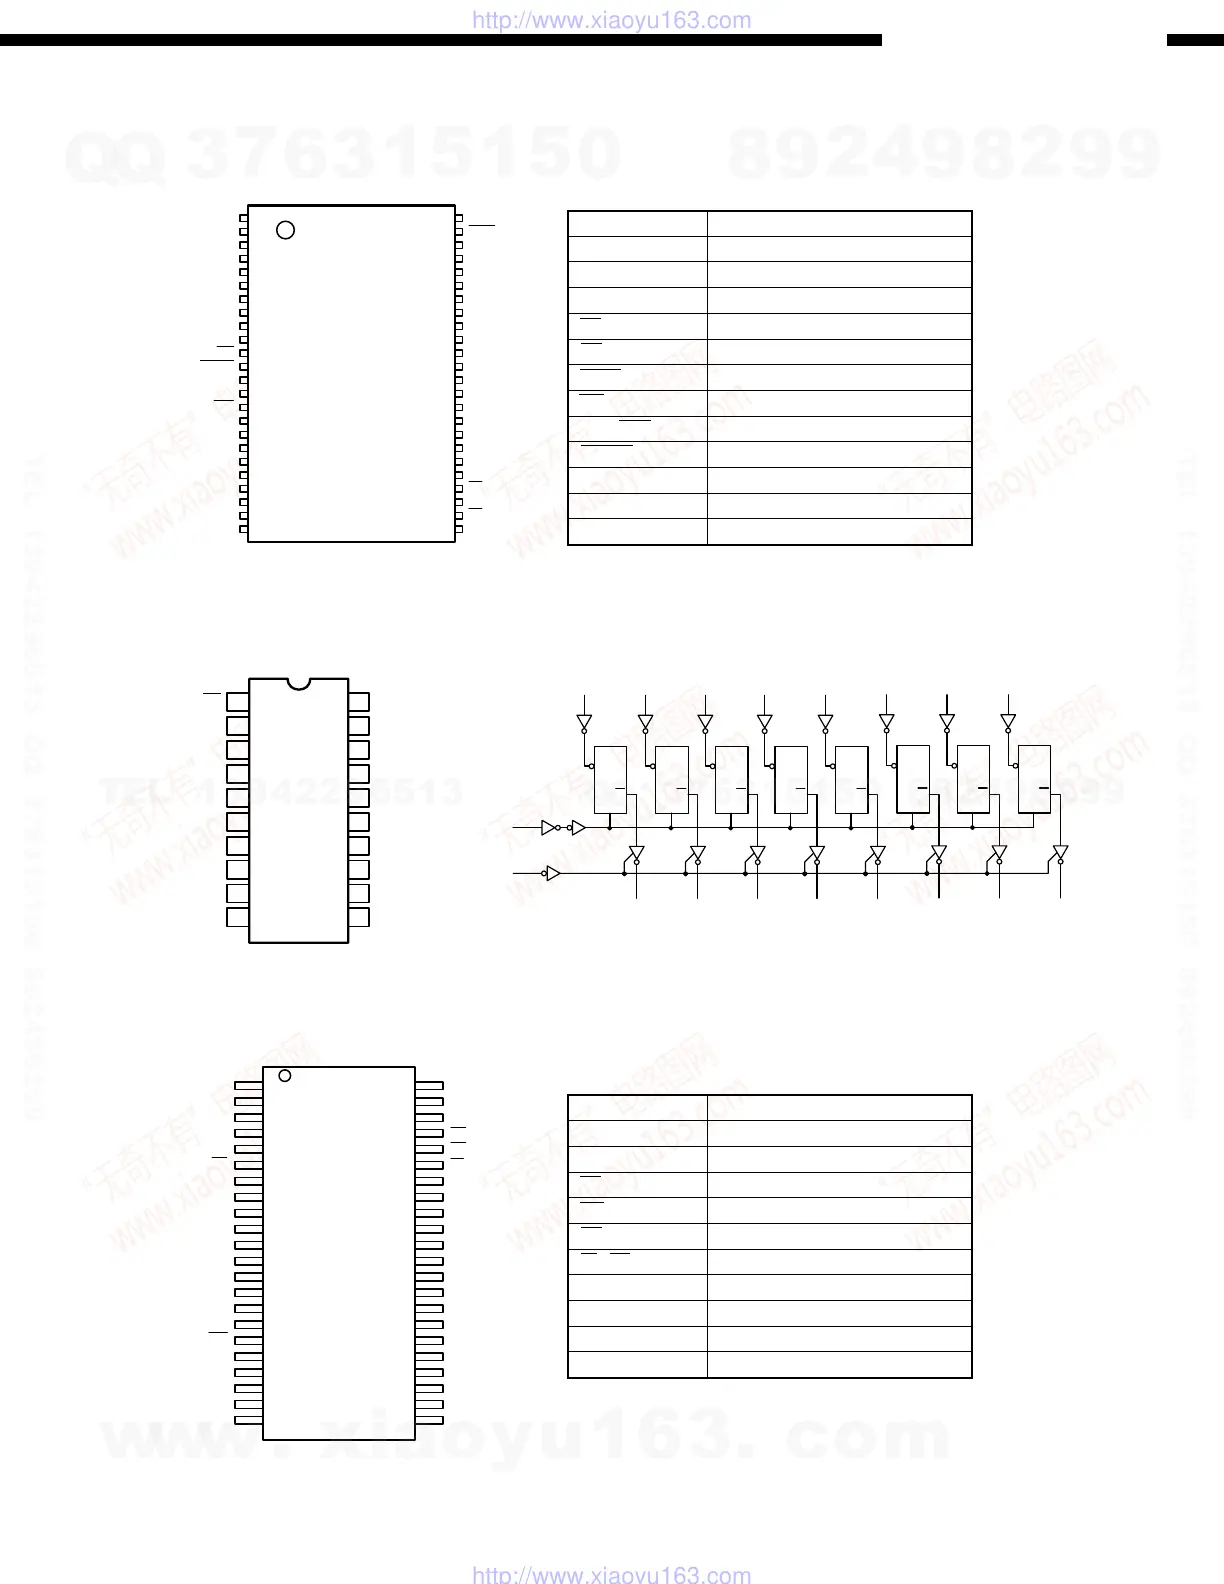
LH28F800BVE-BTL90 (IC504, 507)
1
2
3
4
5
6
7
8
9
10
11
12
13
14
15
16
17
18
19
20
21
22
23
24
25
26
27
28
29
30
31
32
33
34
35
36
37
38
39
40
41
42
43
44
45
46
47
48
A15
A14
A13
A12
A11
A10
A9
A8
NC
NC
WE
RESET
NC
NC
RDY/BSY
A18
A17
A7
A6
A5
A4
A3
A2
A1
A16
BYTE
V
SS
DQ15/A-1
DQ7
DQ14
DQ6
DQ13
DQ5
V
DD
DQ11
DQ3
DQ10
DQ2
DQ9
DQ0
OE
V
SS
CE
A0
DQ1
DQ8
DQ12
DQ4
D
Q
L
D
Q
L
D
Q
L
D
Q
L
D
Q
L
D
Q
L
D
Q
L
D
Q
L
D0
D1 D2
D3 D4 D5 D6
D7
LE
OE
1
2
34
5678
9
11
121314
1516
17
1819
Q0 Q1
Q2
Q3 Q4
Q5 Q6 Q7
N74AHCT573PW (IC516, 520)
N74LV573ANS (IC517, 521)
1
2
3
4
5
6
7
8
9
10
20
19
18
17
16
15
14
13
12
11
OE
D0
D1
D2
D3
D4
D5
D6
D7
GND
Vcc
Q0
Q1
Q2
Q3
Q4
Q5
Q6
Q7
LE
1
2
3
4
5
6
7
8
9
10
11
12
13
14
15
16
17
18
19
20
21
22
23
24
25
26
27
28
29
30
31
32
33
34
35
36
37
38
39
40
41
42
43
44
A4
A3
A2
A1
A0
CE
I/O 1
I/O 2
I/O 3
I/O 4
V
DD
GND
I/O 5
I/O 6
I/O 7
I/O 8
WE
A15
A14
A13
A12
N.C.
A5
A6
A7
OE
UB
LB
I/O 1 6
I/O 1 5
I/O 1 4
I/O 1 3
GND
V
DD
I/O 1 2
I/O 1 1
I/O 1 0
I/O 9
N.U.
A8
A9
A10
A11
N.C.
16MB SDRAM TSOP-8 H/W (IC505, 506, 508, 509)
Symbol Function
A0~A18 Address input
DQ0~DQ14 Data in/output
DQ15/A-1 Data in/output/Address input
CE Chip enable input
OE Output enable input
BYTE Word/byte select input
WE Write enable input
RDY/BSY Ready/busy output
RESET Hardware reset input
N.C. No connection
VDD Power
Vss GND
Symbol Function
A0~A15 Address input
I/O1~I/O16 Data in/output
CE Chip enable input
WE Write enable input
OE Output buffer control input
LB, UB Data byte control input
VDD Power terminal (3.3V)
GND GND
N.C. No connection
N.U. Unusable (input)
w
w
w
.
x
i
a
o
y
u
1
6
3
.
c
o
m
Q
Q
3
7
6
3
1
5
1
5
0
9
9
2
8
9
4
2
9
8
T
E
L
1
3
9
4
2
2
9
6
5
1
3
9
9
2
8
9
4
2
9
8
0
5
1
5
1
3
6
7
3
Q
Q
TEL 13942296513 QQ 376315150 892498299
TEL 13942296513 QQ 376315150 892498299
http://www.xiaoyu163.com
http://www.xiaoyu163.com
 Loading...