1. Version Display Mode
1.1. Actions
Version information is displayed when the device is started in this mode.
1.2. Starting up
(1) Turn the power on.
(2) Press the "SOURCE" button to set the input source to CD.
(3) "NO DISK" appears in the display.
(4) With the power on, press the "
CLEAR
"→"
Cursor LEFT
"→"
STOP
" buttons on the remote control.
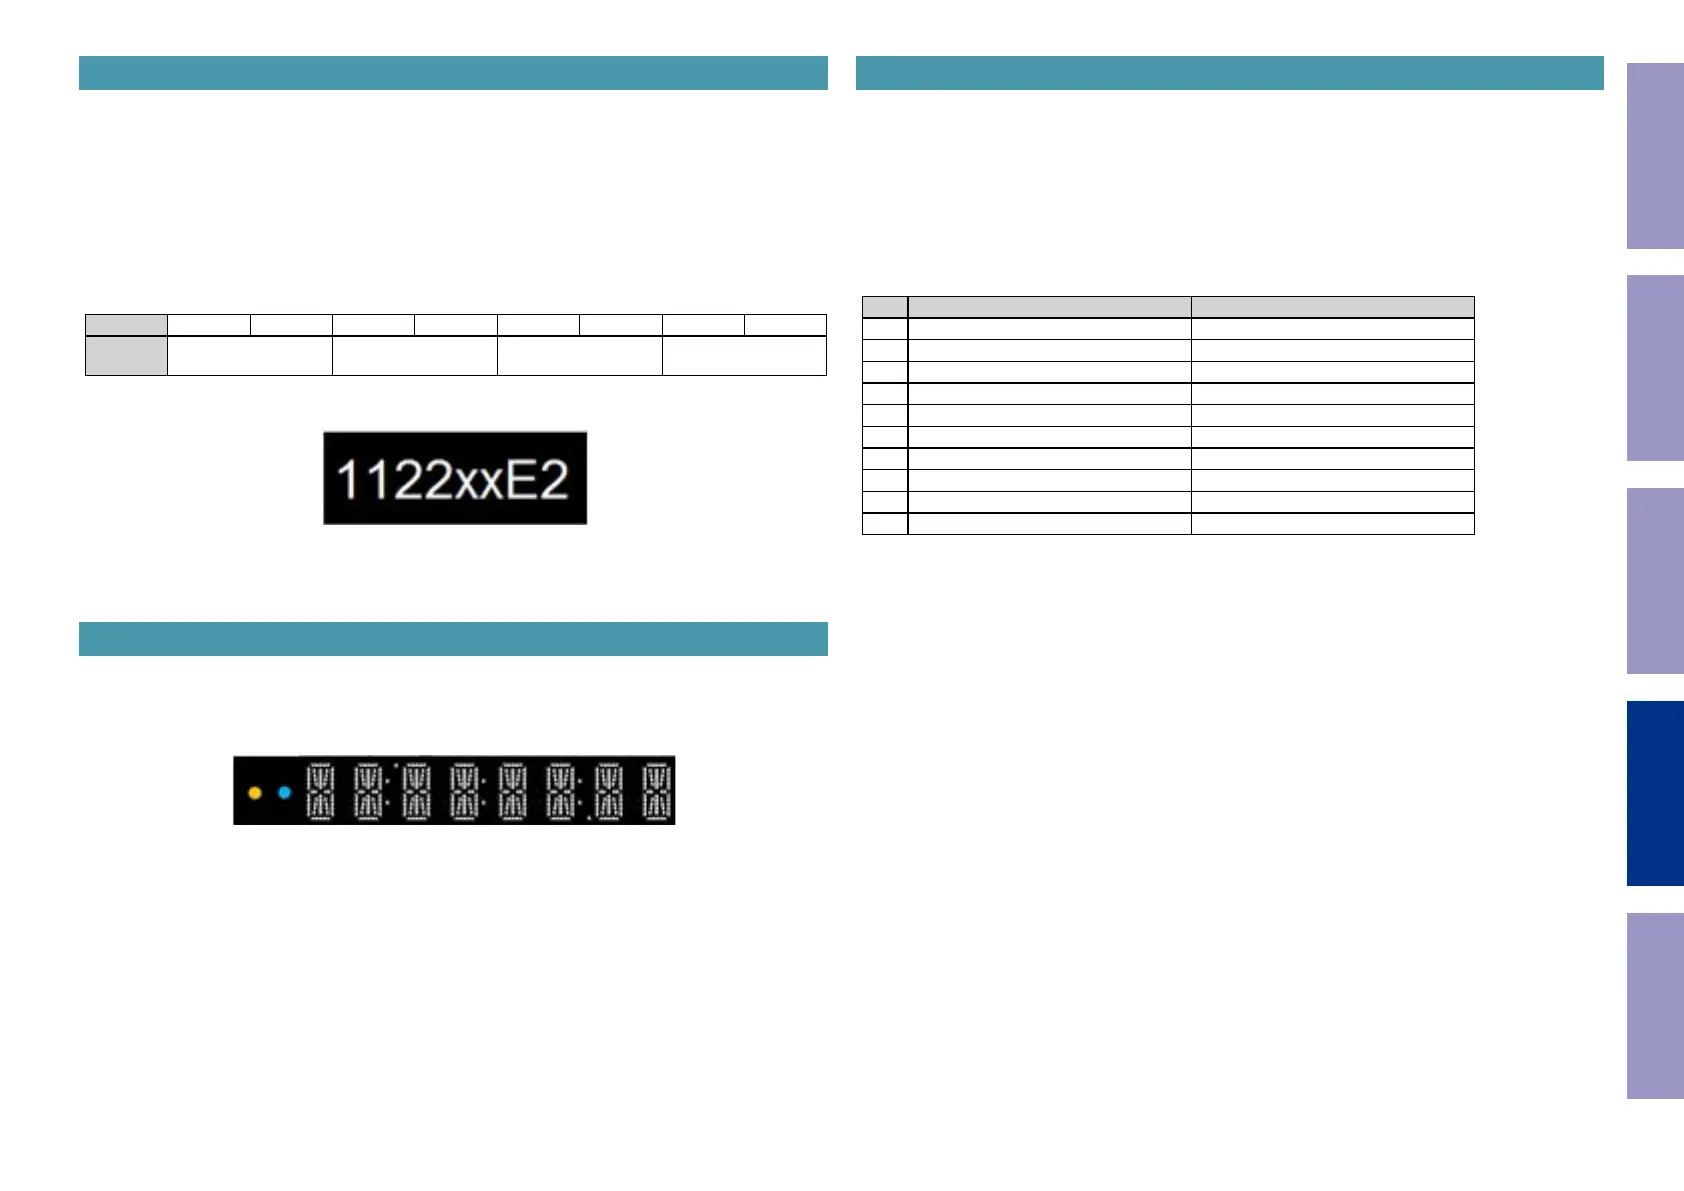
【Ver display】
Display X X X X X X X X
Software MCU version DSP version xed
Region
(E2, E3, JP, CN)
Example : MCU version = 11, DSP version = 22, Region = E2
(5) The software version is displayed for 7 seconds before returning to the normal use status display.
(
2. Display check mode
2.1. Operations
(1) While the power is On, hold down buttons "
SOURCE
" and "
9
" for at least 5 seconds.
(2) The display is fully lit.
The power LED (orange) and Bluetooth LED (blue) are lit.
(3) The display returns to the normal mode after 3 seconds.
(
3. Initialization Mode
Make sure to initialize this unit after replacing the microcomputer or any peripheral equipment, or the
PCB.
3.1. Operations
(1) While the power is On, hold down buttons "
SOURCE
" and "
SOUND MODE
" for at least 5 seconds.
(2) "RESET" is displayed for 3 seconds.
(3) The display returns to the normal mode after the reset.
3.2. Initialization item
No. Items Default
1 Input source CD
2 Auto Standby E2 : On / Others : Off
3 DIMMER 100%
4 TUNER PRESET MEMORY All clear
5 VOLUME 05
6 TONE CONTROL Flat
7 BALANCE CONTROL Center
8 S.DIRECT Off
9 Bluetooth link information All clear
10 CLOCK / TIMER All clear
Before Servicing
This Unit
Electrical Mechanical Repair Information Updating
46
 Loading...