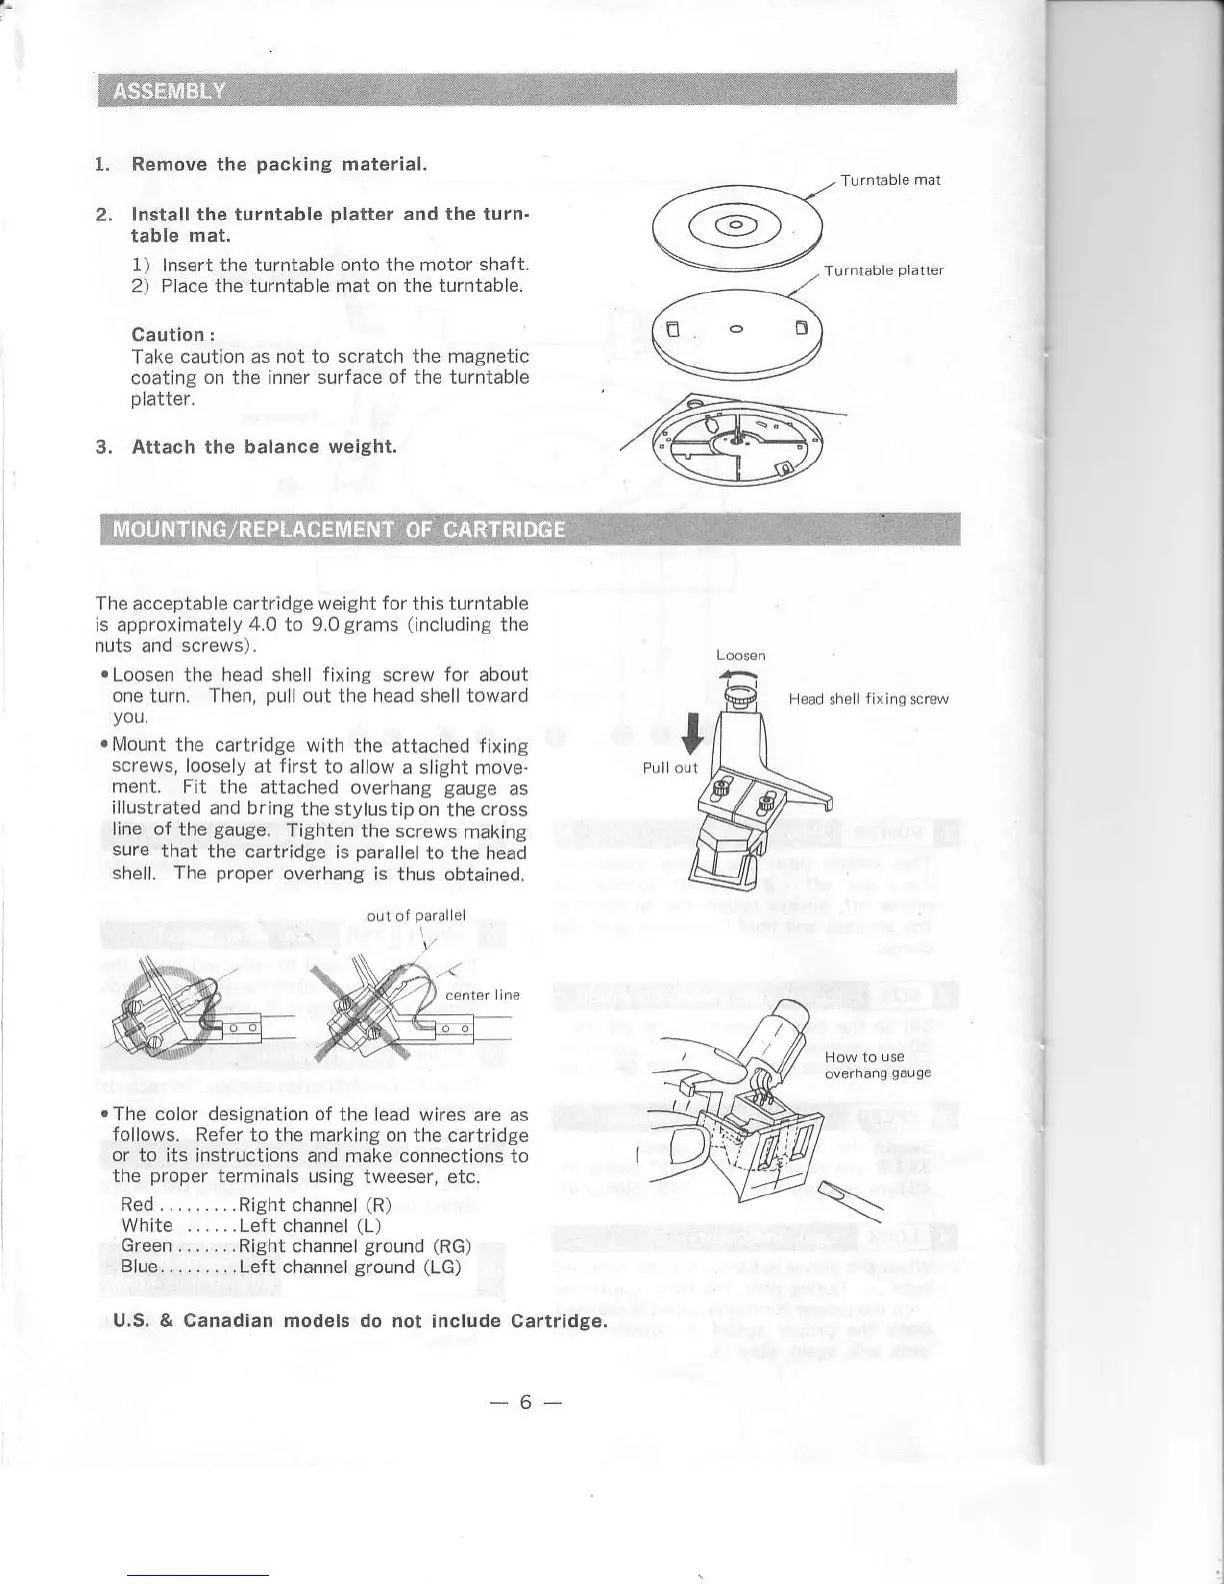
1. Remove the
packing
material.
2, Install
the
turntable
platter
and the turn.
table mat.
r)
2)
lnsert the turntable onto the rnotor
shaft.
Place the turntable mat
on the iurniable.
caution:
Take
cauiion as not to scratch the magnetic
coating
on the inner surface of the turntable
p
arrer.
3, Attach the balance
wsight.
The acceptable
cartridge
weight
for
this turntable
is approxirnate
y
4.0 to 9.0
grams (including
ihe
nuts
and
screws).
.Loosen
the head shell
fixing
screw
for
about
one
t!rn.
Th€n,
pu
out
the
head shell
toward
yoll.
.lMount
the
cartridge \diih
the attached fixing
screws,
loosely at fkst
to allow a slight move.
ment. Fit
the attached overhang
gauge
as
illustrated
and bfing
the
stylus
tip on th€ cross
line of
the
gauge.
Tighien the
screws rnaking
sure
that
the cartridge
is
parallet
io the
neao
shell. The
proper
overhang is thus
obtained.
The color
designatlon
of the lead wires
are as
follows. Refer to the
marking on the cartridge
or
to its instructions and make connections
to
the
proper
terminals
using tweeser, etc.
Red . ... .....Right
channel
(R)
White
..
.. .Left channel
(L)
Green .. ... ..Right channel
ground
(RG)
Blue... .. ... .Left
channel
sround
(LG)
U.S. & Canadian modsls do not
include Cartridge.
-6-
 Loading...