8
ENGLISH
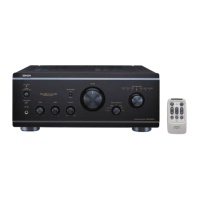
(2) Using the Remote Control Unit
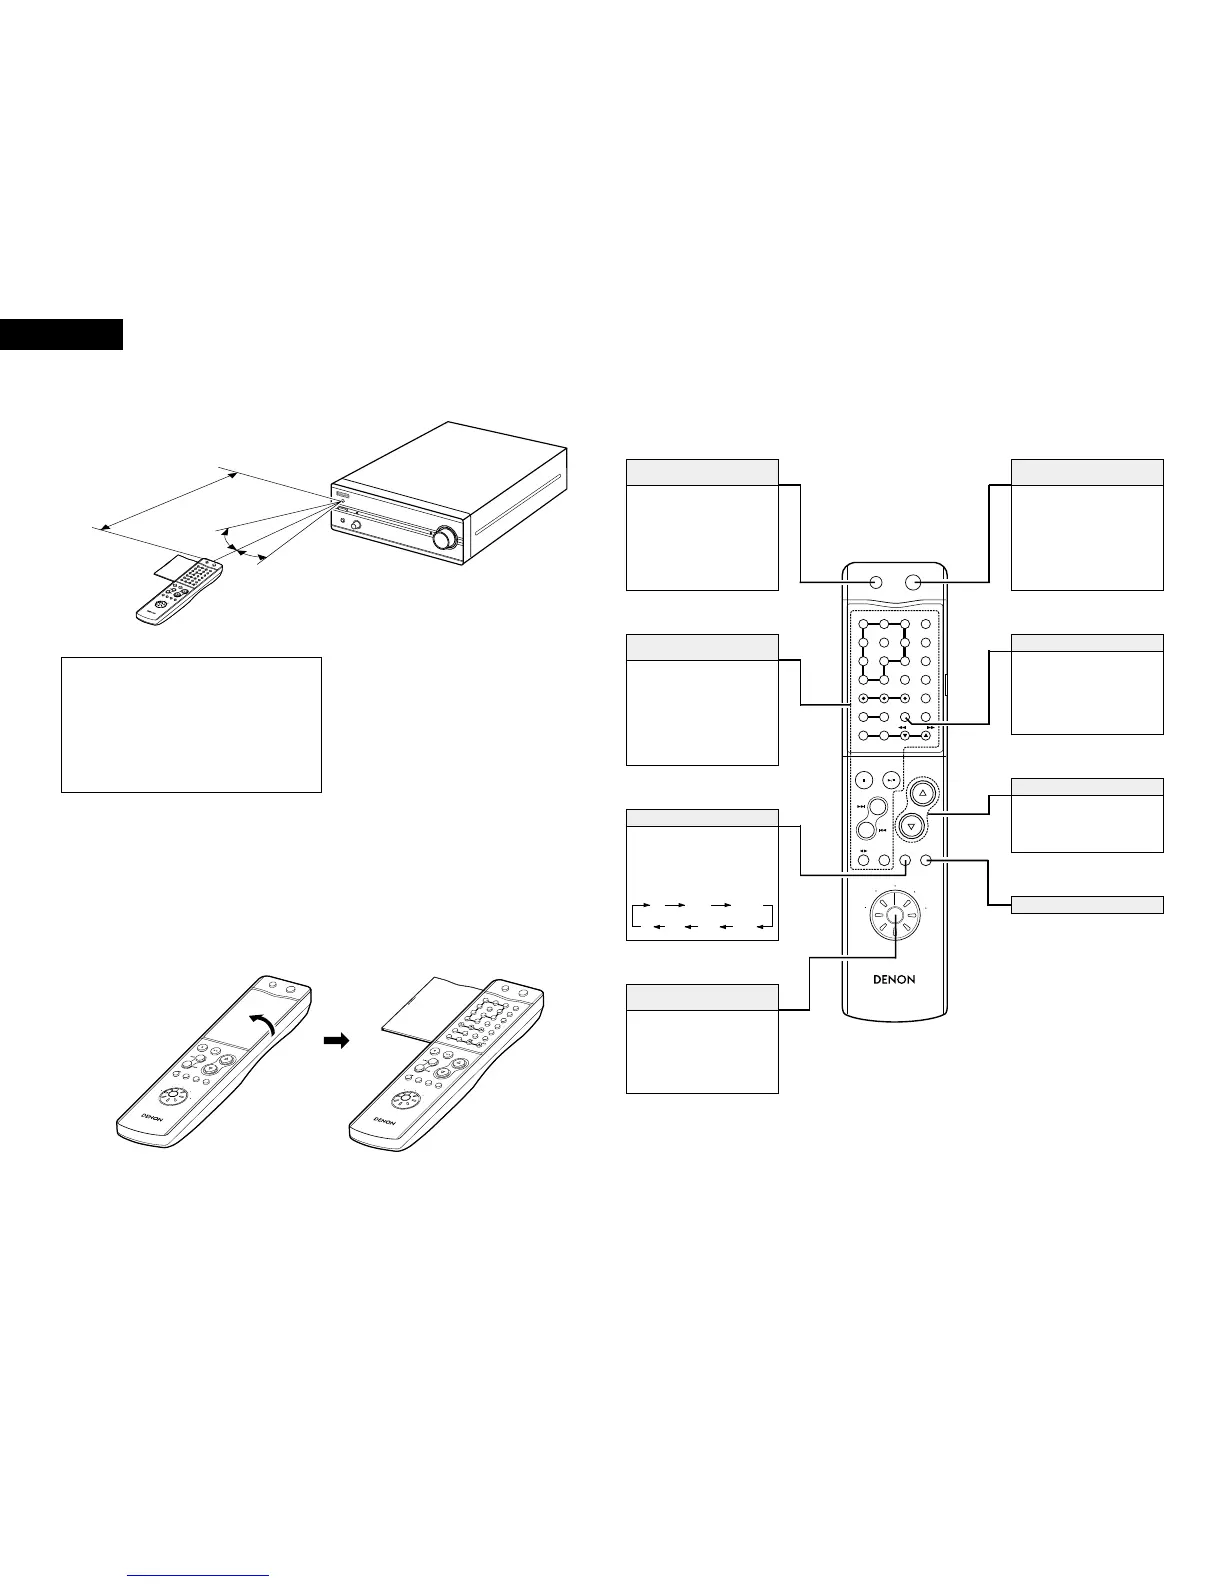
• Point the remote control unit at the remote sensor on
the main unit as shown on the diagram when operating
it.
(When system connections are made, the remote
control signals for all the system components are
received at the PMA-201SA remote sensor.)
• The remote control unit can be used from a straight
distance of about 7 meters, but this distance will be
shorter if the there is an obstacle in the way or if the
remote control unit is not pointed directly at the remote
sensor.
• Use the remote control unit within a range of 30° to the
left and right of the remote sensor.
Approx. 7m
30°
30°
NOTES:
• The remote control unit may not work properly if the
remote sensor is exposed to direct sunlight or
strong artificial light or if there is an obstacle
between the remote control unit and the remote
sensor.
• Do not press the buttons on the main unit and the
remote control unit at the same time. Doing so will
result in malfunction.
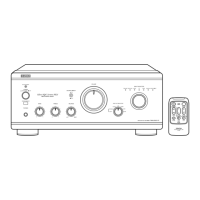
(3) Names and Functions of Remote Control Unit Buttons
2
Opening the remote control unit’s cover
Models compatible with system remote control
• Pre-main amplifier : PMA-201SA
• Tuner : TU-201SA
• CD player : DCD-201SA
• Cassette deck : DRR-201SA
• MD recorder : DMD-201SA
Press this to set the PMA-
201SA’s power to the standby
mode.
(When connected in a system
with the 201SA series, this
button sets the power of the
entire system to the standby
mode.)
Power standby button
(SYSTEM POWER STANDBY)
When connected in a system
with the 201SA series, these
buttons are used to operate the
various connected system
components.
For operating instructions, refer
to the manuals of the various
components.
201SA series
function operation block
Press this to select the function
source to be played.
The function switches in the
following order each time the
button is pressed:
FUNCTION button
Use this to select the function to
be operated with this remote
control unit. For instructions on
operating the various
components, refer to their
respective manuals.
Remote control
function selector switch
When this button is pressed
while the PMA-201SA’s power is
in the standby mode, the PMA-
201SA’s power turns on.
(When connected in a system
with the 201SA series, this
button turns on the power of the
entire system.)
Power on button
(SYSTEM POWER ON)
• Press
D
to increase the
volume,
H
to decrease it.
• These buttons are also used to
set various modes.
VOLUME/SELECT buttons
CD
MD TAPE AUX-2
PNONO
TUNER DVD/AUX
MODE button
2 Buttons not described here function in the same way as the corresponding buttons on the main unit.
The display becomes darker (in 4
steps) each time this button is
pressed.
Adjust the brightness of the
display according to the
brightness of the room.
DIMMER button
 Loading...