3. Quick Guides
Basic Procedure
1. With the instrument arm in the down position, launch the app of interest.
o Optional: Enter a sample name and additional sample information.
2. Select or add a new protocol.
o Optional: Optimize image and count settings.
3. With the arm down, dispense the sample onto the measurement surface.
o Note: A slide may be used when counting biohazard samples. Choose “Slide” mode in
protocol.
4. Focus the image so that brightfield cells are visible with a bright center and a dark outline (figure
1).
5. Ensure the cells are no longer moving and then tap the Count button.
6. Once measurement is complete, wipe away sample with a clean dry laboratory wipe and close the
arm
Best Practices
• Ensure surface is clean prior to dispensing a sample onto the measurement surface.
• Vortex samples before loading for best results.
• Ensure all sample concentrations fall within concentration limits of the instrument for accurate
results.
o Use the appropriate protocol settings for Chamber Height when measuring high or low
concentration samples, or when using slides.
o Note: Refer to the text located in the Count button background field for the proper loading
volume when measuring low or high-density samples.
• Lower the arm before dispensing the sample onto the surface.
• Ensure cells have settled to the lower surface before tapping the Count button. The time for cells
to settle may vary by cell type and should be determined empirically.
• Avoid introducing air bubbles into the sample solution when mixing or dispensing samples.
• Refer to DeNovix assay protocols or other manufacturer guidelines for cell dyes such as Acridine
Orange, Propidium Iodide or Fluorescein Diacetate for assay specific instructions.
• Optimize Focus and Exposure settings to ensure the algorithms deliver the most accurate results.
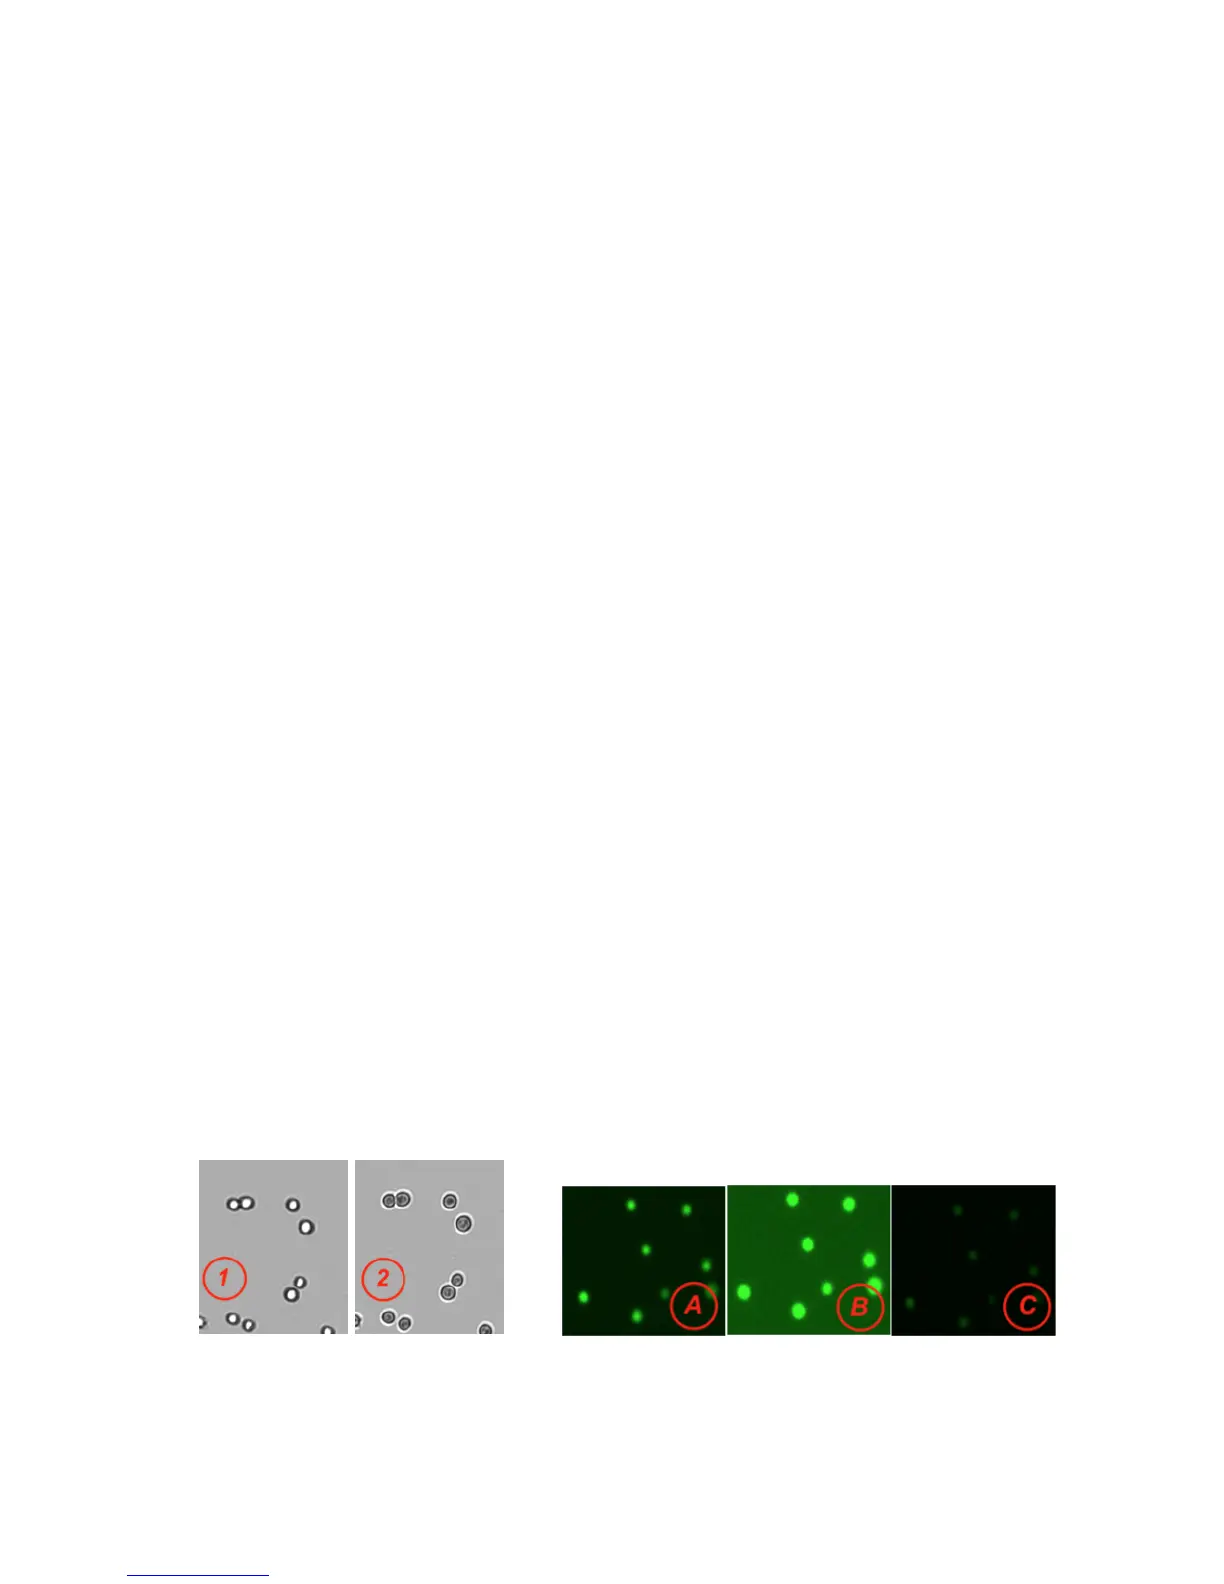
Focus Example: 1) Properly focused 2) Improper focus
Exposure Example: A) Correct B) Exposure too high C) Exposure too low