www.desatech.com
111986-01F24
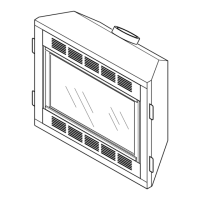
DOOR
-
tion see Replacement Parts,
-
-
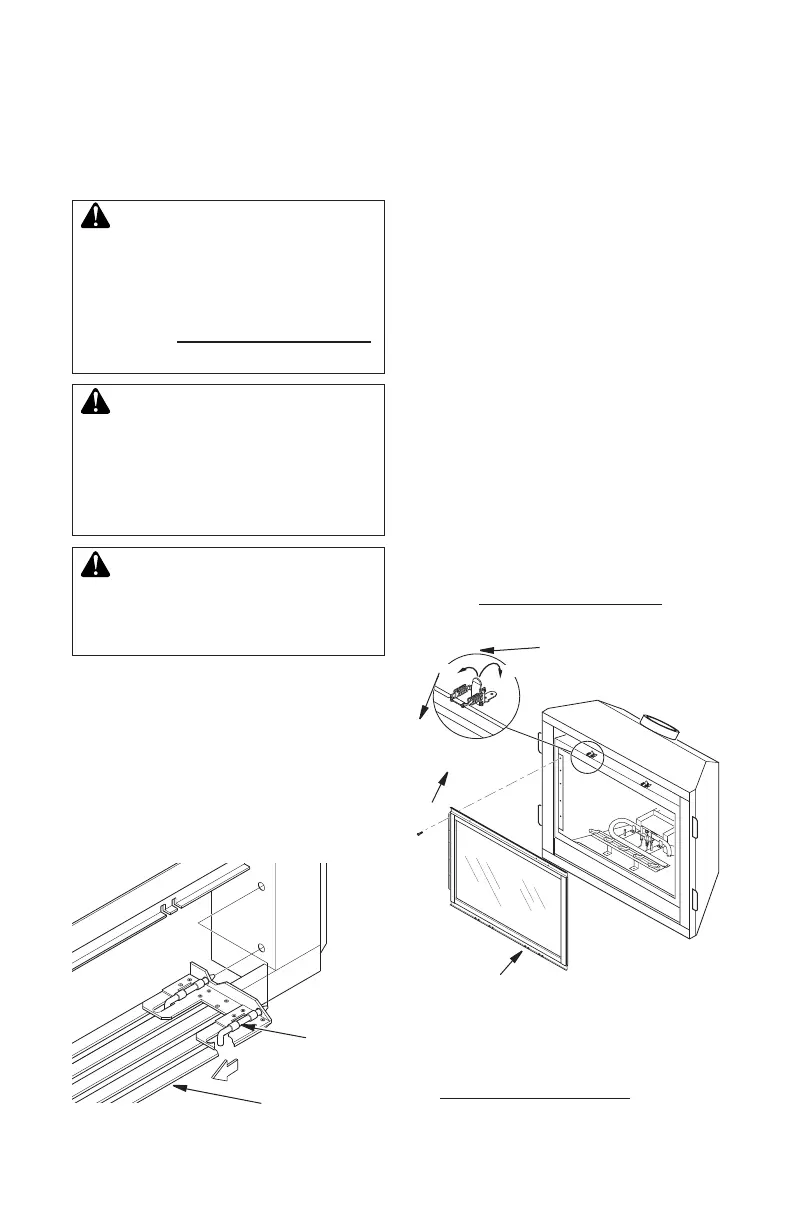
Remove the top and bottom louver panels by
simultaneously pulling both top end spring
latches towards the center of the appliance
until they are disengaged from the locating
holes (see Figure 40). Repeat for bottom
spring latches and pull the louvers outward.
To install or replace items removed, simply
reverse the procedures above.
FIREPLACE
INSTALLATION
Continued
If replacement of glass is necessary, the entire
assembly, glass and frame, must be replaced.
If glass is broken, wear gloves and tape the
remaining fragments onto the frame.
1. Remove screen assembly by pushing the
rod either left or right and then down and
forward to remove screen/rod assembly
from the rebox. Set assembly aside.
2. Lift up on latches to unlock. There are two
on top of rebox and two below rebox that
hold glass door in place (see Figure 41).
3.
While holding glass door to prevent it from
falling and causing injury, remove the ve
screws from the hinge located on the left side
of door frame assembly (see Figure 41).
4. Remount the new frame at the hinge with
ve new screws before closing door. This
will ensure seating of the gasket.
5. Close glass door frame. Lock latches by
placing the bar under the tab on door and
pushing down and back on latch (see
Figure 41).
6. Replace screen/rod assembly by revers-
ing step 1.
7. Replace louvers by reversing procedure
under Removing Louver Panels.
Figure 40 - Removing Louver Panel
Louver Panel
Spring
Latch
Glass
Frame
Assembly
Screw
Figure 41 - Removing/Replacing Glass
Door
Hinge
Latch
See Cleaning and Maintenance on page 30.